Introduction
Oracle Business Intelligence Cloud Connector (BICC) allows you to extract business intelligence and other data in bulk and load it into external storage destinations. For more information, refer to the official BICC documentation.
By default, the SOAP and REST API examples in the documentation use basic authentication (username and password). However, for security and compliance reasons, this method is not allowed in some environments.
This blog will show you how to configure and use token based authentication (JWT) for BICC APIs, which provides a more secure alternative.
Configuration Steps
First, log in to your Fusion Applications instance.
Step 1: Open Security Console
-
Navigate to the Hamburger Menu (top left corner)
-
Go to Tools → Security Console
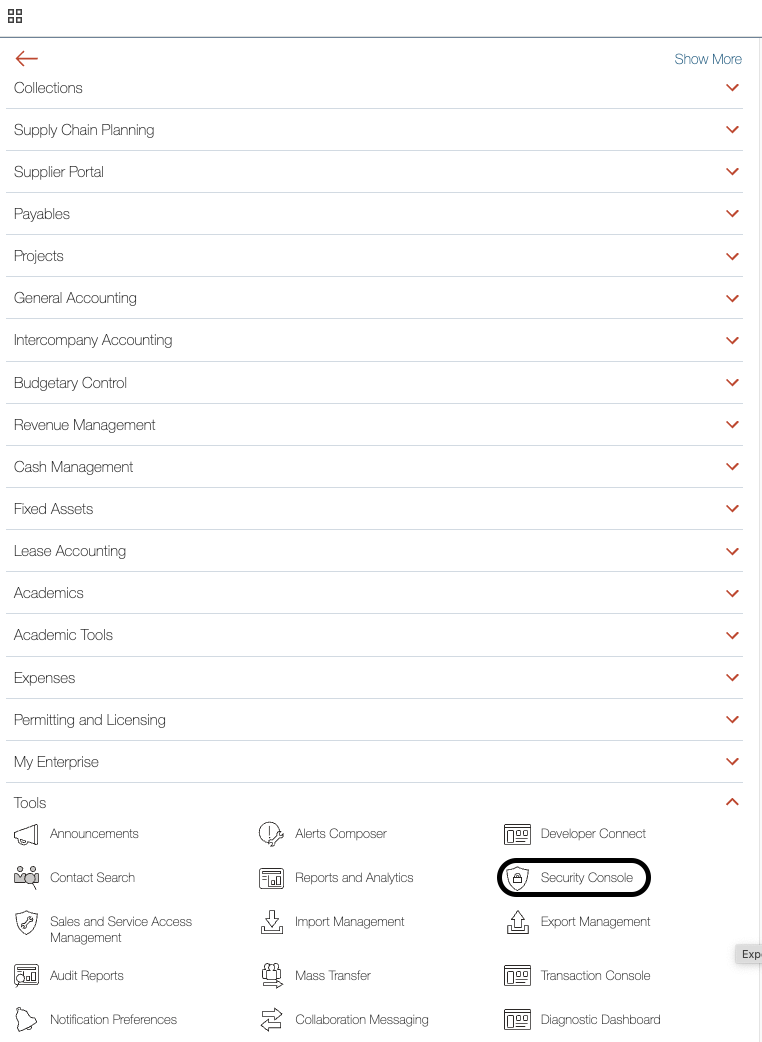
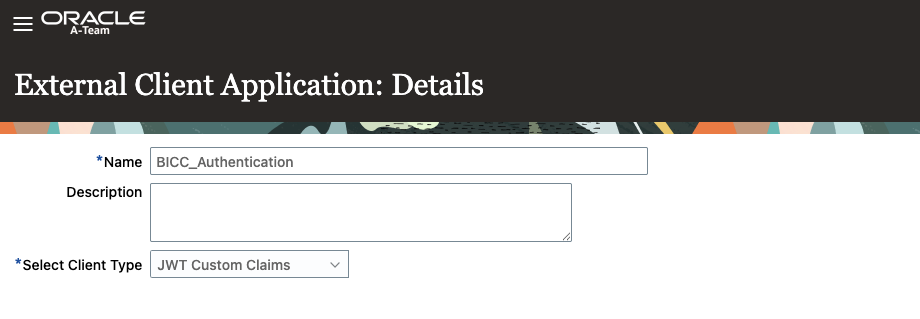
Step 2: Create an External Client Application
-
Click “API Authentication“
-
Click “Create External Client Application”
-
Click “Edit”
-
Enter a Name
-
Select “JWT Custom Claims” as the authentication method
-
Click “Save and Close”

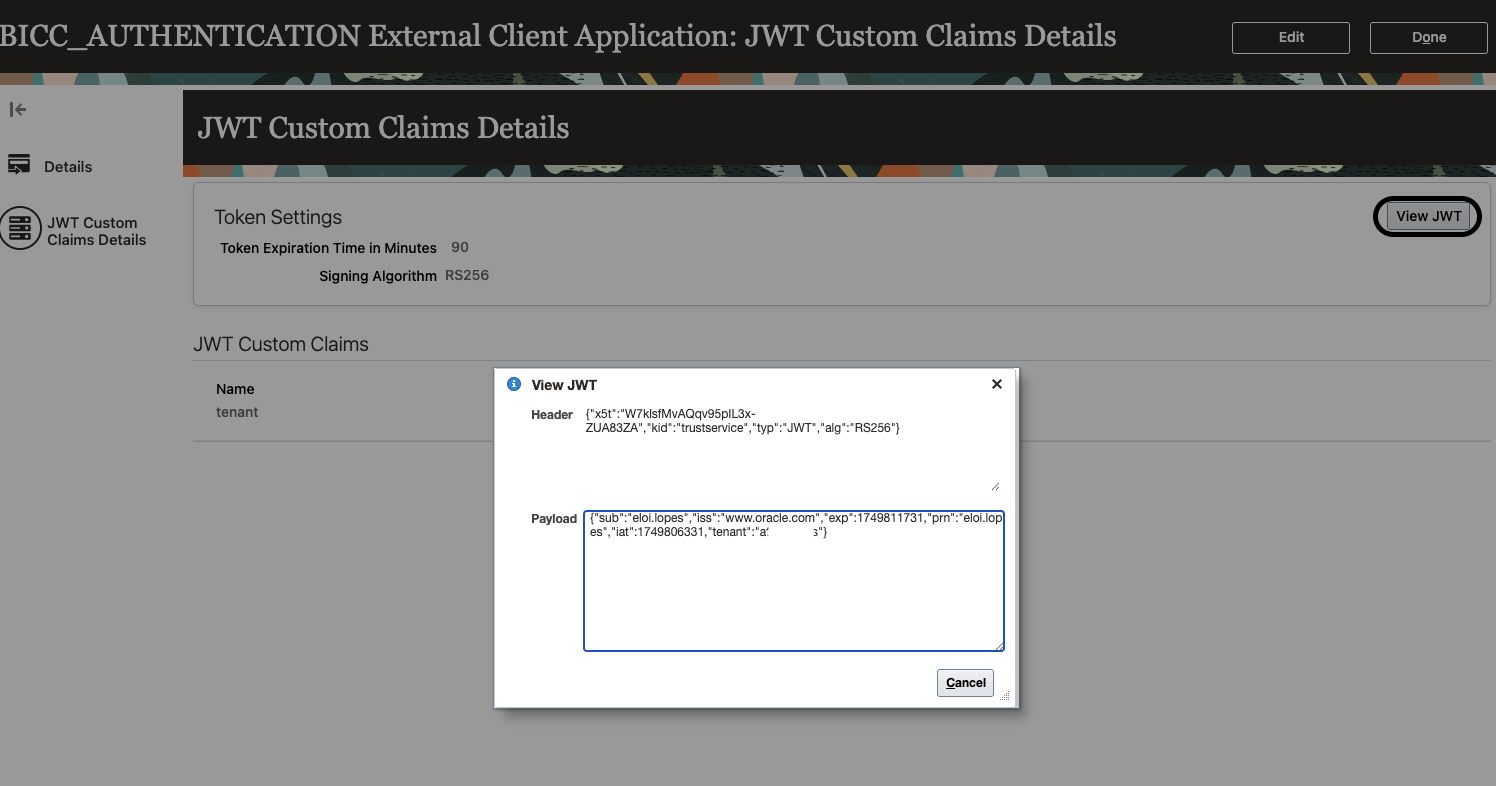
Step 3: Configure JWT Claims
-
In the JWT Custom Claims Details, click “Edit”
-
In the Value for Tenant, enter your Fusion tenant name.

Generate Keys and Certificate for JWT Authentication
Now that your external client application is configured in Fusion, let’s generate the public/private key pair, X.509 certificate, and DER file needed to authenticate with BICC using JWT.
Step 5: Generate Keys and Certificate
Run the following commands in a terminal (with OpenSSL installed):
openssl genrsa -out private.key 2048
openssl req -new -x509 -key private.key -out publickey.cer -days 365
You’ll be prompted to enter certificate information. Example input:
Country Name (2 letter code) [AU]:US
State or Province Name (full name) [Some-State]:CA
Locality Name (eg, city) []:LA
Organization Name (eg, company) [Internet Widgits Pty Ltd]:BICC
Organizational Unit Name (eg, section) []:BICC
Common Name (e.g. server FQDN or YOUR name) []:.
Email Address []:.
Step 6: Convert Private Key and Create DER File
openssl rsa -in private.key > private_key.pem
openssl pkcs8 -topk8 -inform PEM -outform DER -in private_key.pem -nocrypt > jwt.der
cp publickey.cer pub.pem
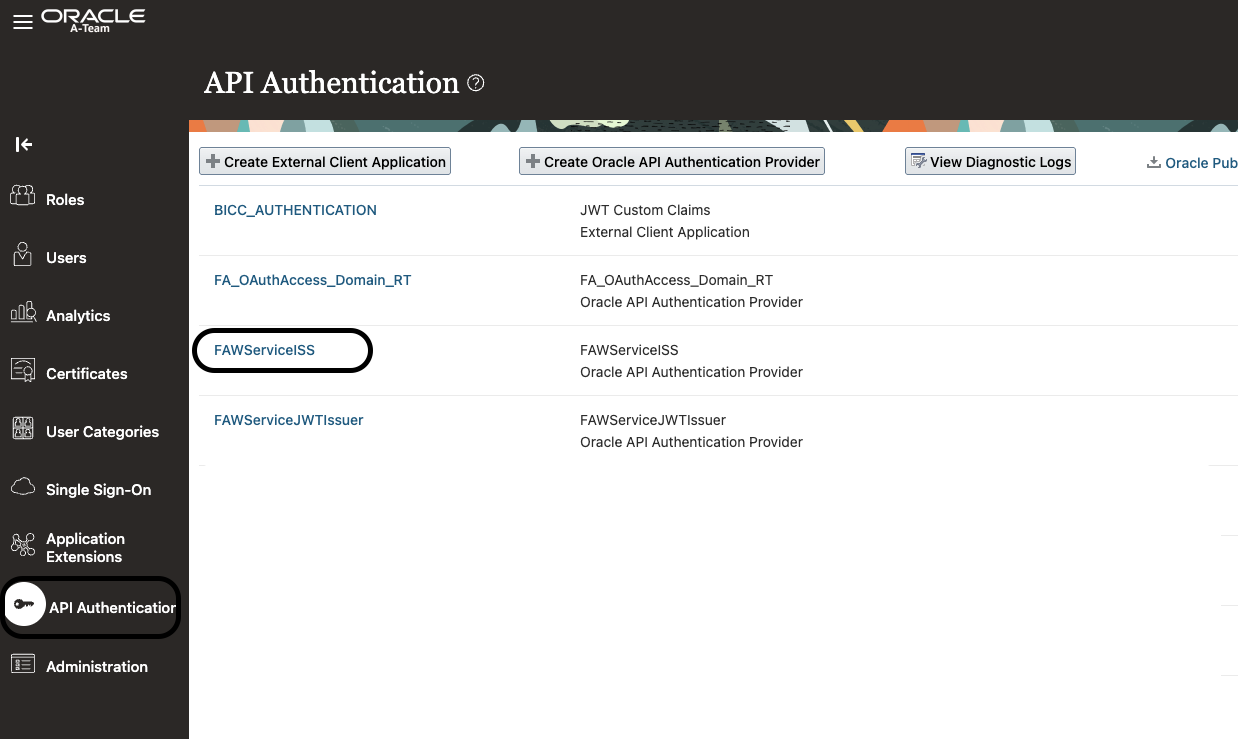
Upload Certificate to Fusion
Step 7: Upload Public Certificate to FAWServiceISS
-
In Fusion, navigate to API Authenticator
-
Click on FAWServiceISS
-
Under Inbound API Authentication Public Certificates, upload the
publickey.cerfile

Java Code Setup
Before running your Java code to generate the JWT and call the BICC API, make sure you have the following:
-
jwt.der: Private key in DER format -
pub.pem: Public key (optional if needed for validation) -
PRN and Tenant values: These are available in the JWT Custom Claims Details section in the Security Console:
Step 8: Modify and Run the Java Code
You can now update the Java code to use the keys and configuration from the previous steps. This Java code can be found on oracle documentation. I named the file GenerateJWT.java
Step 9: Download Required Java Libraries
Before running the JWT generation code, you’ll need to download the following Java libraries and dependencies.
Required JAR Files:
Jackson Libraries:
Oracle Security Development Toolkit (OSDT) Libraries:
Note: These usually come with Oracle Fusion Middleware. I’m hosting these files, so you can donwload it directly without installing Fusion Middleware. They might not be available in the future.
Step 10: Generate JWT Token via Java
Use the following command to compile and run it with the required classpath:
java -cp “./jackson-mapper-asl-1.9.13.jar:jackson-core-asl-1.9.13.jar:jackson-core-2.10.2.jar:jackson-databind-2.10.2.jar:osdt_cert-19.3.0.0.jar.jar:osdt_restsec.jar:osdt_core-19.3.0.0.jar.jar:jackson-annotations-2.10.2.jar” GenerateJWT.java

Copy the token and save it.
Step 11: Test the BICC APIs
Once you have the JWT, you can test BICC API calls using different tools.
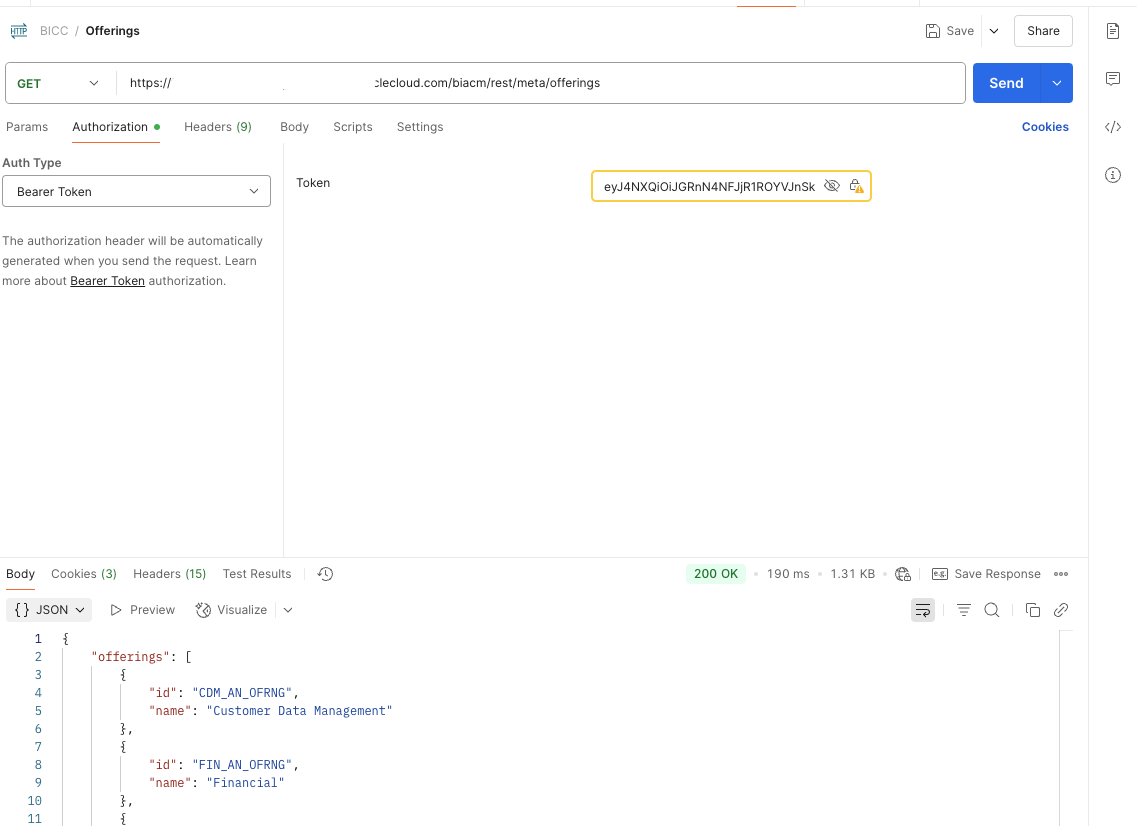
Using Postman
-
Open Postman
-
Set the request method to GET
-
Enter the API endpoint:
https://<fusion-host>/biacm/rest/meta/offerings
-
In the Authorization tab, choose Bearer Token
-
Paste your generated JWT token
-
Click Send
Using cURL
curl –location ‘https://<fusion-host>/biacm/rest/meta/offerings’ \
–header ‘Authorization: Bearer <YOUR_JWT_TOKEN>’
Replace <fusion-host> with your Fusion instance URL and <YOUR_JWT_TOKEN> with the token you generated.
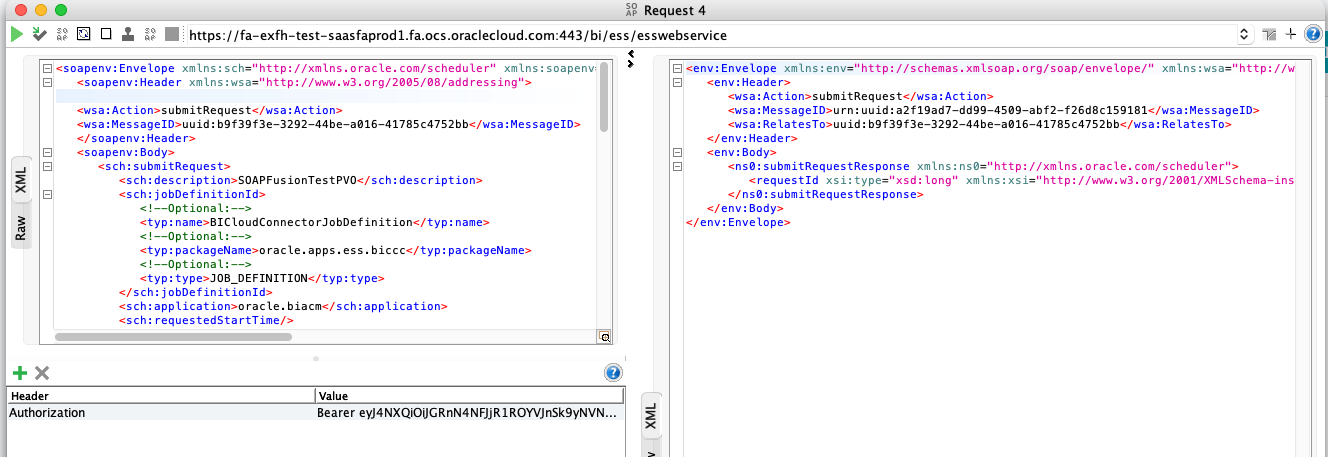
Using SOAP
For SOAP-based services, you will need to insert the Authorization: Bearer <TOKEN> header into the SOAP envelope. Most SOAP tools (like SOAP UI) allow you to configure headers easily.
Conclusion
Using token-based authentication improves security and aligns with modern best practices for accessing Oracle Fusion APIs like BICC. With the above configuration, you’re now ready to securely authenticate without relying on username/password credentials.