Introduction
The Oracle Transportation Management (OTM) Logistics Digital Assistant (LDA) Getting Started Guide, provides the necessary steps for customers to setup the various components and get the LDA active in their environment.
The main components and setups involved are,
- OTM setup and configuration
- IAM Identity Domain setup
- ODA setup and configuration
With the erstwhile Identity Cloud Services (IDCS) instances now migrated to IAM Identity Domain (referred to as IAM domain in this blog) the screens and consoles are different as compared to earlier releases. This blog provides some example screenshots of the IAM Domain setup to help users to refer to and be able to quickly setup LDA in their environments.
Context and Terminology
- OTM – Oracle Transportation Management. Refer – product documentation here.
- ODA – Oracle Digital Assistant – A digital assistant platform for developing skills that can run on different channels. Refer – product documentation here.
- LDA – Logistics Digital Assistant – Set of ODA skills provided by Oracle that integrate with OTM to provide conversational interface for transportation use cases. These are built on top of ODA platform. Currently, OTM Order Shipment status inquiry skill is available for users in this category. Refer – product documentation here.
- IAM Domain – Identity provider in Oracle cloud. In this blog’s context we could have the same or different IAM domains protecting OTM and ODA respectively. Refer – product documentation here.
Refer to the latest LDA Getting started guide for detailed comprehensive steps of LDA setup. Namely all the below 3 sections
- OTM setup and configuration
- IAM Domain setup
- ODA setup and configuration
Next section will focus on the IAM domain setup.
Create Confidential App on IAM Domain
Make sure to login to the IAM Domain that protects your OTM instance.
Quick way to get the correct IAM domain URL – open the OTM console on your browser. You will be redirected to the IAM domain login page. Grab the host details from the login page, and append ui/v1/adminconsole (example https://idcs-98925xxxxxx3431c0a4.identity.oraclecloud.com/ui/v1/adminconsole)
Login using the Identity administrator credentials (as you are required to create a confidential application within the IAM domain)
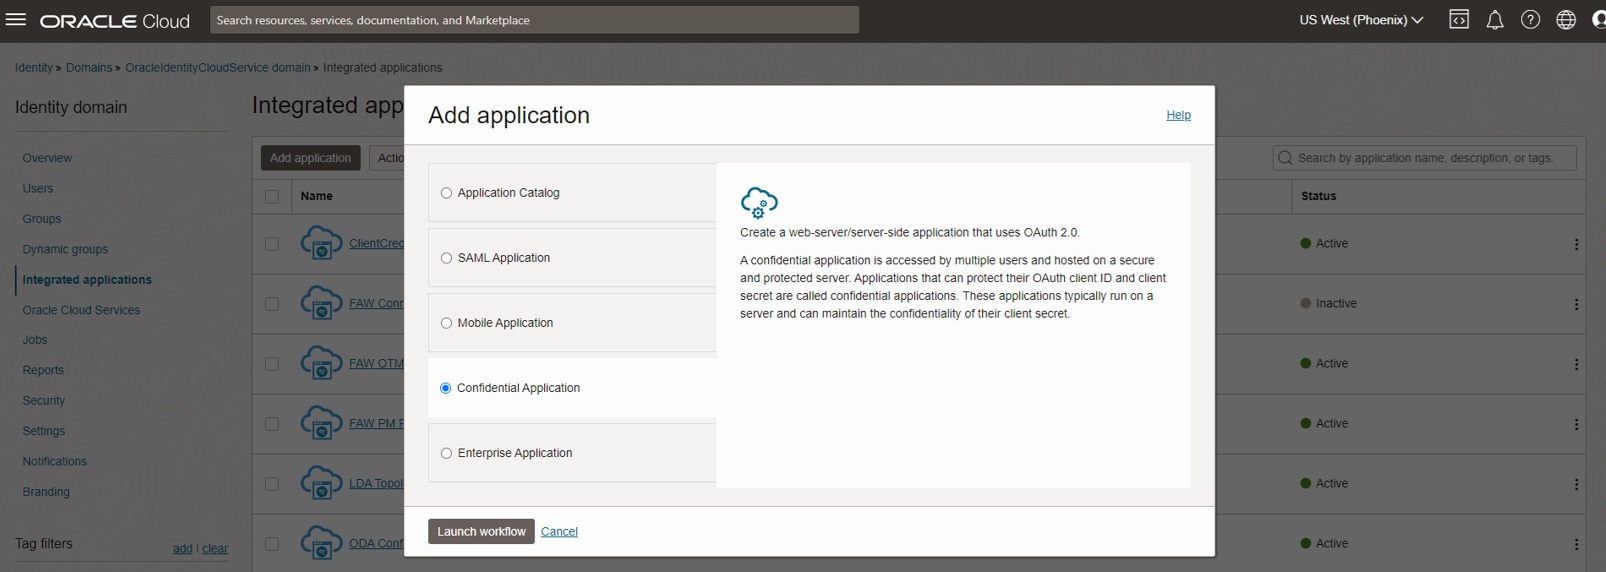
Navigate to Integrated Applications and choose to create a new Confidential Application and Launch workflow
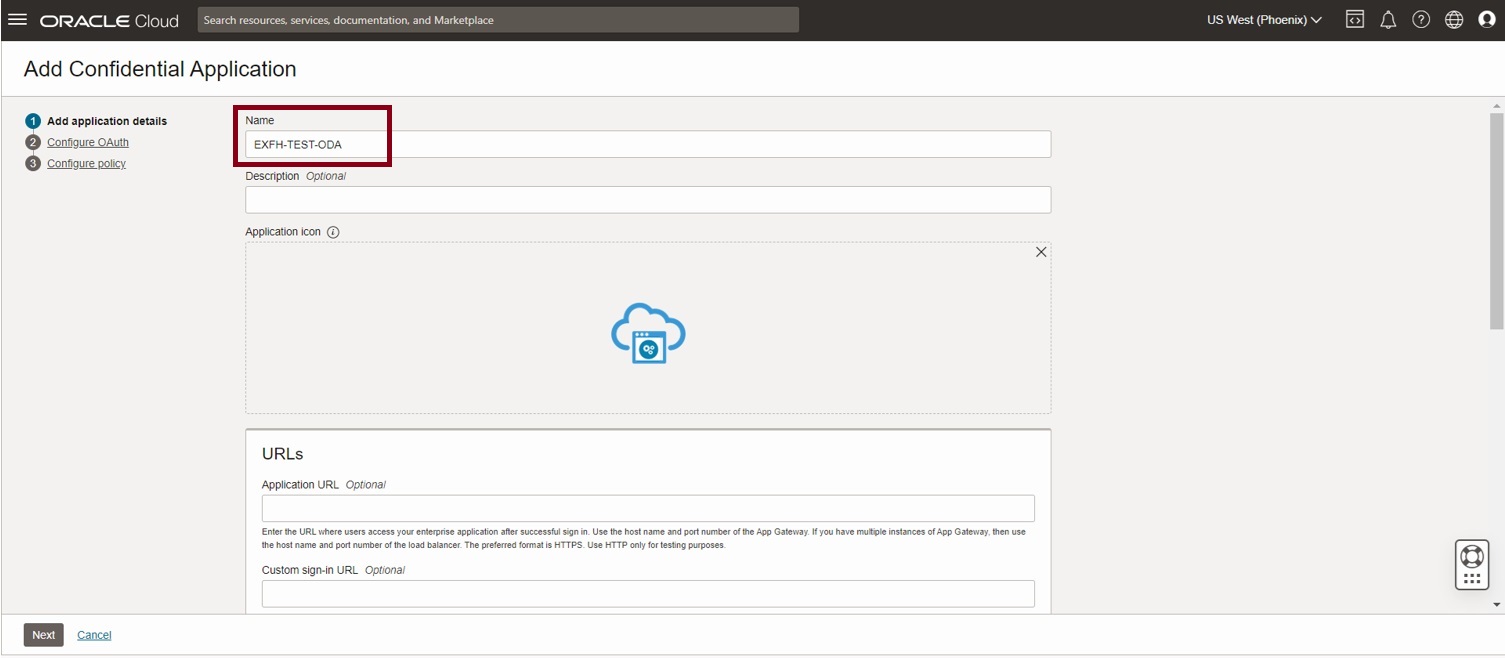
Enter a name for the Confidential Application and click next
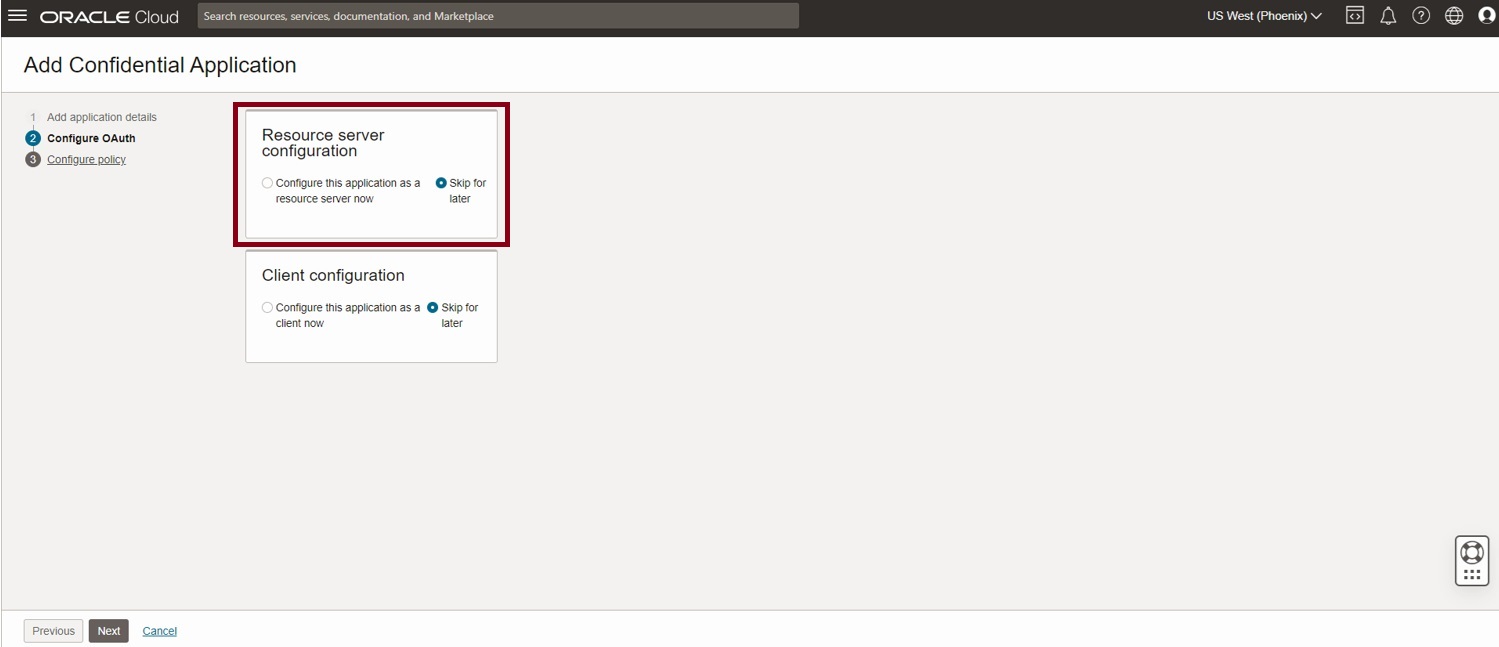
This takes you to the Add Confidential guided flow. Choose the resource server configuration first. Select ‘Configure this application as a resource server now’
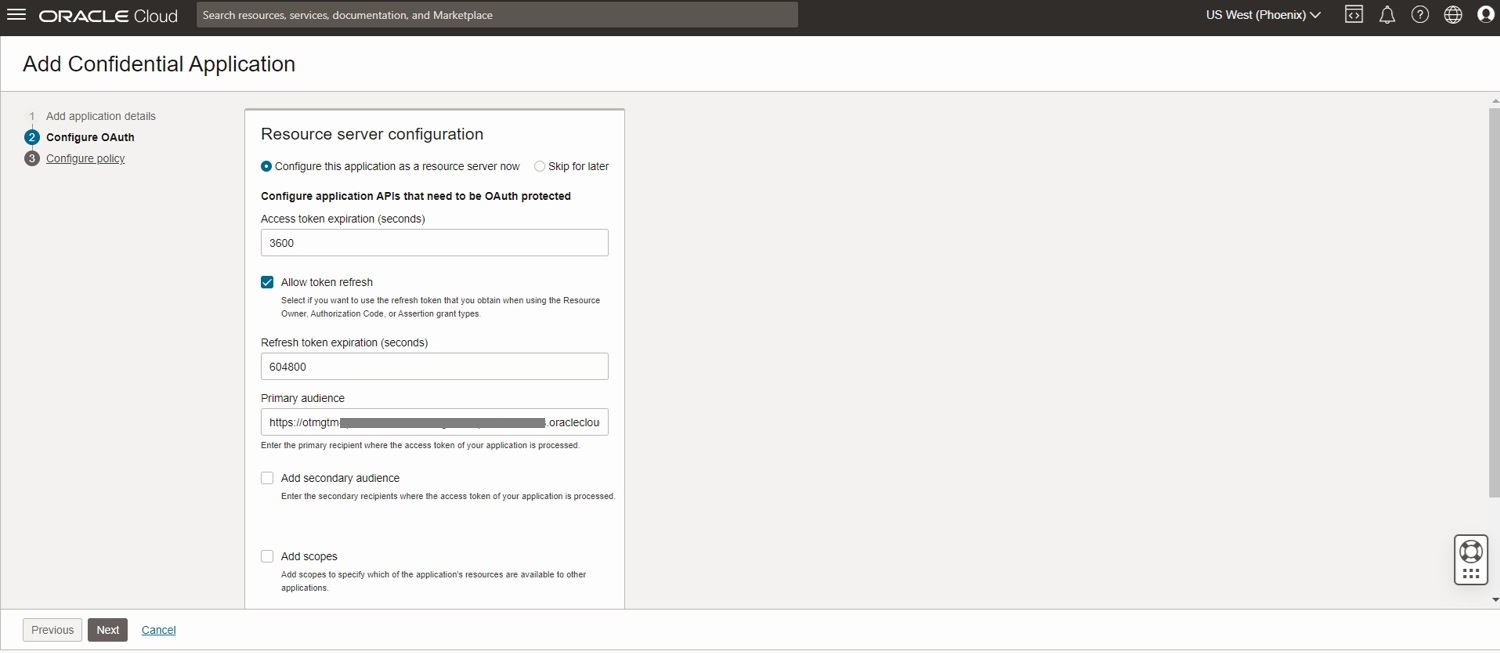
Within the resource server configuration, provide value for access token expiration. Default is 1 hour (3600s) which is suitable for most cases.
Select Allow token refresh and provide a value for refresh token expiration. Default value is 1 week (604800 s)
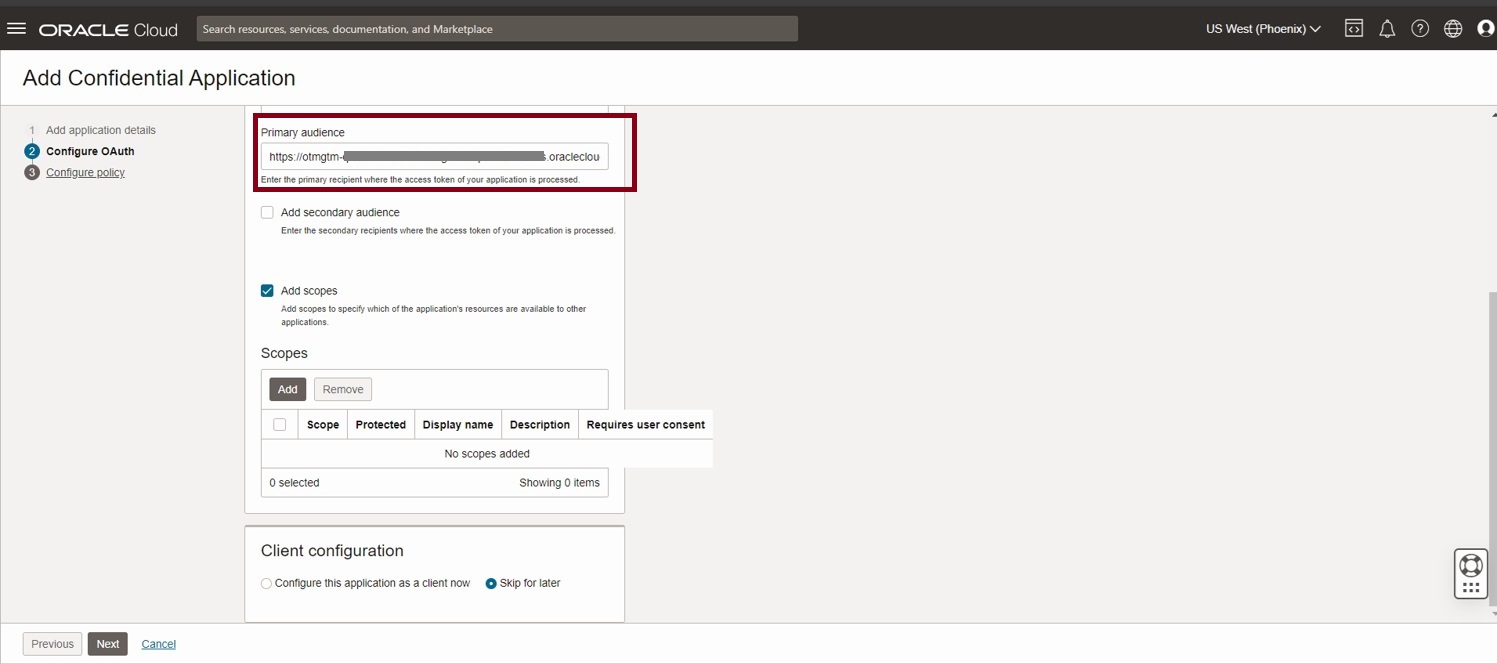
Provide the value for Primary audience. This is the base URL for the OTM REST API.
(Example https://otmgtm-example-instance.oraclecloud.com/logisticsRestApi/)
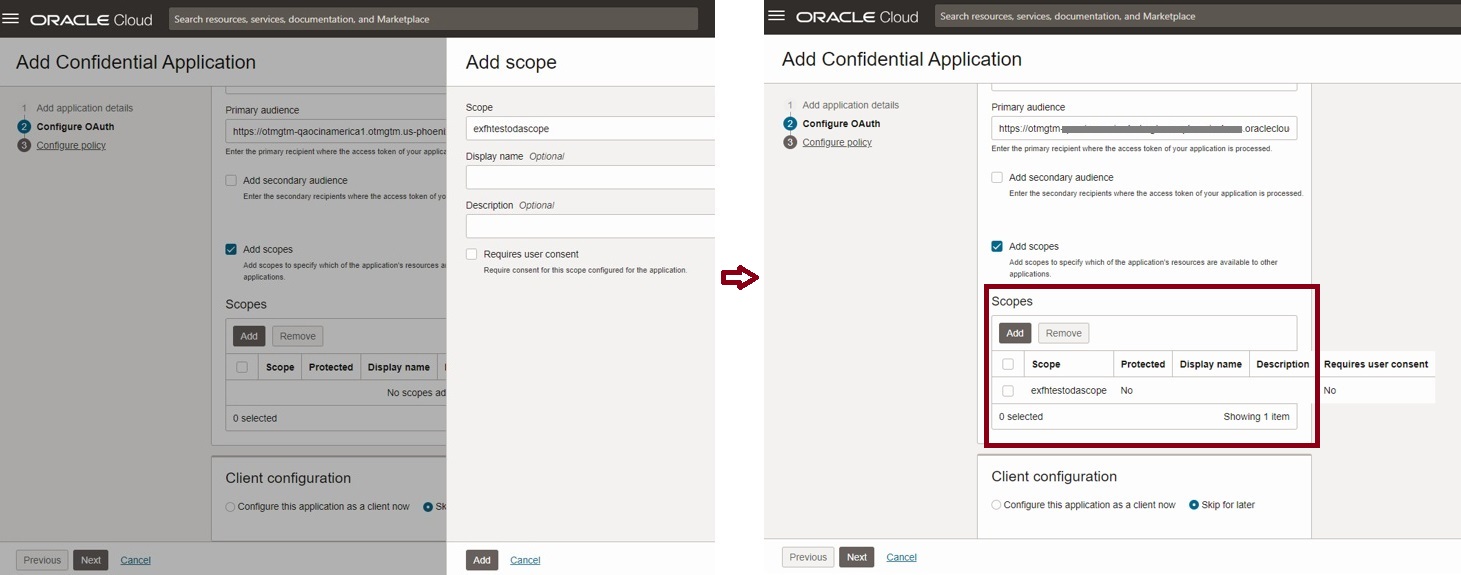
Select Add scopes and click on Add
Provide a unique name for the scope and complete by clicking Add.
This is how the console looks after adding a scope
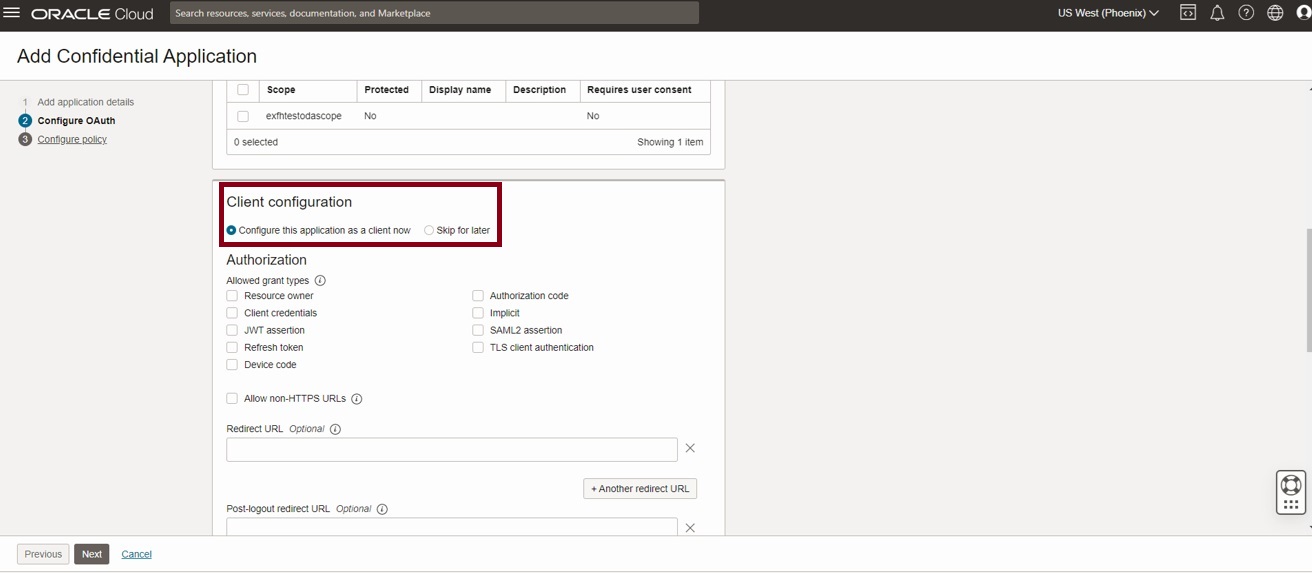
Now select ‘Configure this application as a client now’
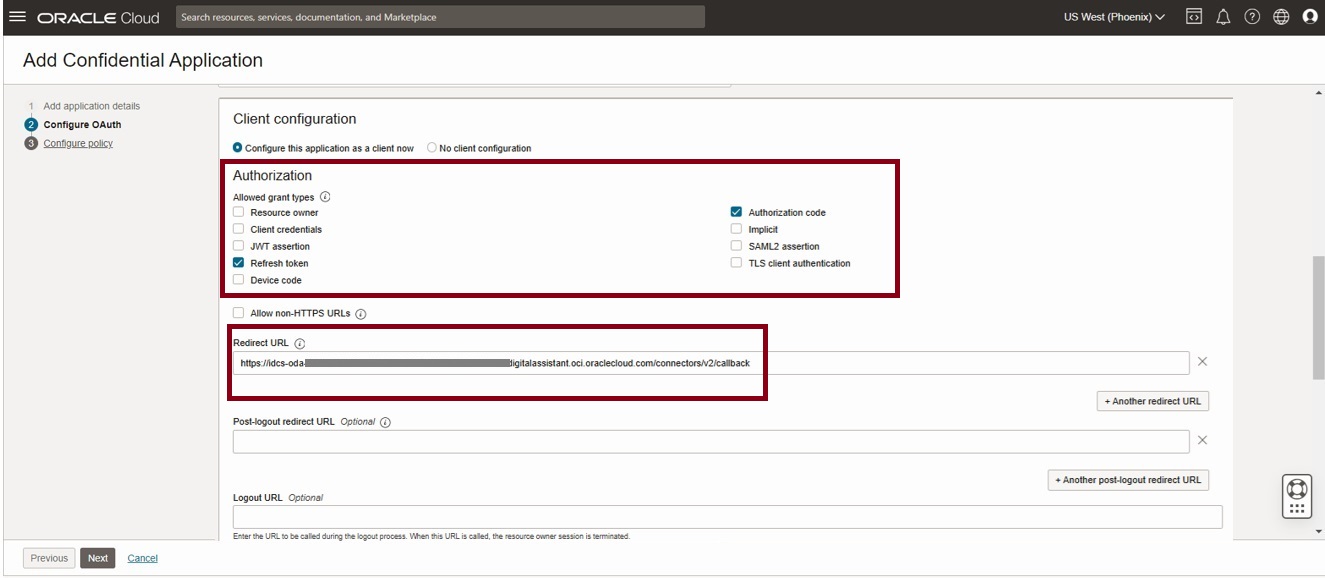
Under Authorization, Allowed grant types, make sure that Authorization Code and Refresh token are selected.
In the redirect URL provide the ODA URL in this format https://example-oda-instance-da2.data.digitalassistant.oci.oraclecloud.com/connectors/v2/callback
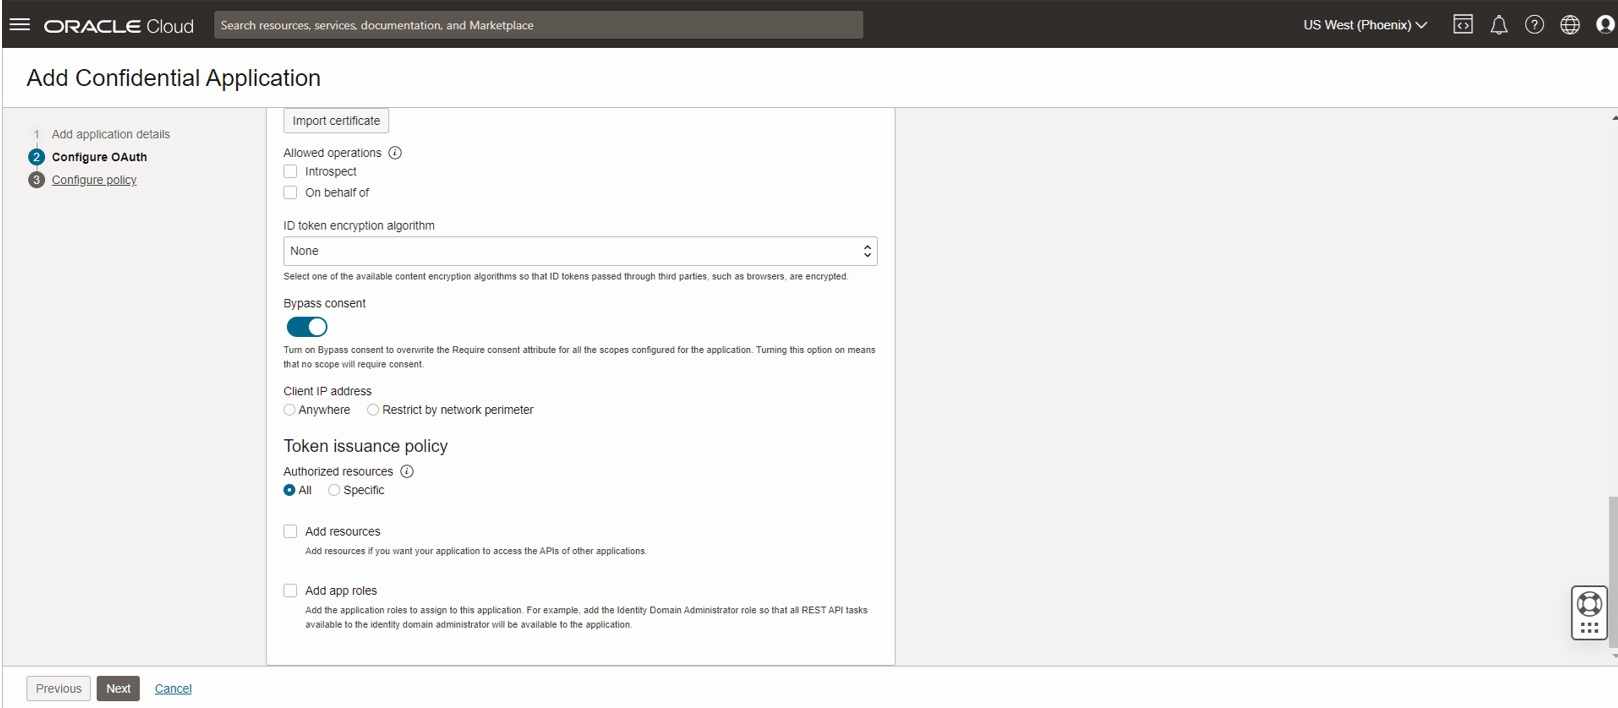
Turn on the Bypass consent switch and configure the token issuance policy to ‘All’ as shown below
Select Next in the Create confidential App workflow
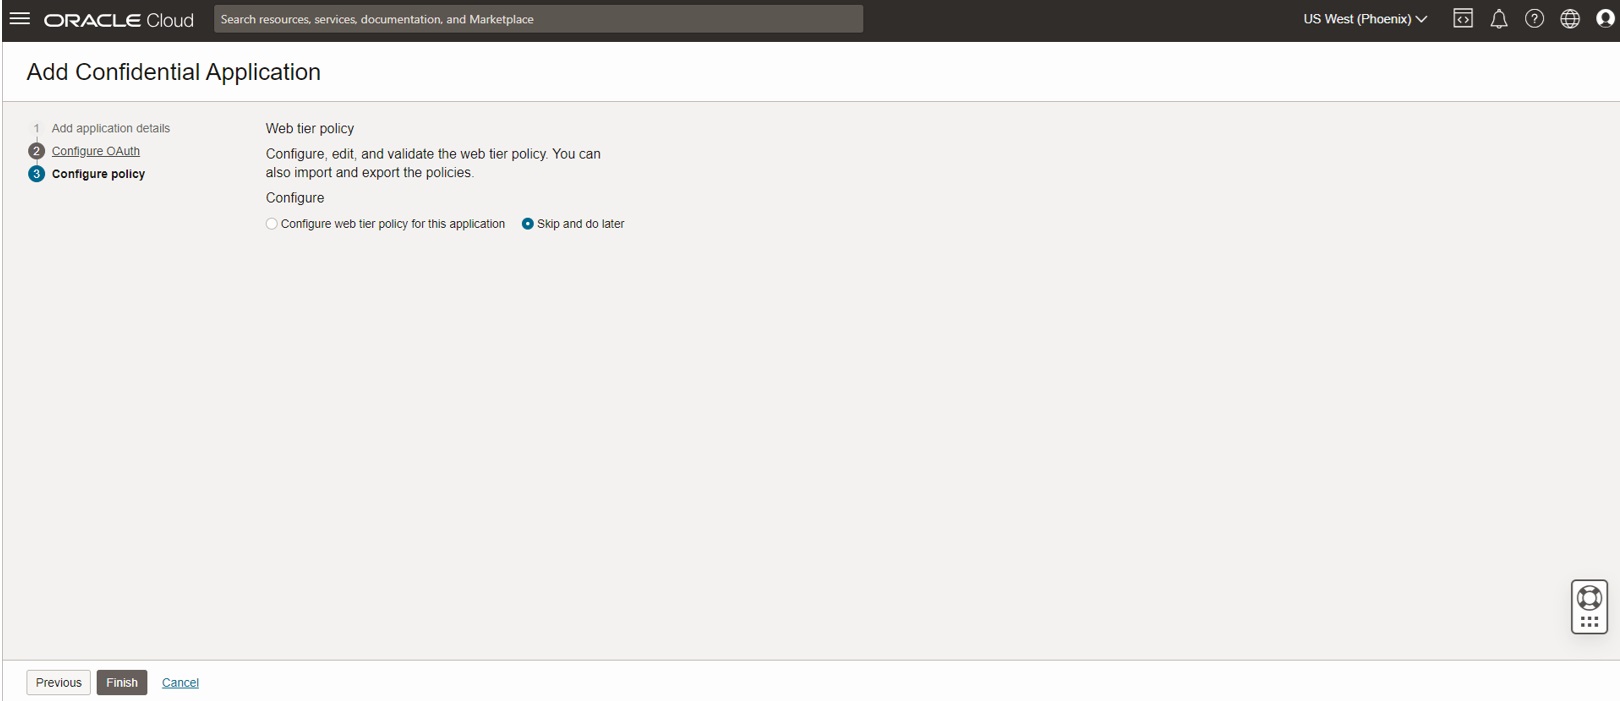
Skip the web tier policy and click on Finish to complete the workflow.
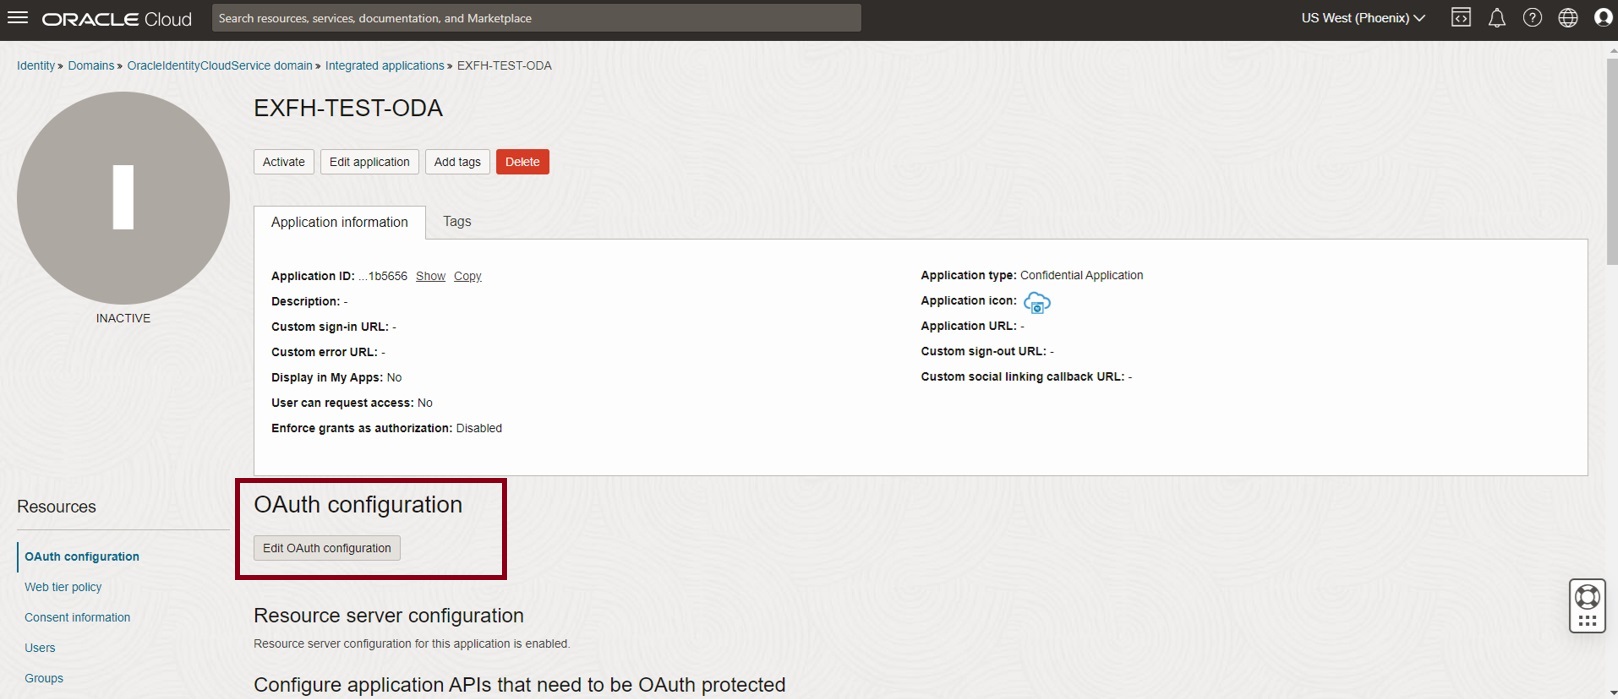
This takes you to the Confidential Application which is created and in Inactive state as shown below.
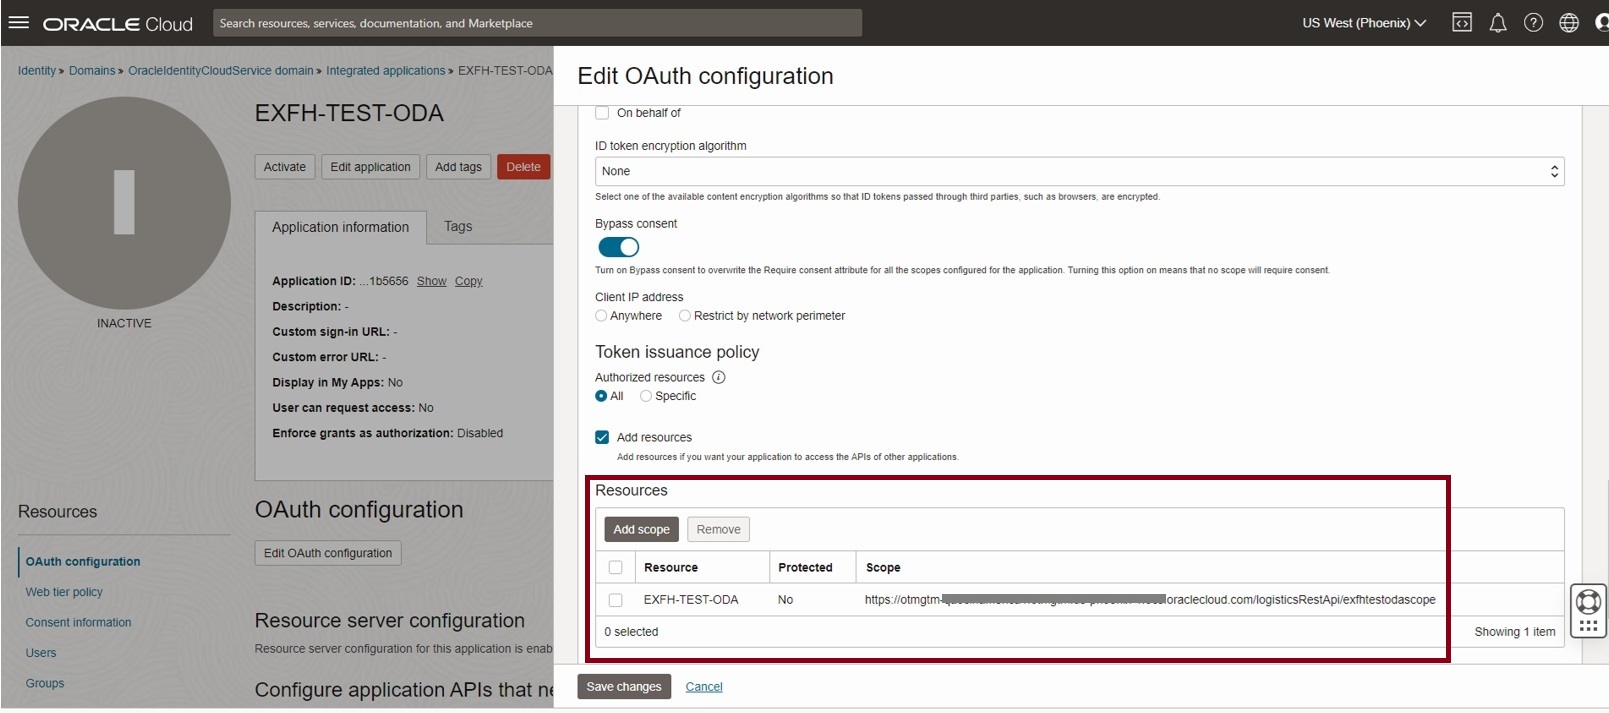
Click on ‘Edit Oauth Configuration’
Navigate to Token issuance policy and select Add resources. Under Resources, click on Add scope
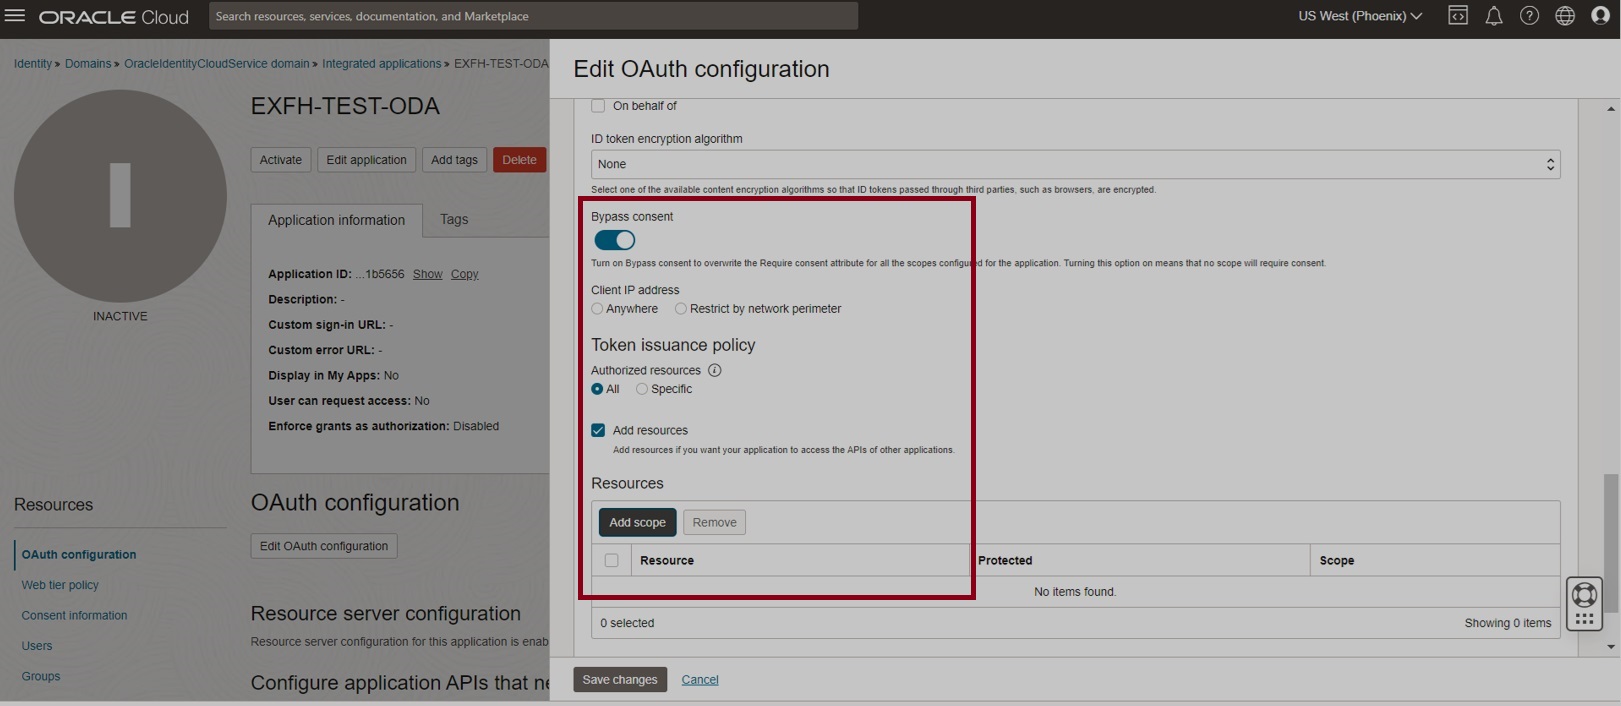
Now select the current confidential application and expand and select the available scopes under it, as shown below. Click Add in the Add scope dialog.
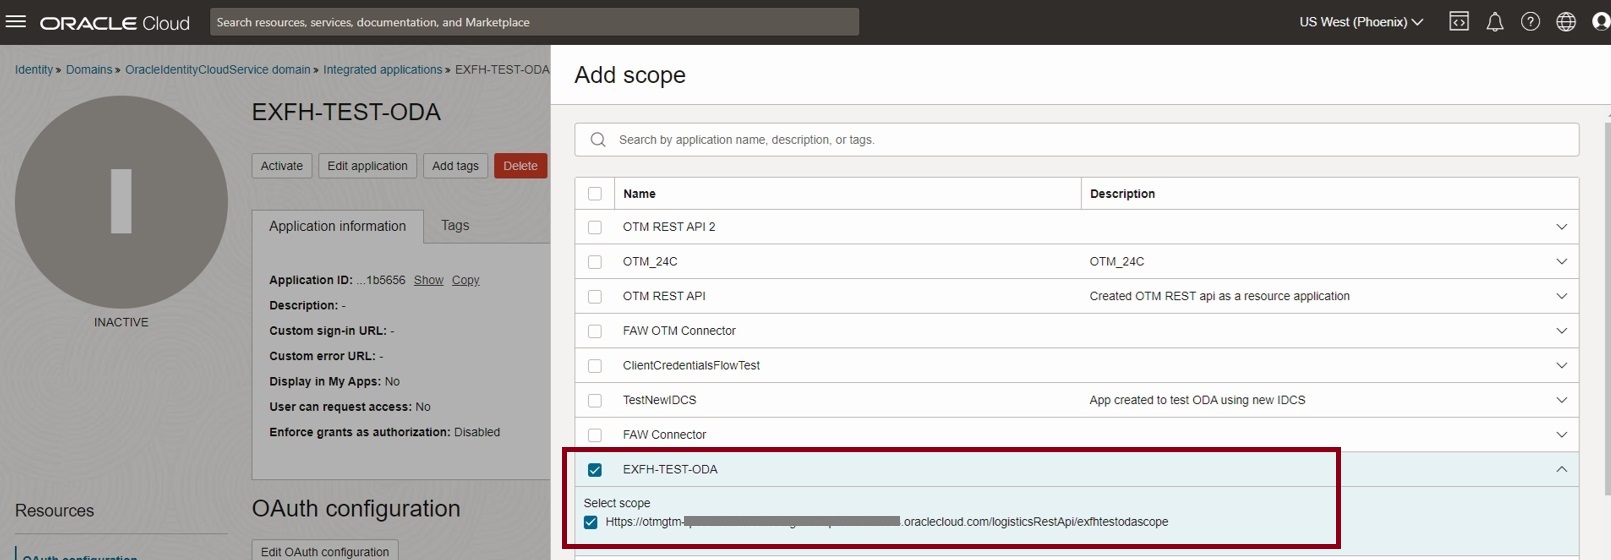
Notice that the added scope is available in the Resources section.
Click on Save changes
Now Activate the Confidential Application.
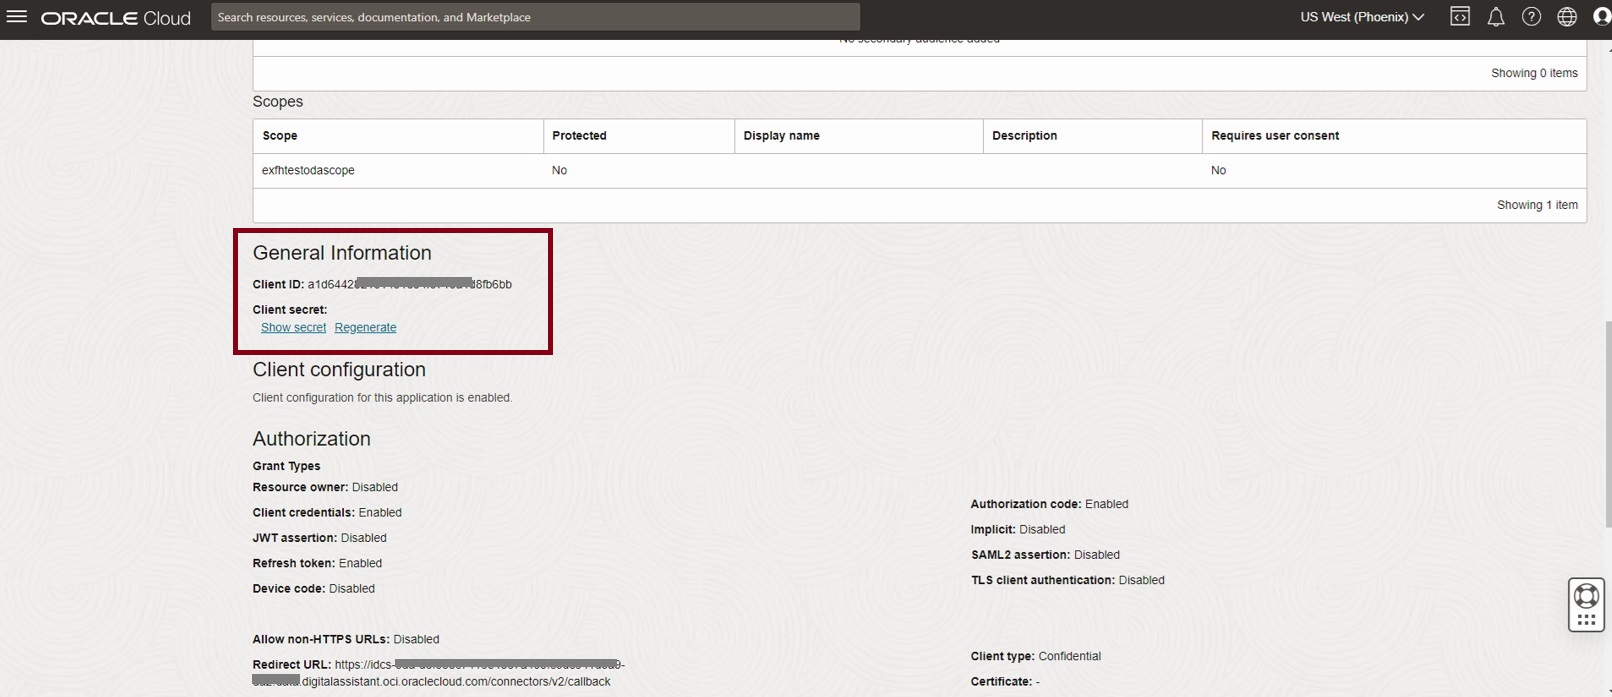
Once the Confidential App is activated, copy the client Id and client secret from the General Information section. This will be required for configuring the Authenticaton Service on ODA in the next section.
Next, we use the details of the Confidential App created in IAM Domain to create an Authentication Service in ODA.
- OTM setup and configuration
- IAM Domain setup
- ODA setup and configuration
Configure the Authentication Service in ODA
The LDA skill will use the Authentication service to obtain Oauth access token which then provides access to the OTM REST API.
Below screenshot shows the configuration of the ODA Authentication Service using values from the IAM domain Confidential App we created in the previous section
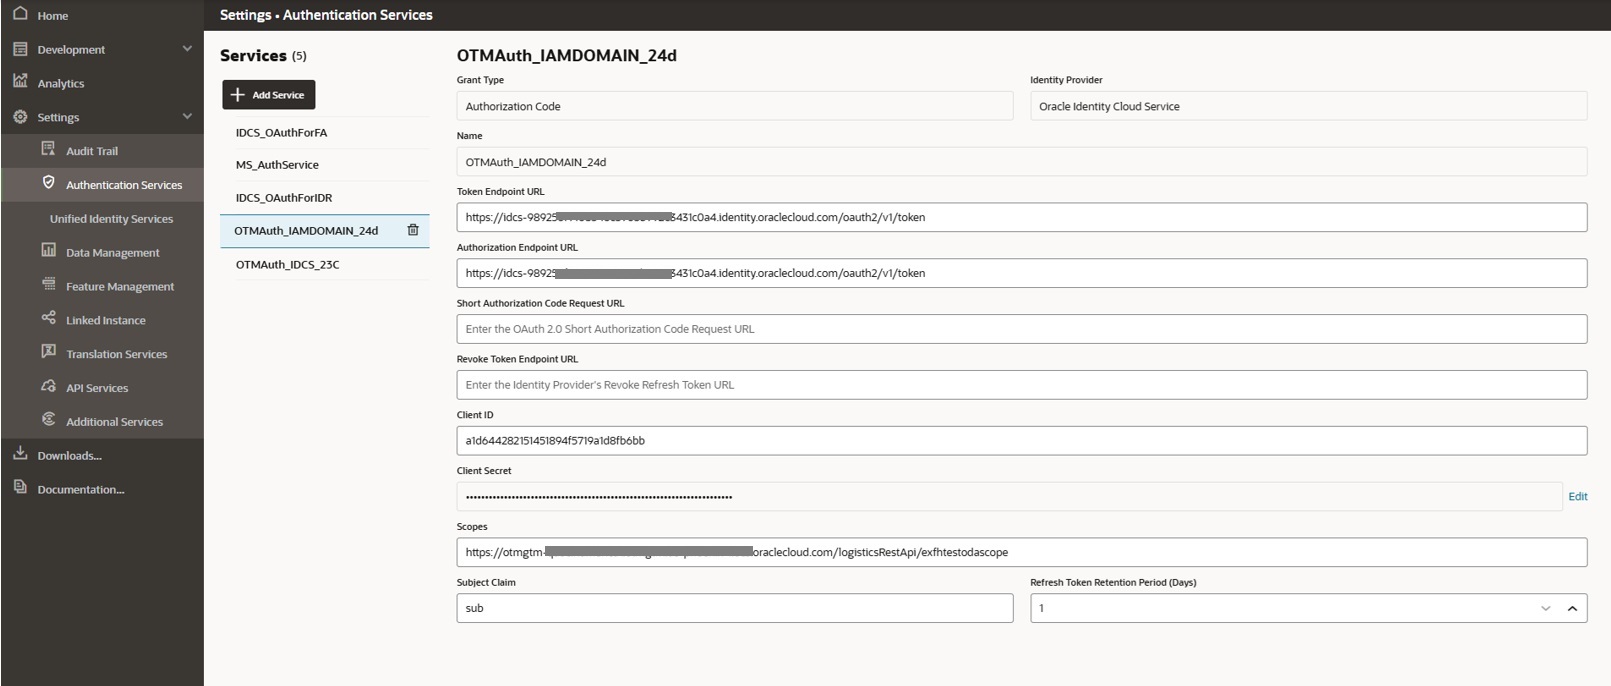
Example values for the Authentication Service fields are as follows
- Grant Type – Authorization Code
- Identity Provider – Oracle Identity Cloud Service
- Token Endpoint URL – point to the IAM Domain token URL
- Example – https://idcs-98925xxxxxx3431c0a4.identity.oraclecloud.com.identity.oraclecloud.com/oauth2/v1/token
- Authorization Endpoint URL – IAM Domain Authorize URL
- Example – https://idcs-98925xxxxxx3431c0a4.identity.oraclecloud.com.identity.oraclecloud.com/oauth2/v1/authorize
- Client Id – obtained from IAM Domain Confidential App created in previous section
- Example – a1d6442xxxxxxa1d8fb6bb
- Client secret – obtained from IAM Domain Confidential App created in previous section
- Example – 017783e4-xxxxxxe-aeff17255849
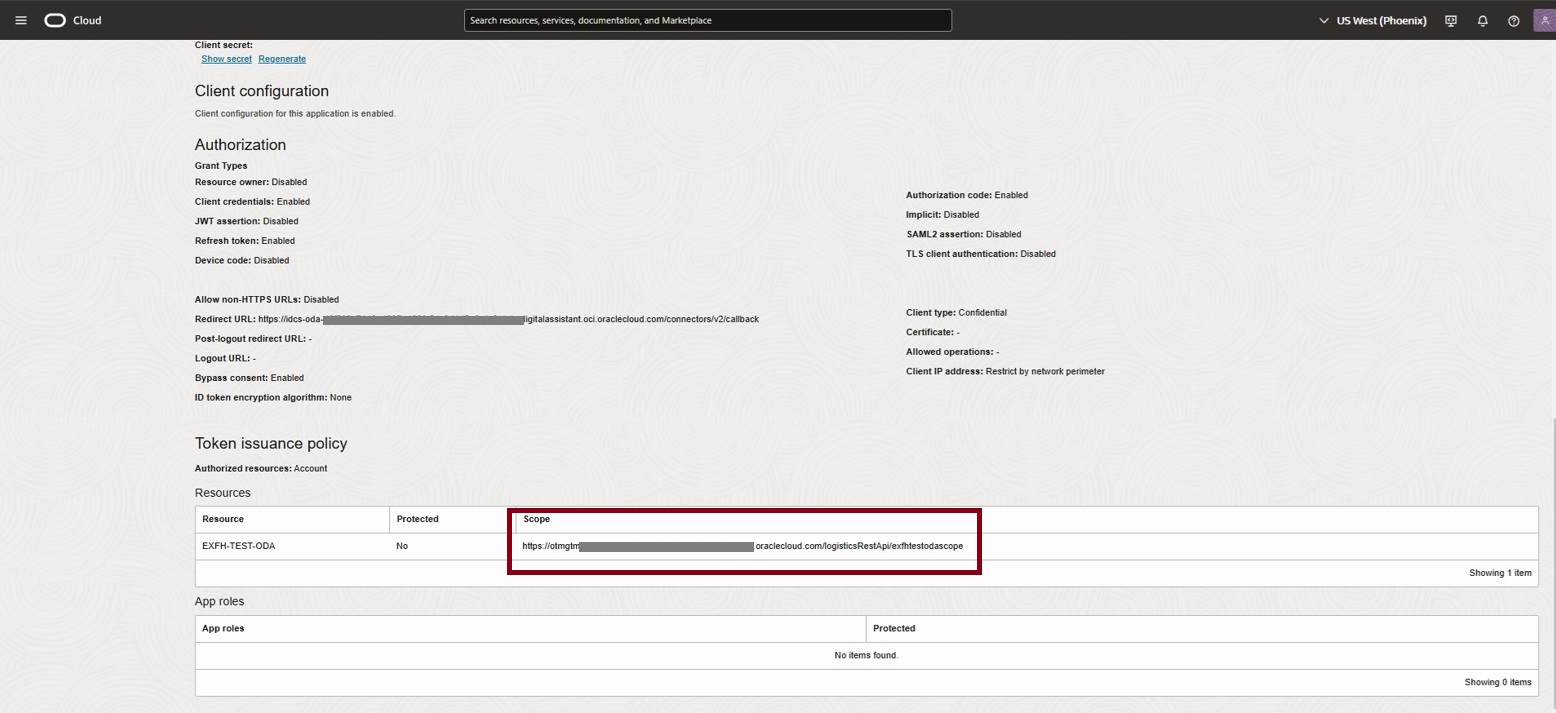
- Scope – obtained from the activated IAM Domain Confidential App, refer to the scope within Token issuance policy section of Client configuration (as shown below
- Example – https://otmgtm-example-instance.oraclecloud.com/logisticsRestApi/exfhtestodascope
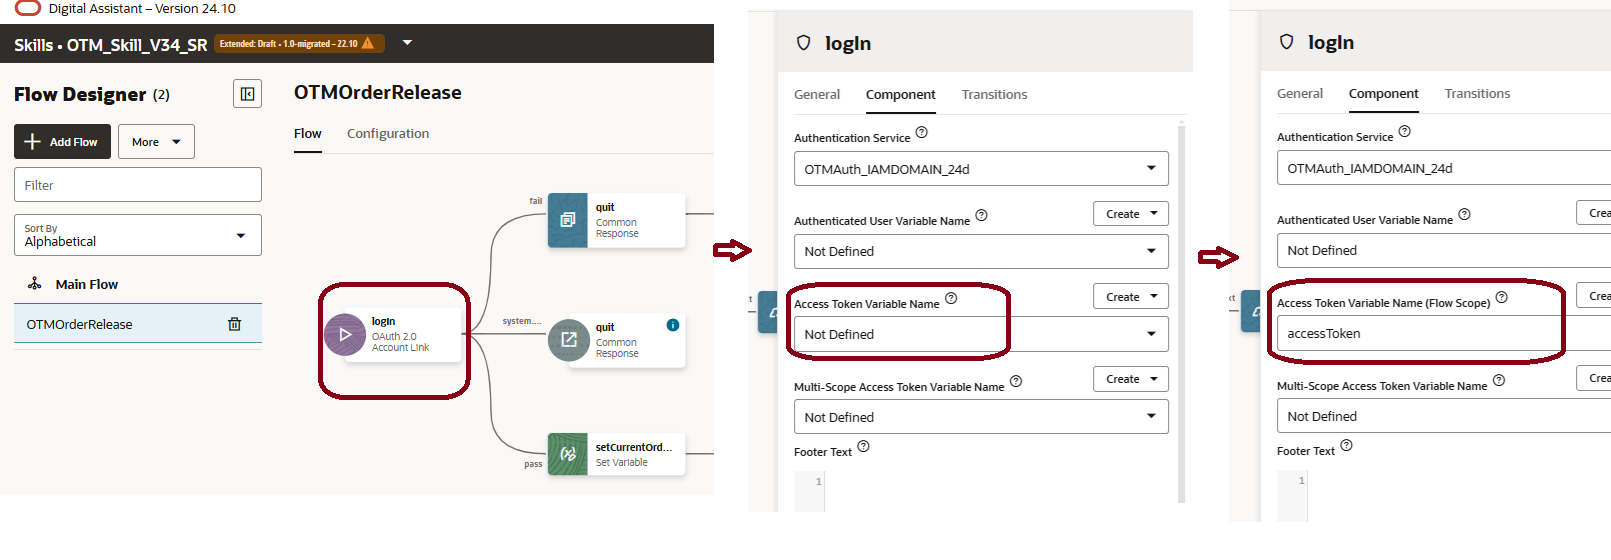
Note for OTM skills migrated to Visual Flow Dialog
Note for Visual Flow Dialog – Ensure that the Access Token Variable Name is set if your OTM skill has been migrated from YAML dialog flow to Visual Dialog flow.
Edit the ‘login state’ which is the first state in the converted Visual flow and update the Access Token Variable Name from the Component Tab as shown below. The variable needs to be set explicitly to ‘accessToken’ for the authenticated token to be propagated correctly into the custom component. If the accessTken variable is not set, you may encounter HTTP 401 errors even after successful authentication and token generation in the conversation flow.
Conclusion
In this blog we saw references and example values required for IAM Domain Setup and ODA Authentication service configuration for OTM Logistics Digital Assistant setup