
This blog was updated in August 2026 to reflect the latest OAuth configuration guidance in the Oracle Fusion Cloud Applications documentation: Configure OAuth to Access Oracle Fusion Cloud Applications REST APIs.
Introduction
In this blog, we’ll go through the steps to authenticate and access the v1 BOSS REST APIs (those that include /api/boss/ in the path). For example, this applies to the v1 APIs listed under REST API for Common Features
Steps to Access the V1 APIs
Create an OAuth Confidential Application
OAuth in the context of Oracle Fusion Applications uses an auto-generated token (a JSON Web Token, also known as JWT) to grant access to the APIs. To set this up, you need to configure the OAuth flow using the Oracle Cloud Infrastructure Identity and Access Management (IAM) domain linked to your Fusion Applications instance.
At a high level, the configuration process includes:
Identify the Identity Domain: Determine the domain where you will create your confidential application. This domain acts as the authorization server.
Specify Grant Types: Choose the OAuth grant types based on your requirements. You can configure either a 2-legged or 3-legged OAuth flow. In this blog, we will go through the steps to configure 2-legged OAuth flow of type Client Credentials.
Define Access Scope: Set the scope that determines the level of access the token will provide.
Generate Access Token: Obtain the OAuth token after configuring the application.
Use the Token: Utilize this token to authenticate and access the REST API resources.
Following are the details to configure the Confidential Application.
- Log in to the IDM Admin Console and navigate to your pod’s identity domain of type Oracle Apps.
- Click Integrated applications
- Click Add application
- Select Confidential Application and click Launch workflow
- Create a Confidential application and click on Submit.
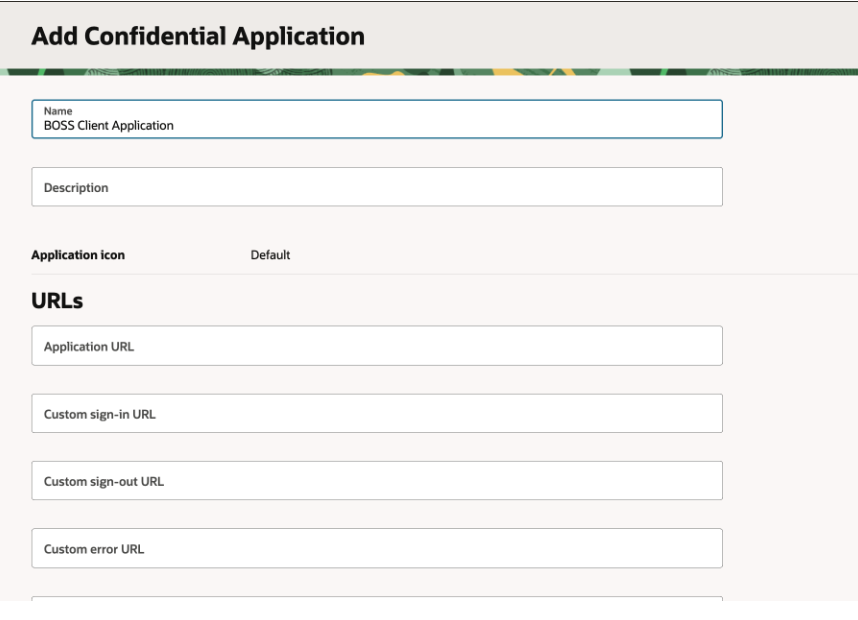
6. Open the application you created.
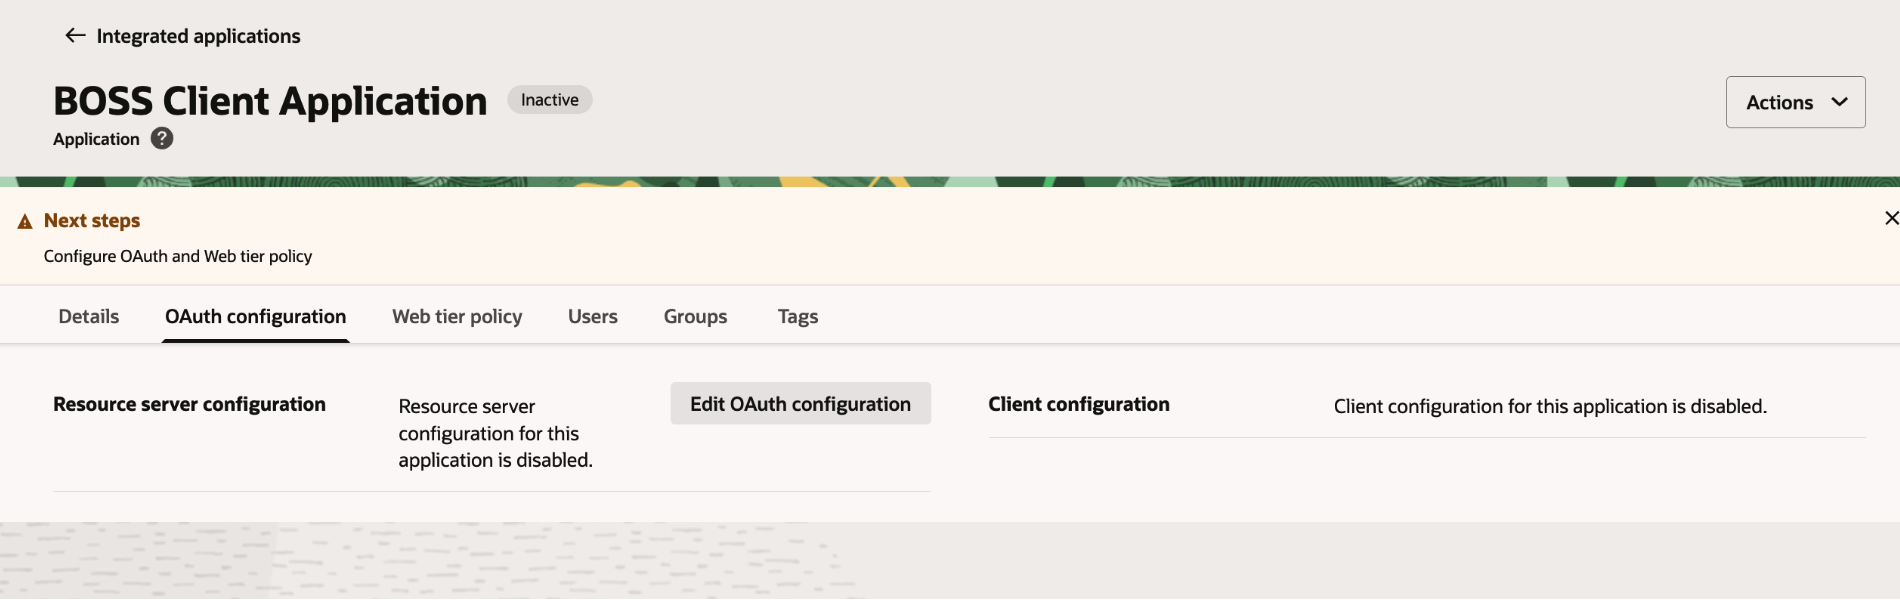
7. Click on Edit OAuth Configuration and do the following
7.1 Select Configure this application as a client now
7.2. Choose Allowed Grant Type as Client Credentials.
Client Credentials Grant Type :
Use this for applications that process requests without user interaction and don’t require user-level permissions. Here, the client credentials are embedded in the application and validated by the authorization server. This flow is typically recommended for automated client–server interactions handling application-level requests.
7.3. Choose Client type as Trusted.
7.4 Generate an RSA private key and its corresponding X.509 public certificate. The private key is used to sign the JWT assertion, while the public certificate is imported into the Oracle Identity Domain so that Oracle can verify the JWT signature.
7.5 Click Import Certificate and select the public signing certificate.
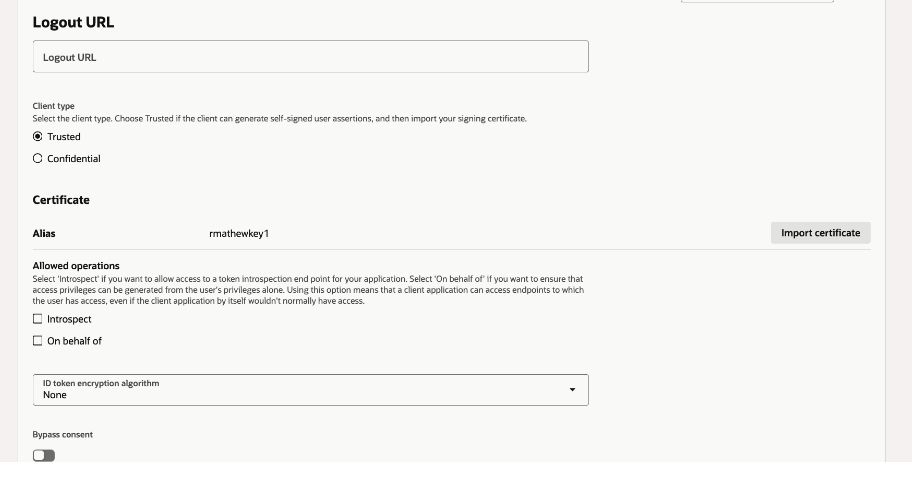
7.6 In Authorized resources, select Specific so that the user is granted access only to the specific resources.
7.7. Select Add resources
7.8. Click Add scope, then search and select the scope, Oracle Boss Cloud (Spectra)
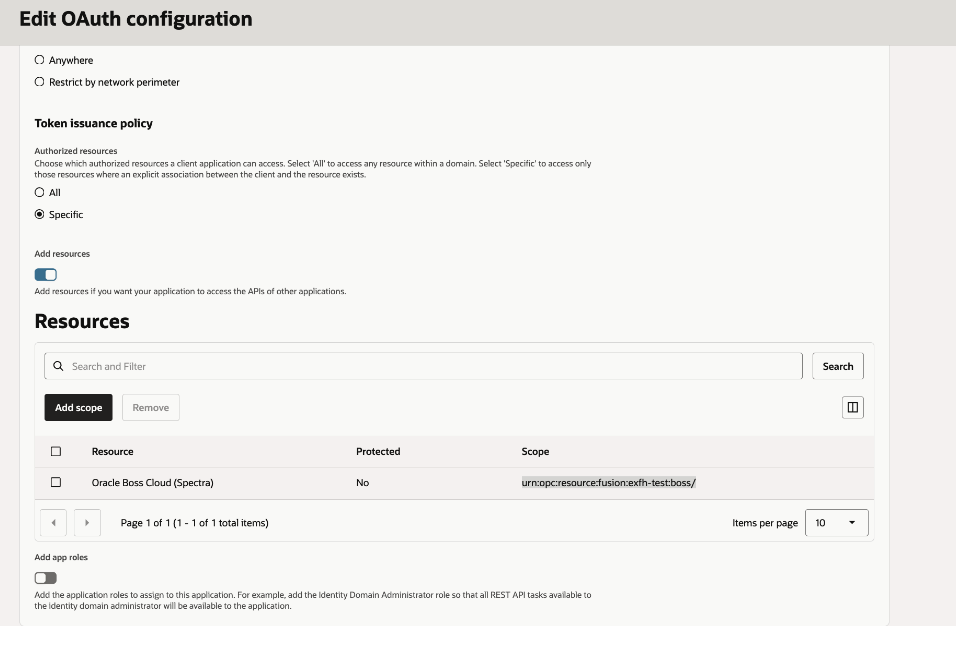
8. Click Add and Submit
9. Click on Activate to activate the application

10. Take note of Client ID of the application. This is used for generating tokens.
Role Access
V1 APIs are secured using SAS which adds new security technology that introduces elements called permission groups.Follow the steps below to ensure that your role is updated with the required permission groups to access the V1 REST API.
1.Go to Setup and Maintenance
- Search for Manage Administrator Profile Values and enter this task
- Search for the profile value by profile option code ORA_ASE_SAS_INTEGRATION_ENABLED
- Set its value to Yes at the Site level
- Save the profile value
2. Go to Tools → Security Console
- Search for the role you want to update, say for example ORA_FND_APPLICATION_DEVELOPER_JOB and click Actions > Edit.The Basic Information page now includes an Enable Permission Groups button.
- Click Enable Permission Groups and confirm
- Go to the Permission Groups train stop. You can see the permission groups enabled to the role. For example, read: Common Lookup Type Permission Group gives the Permission to read an artifact type OraBusinessObject with Artifact Name as Common Lookup Type. This is the permission required to read the common Lookup v1 REST API Business Objects.
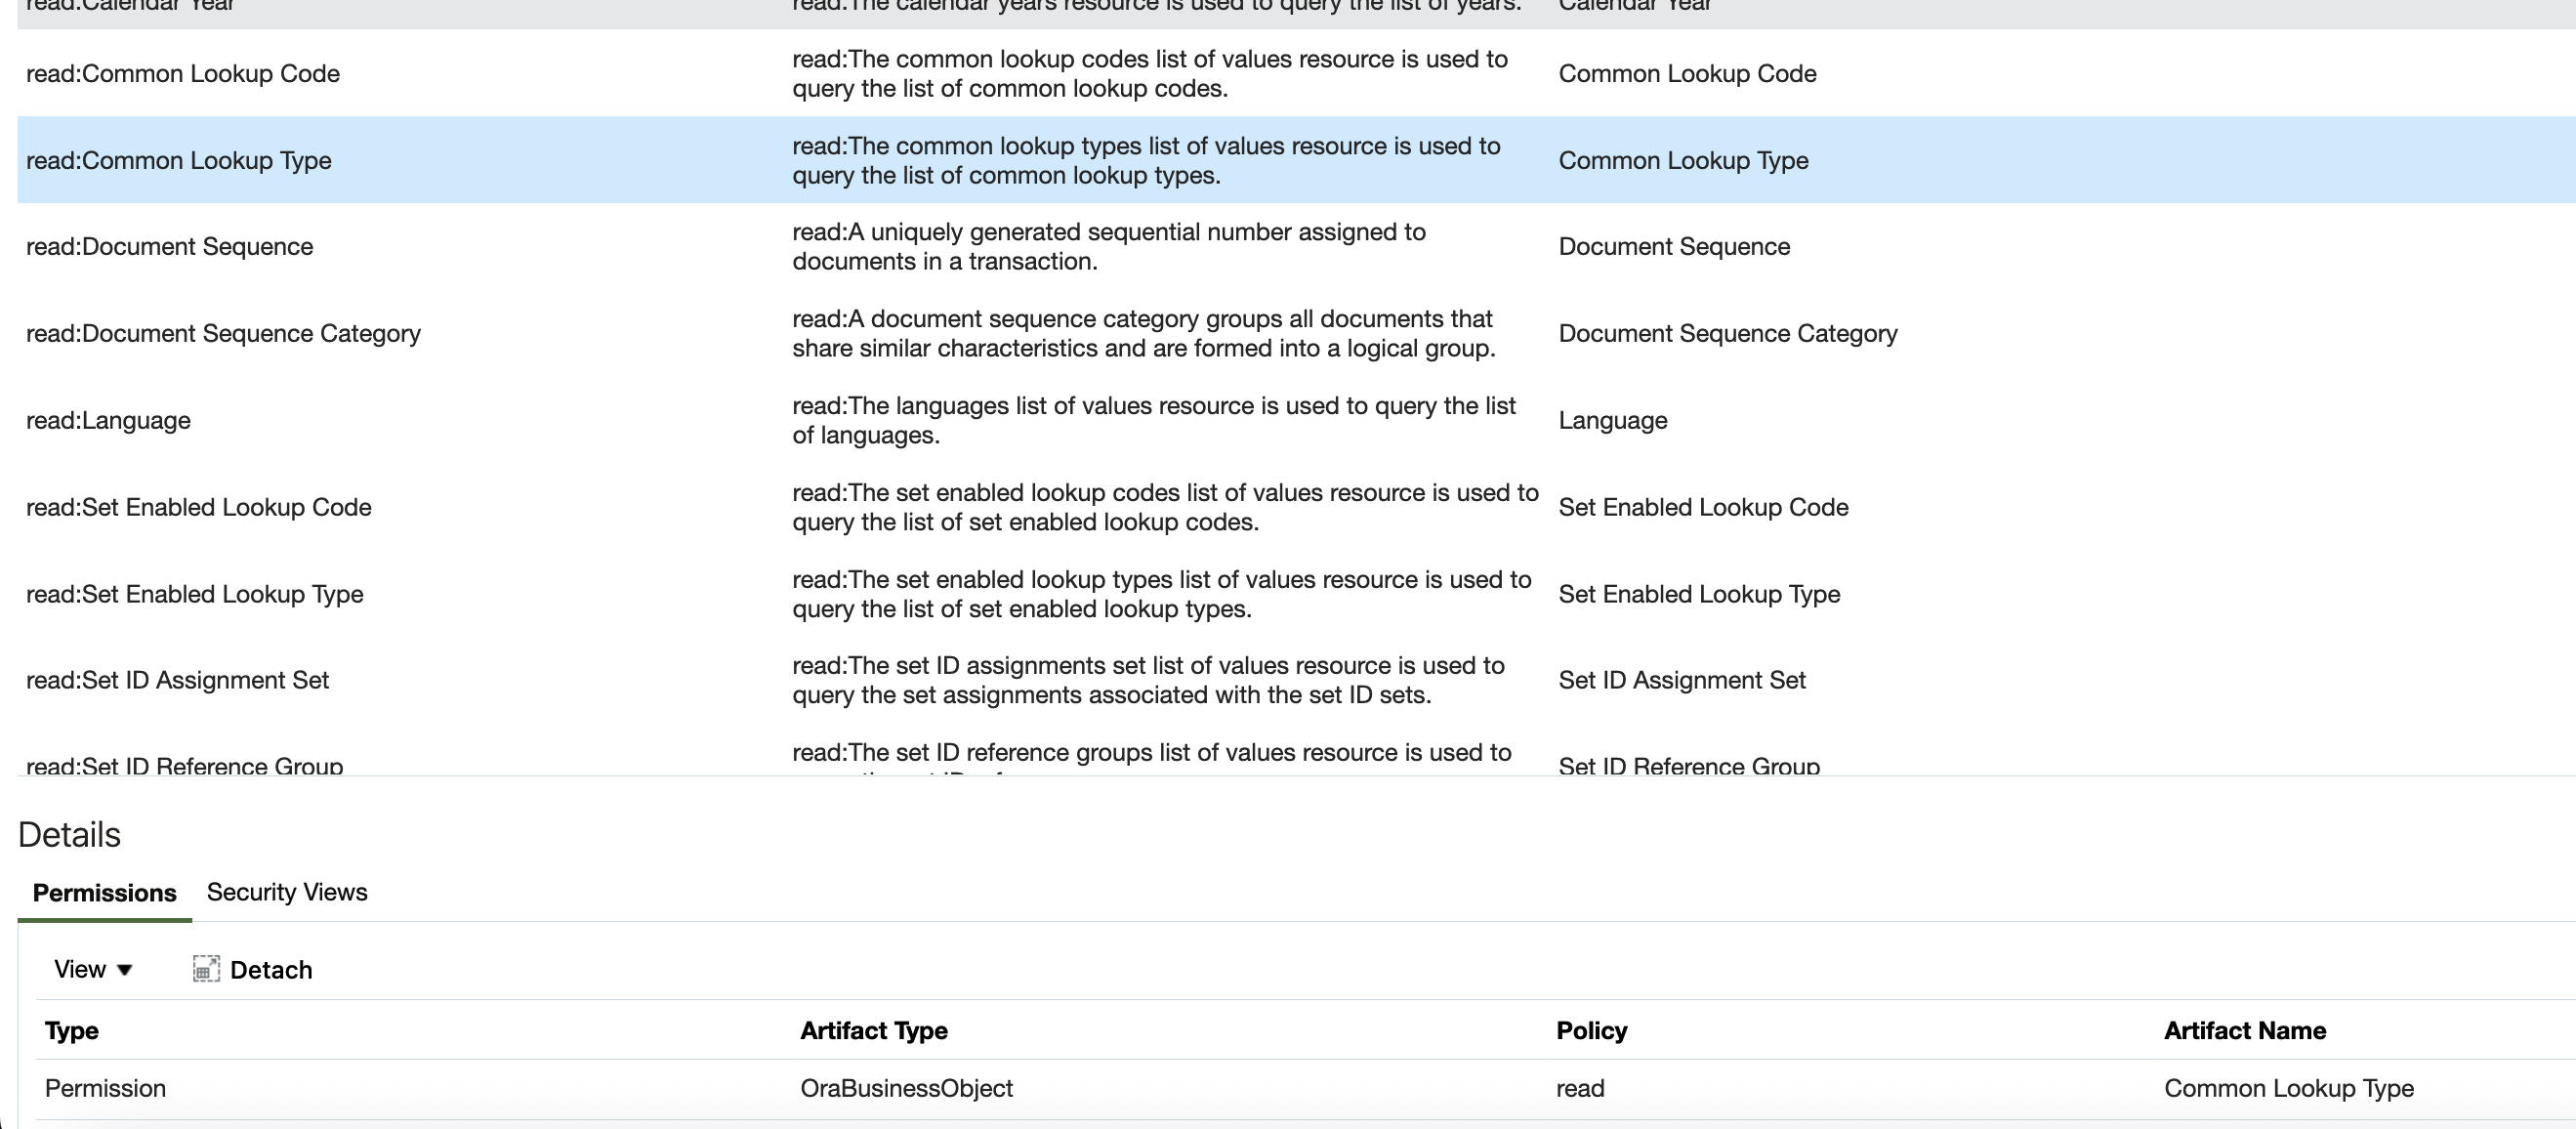
3. Assign roles to the client application in Security Console for role-based access control. For details, see Manage Roles in Custom OAuth Client Applications Using Application Extensions Page
Generate the Access Token
1.Create JWT client assertion which consists of a header, payload, and digital signature. This will be used in Step 2 below.
Create the JWT Header
The JWT header specifies the signing algorithm and identifies the certificate associated with the private key used to sign the assertion.
{
  "alg": "RS256",
  "typ": "JWT",
  "kid": "<certificate-alias that matches the alias used in Oauth Application while importing public certificate>"
}
Create the JWT Payload
The payload contains claims that identify the OAuth client and define the validity of the assertion.
{
  "iss": "<client-id>",
  "sub": "<client-id>",
  "aud": "https://identity.oraclecloud.com/",
  "iat": "<issued-at-time>",
  "exp": "<expiration-time>",
  "jti": "<unique-jwt-id>"
}
The time-based claims are generated when the assertion is created. iat indicates when the JWT was issued, while exp specifies when it expires. jti provides a unique identifier for the assertion.
Sign the JWT with the Private Key
After constructing the JWT header and payload, the sign them using the private key corresponding to the public certificate previously imported into Identity domain.
2. Request an access token.
You should use the urn:opc:resource:fusion:<<replace with your podname>>:boss/ scope, while running the commands shown below. To generate the access token using Client Credential grant type OAuth, use
curl --request POST https://<identity domain URL>/oauth2/v1/token" -H "Content-Type: application/x-www-form-urlencoded;charset=UTF-8" -d "grant_type=client_credentials&scope=urn:opc:resource:fusion:<<replace with your podname>>:boss/&client_id=<client_id>&client_assertion_type=urn:ietf:params:oauth:client-assertion-type:jwt-bearer&client_assertion=<client_assertion_JWT>Expect a response as shown below,
Status: 200 "access_token":"eyJ4NXQiOiI4Wk. . ." "token":"Bearer", "expires_in":3600
Copy the value displayed for access_token. This is the token that you’ll need to request access the API.
Execute REST APIs
Now that you have the access token generated by the OAuth 2.0 API provided by IDCS, you can use that token to authenticate calls to APIs . Make sure to specify the token as a Bearer token in the authorization header of your requests so that it can be properly processed.
Example,
curl --location 'https://fa-exfh-test-saasfaprod1.fa.ocs.oraclecloud.com/api/boss/data/objects/ora/commonAppsInfra/objects/v1/territories' --header 'Authorization: Bearer kkkkk....'
References
https://docs.oracle.com/en/cloud/saas/applications-common/26c/farca/configure_oauth.html