In this article, we are going to be using Windows PuTTY to securely log into a remote Linux instance with SSH. We will use a private key instead of a password. The instance in this case will be an Oracle OCI Compute instance, running Oracle Linux.
OCI Compute Instance Creation
A comprehensive description, for all of the options available when creating an Oracle OCI Compute instance, is beyond the scope of this article. Here, we will only touch on the parts required to log in remotely using PuTTY.
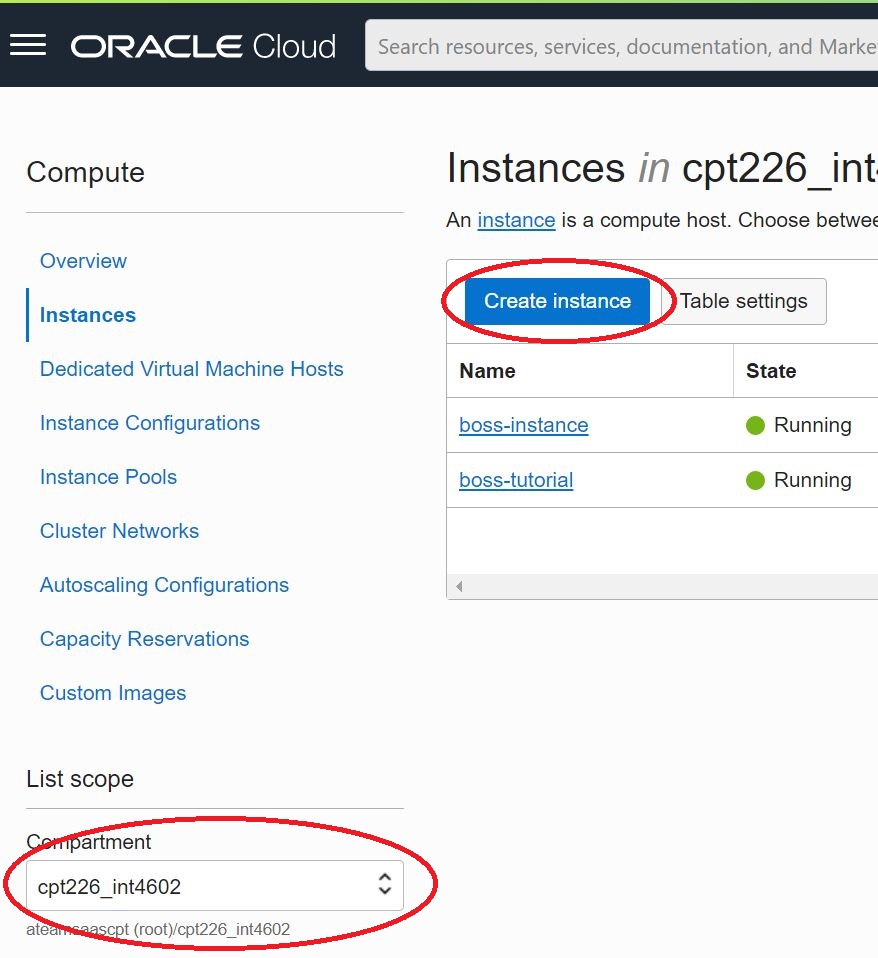
Log into your Oracle Cloud account and use the burger menu at the top left to select Compute, and then select Instances. Ensure you have the correct compartment selected and click on Create (see the image below).
You can stick with all of the defaults values for, Placement, Security, Image and Shape, and Networking. You may want to change the Name to something more meaningful. Make sure that we are assigning a public IP in the Networking section.
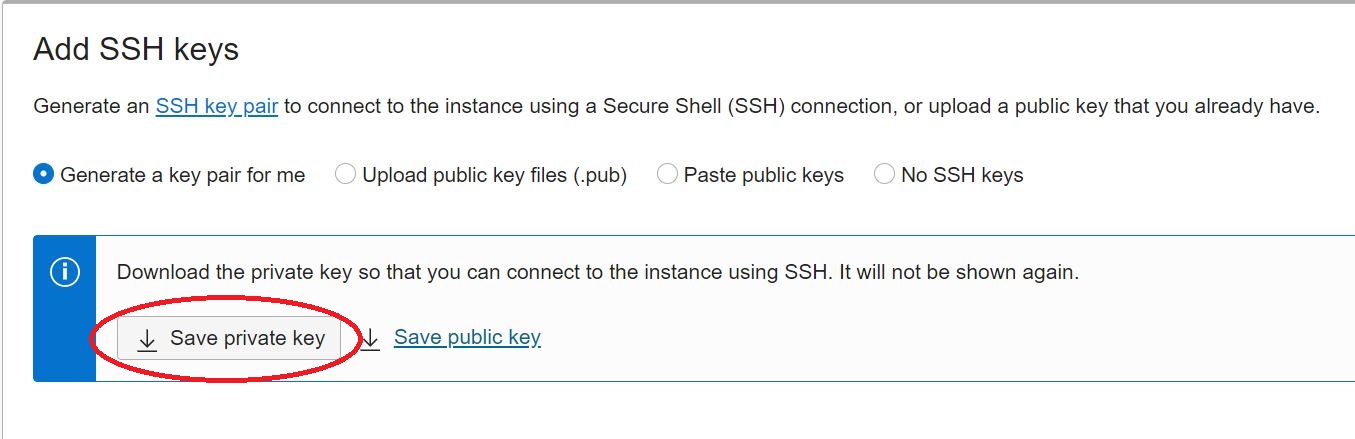
The section we are most interested in is Add SSH keys. This is where we will download the private key to our Windows machine, for use in our SSH login. The diagram below shows you the button to save the private key.
Once you’ve saved the private key you can go ahead and click the Create button. The instance will begin provisioning and this may take a few minutes, but you can get the Public IP immediately (see below). Just copy that IP address and store it somewhere safe.

Now we can revert to the Windows desktop to convert the private key into a format that PuTTY can use.
Private Key Conversion
Run PuTTYGen on your Windows machine. You’ll see a screen like the one below.
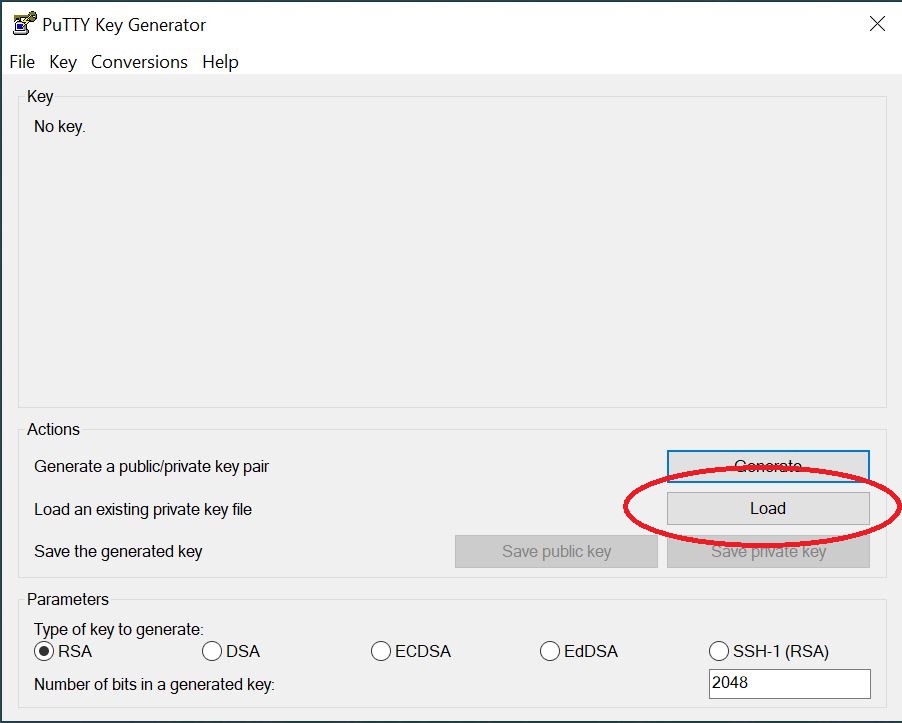
Click on the Load button and you’ll see a Browse window. It’s PuTTY so it will default to the file extension .ppk. Change that to All Files as shown below.

That should enable you to locate your Oracle Compute instance private key (that you downloaded earlier). Click on Open and then click OK on the popup. On the next Screen click on Save private key (make sure that the type of key is RSA and the number of bits is 2048). Click Yes to ignore the pass phrase warning, and then save the converted key. This is what you’ll use with PuTTY.
See the Oracle documentation for more details
Open your SSH Session with PuTTY
Here is the PuTTY download link.
Note: if you only have access to a private compute instance then you’ll need to use OCI Bastion instead. If that is the case then have a look at this article.
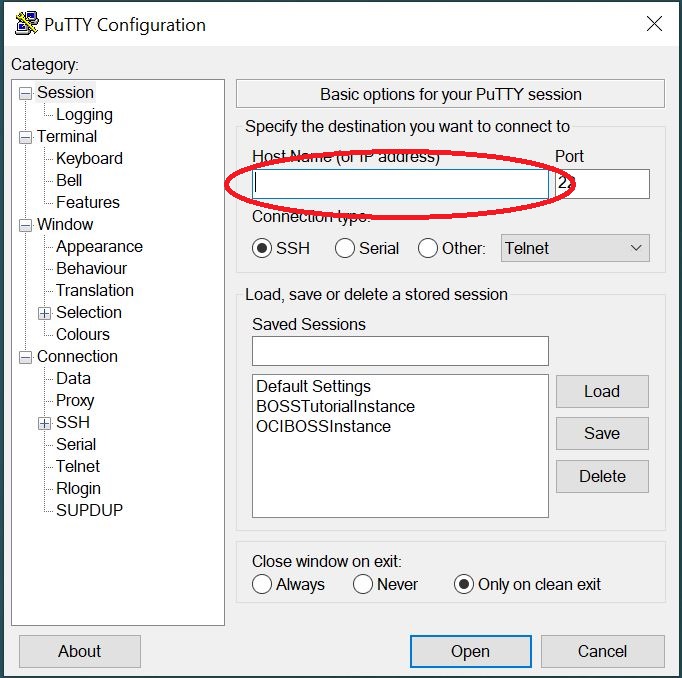
Now you are ready to connect to your Oracle OCI compute instance. Open PuTTY. Enter the public IP address you noted from earlier, into the Host Name box (as shown below).
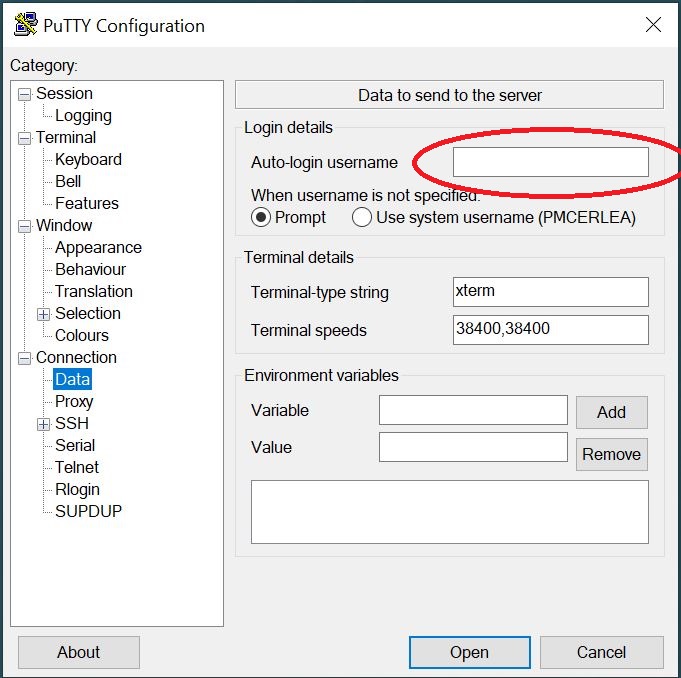
Next click on Connection->Data. Enter your Compute instance user name in the Auto-login username box (as shown below). This isn’t strictly necessary; it’s more of a convenience so that you don’t have to enter the user name on every SSH session login. You won’t have to enter a password either as we are using private key.
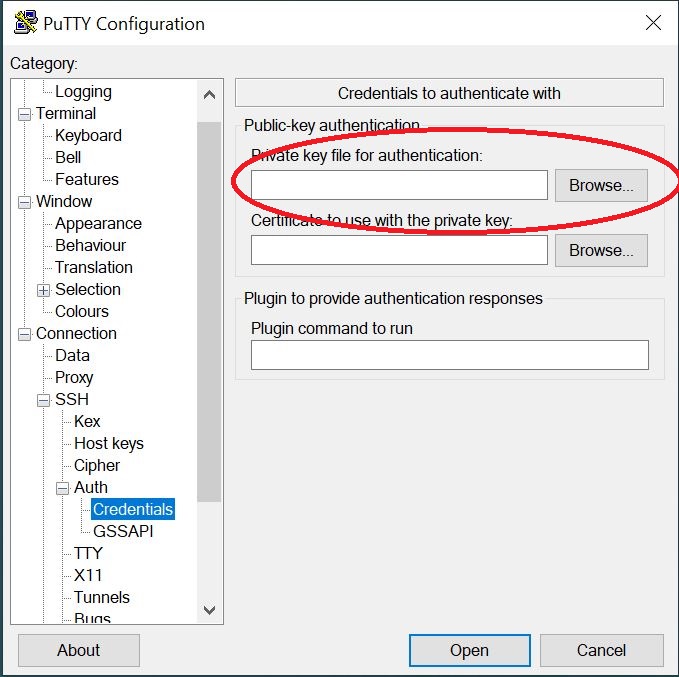
Now we are ready to load the converted private key from the previous step. Click on Connection->SSH->Auth->Credentials and you’ll see a screen like the one shown below. Click on Browse and locate your converted private, i.e. the one with the .ppk extension.
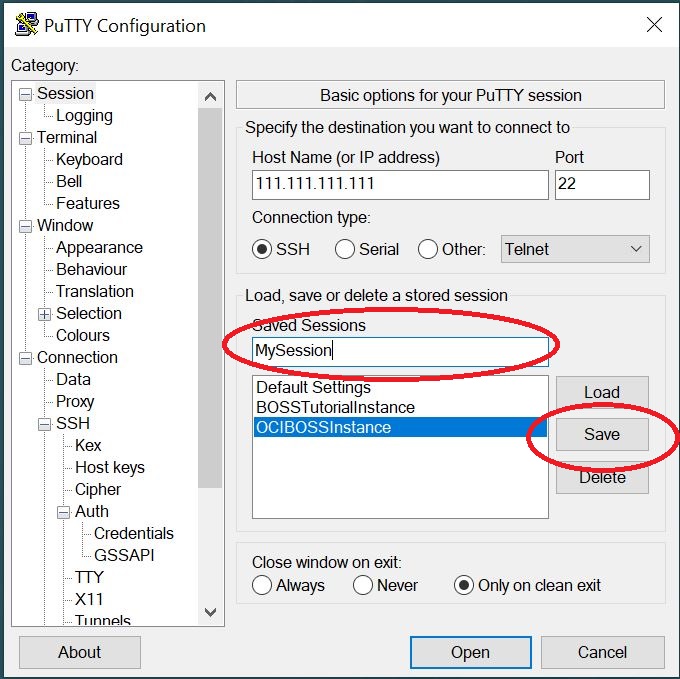
Now you can return to the first screen by clicking on Session in the left hand pane. Enter a value in the Saved Sessions box as shown below and click Save. That’s your session details persisted for subsequent logins. Now to the moment of truth .. click on Open to open an SSH session with your OCI compute instance.
Note: the default subnet security list in OCI (for your instance) comes with an Ingress rule for port 22 (i.e. SSH), so that’s why you didn’t need to add one when creating the instance. However if you wish to open other ports then you’d have to add additional Ingress rules for those, and also open the corresponding ports in your instance’s firewall.