We’re excited to provide an early look at a brand new feature within Oracle Fusion, the Data Extraction tool. While the tool is in its initial release phase, it’s meant for users seeking streamlined, accessible, and secure data access across Fusion’s functional areas.
What Is the New Data Extraction Tool?
The Data Extraction tool is Oracle Fusion’s next-generation data extraction tool for securely extracting data from various functional pillars. This tool is envisioned as a modern alternative, and eventual successor, to legacy extraction mechanisms such as BICC. Although current coverage is limited (not all modules and objects are available yet), Oracle is actively expanding support across upcoming releases. Customers are encouraged to get hands-on and provide feedback.
The Data Extraction tool is turned off by default and won’t show up until it’s switched on. Administrators need to enable it in Fusion Setup Manager. You can find the feature under the Manufacturing offering. Once it’s enabled, the app will show up under Tools. To fully activate it, you need to submit a Support Request (SR) to Oracle, selecting any Fusion Applications product area (for example, Oracle Fusion Manufacturing Cloud Service). You must set the Category to Custom Reports and Analytics and the Subcategory to Data Extraction.
To enable the tool, the customer must opt in to the feature, which is available under the Manufacturing and Supply Chain Materials Management offering in this initial release. The feature is named “Redwood: Extract Application Data from a Read-Optimized Data Store using a Redwood Page”.
Getting Started
Pre-requisites & Security Configuration
A key pillar of Data Extraction is its emphasis on security and permissions. Before using the tool, you need to ensure two essential configurations are completed:
1. Enable Required Profile Option
- Navigate to: My Enterprise and then Setup and Maintenance in Oracle Fusion.
- Click on the Tasks icon (usually on the right).
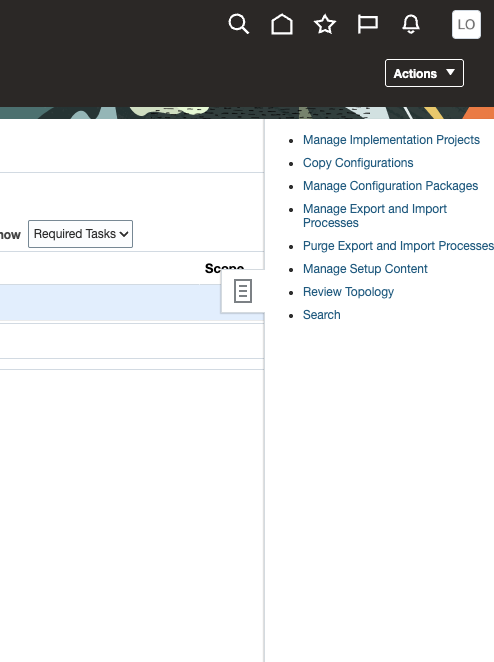
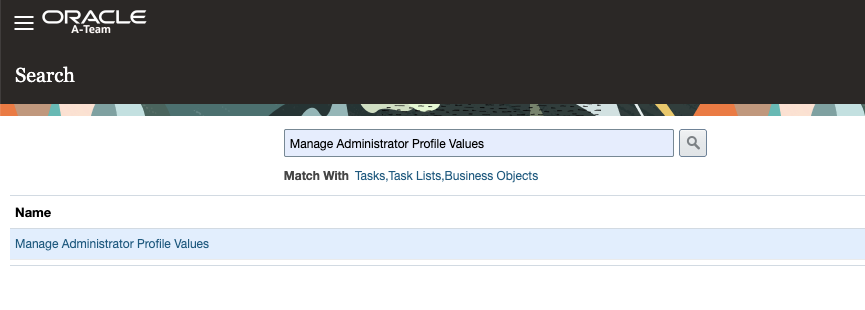
- Search for and open Manage Administrator Profile Values.
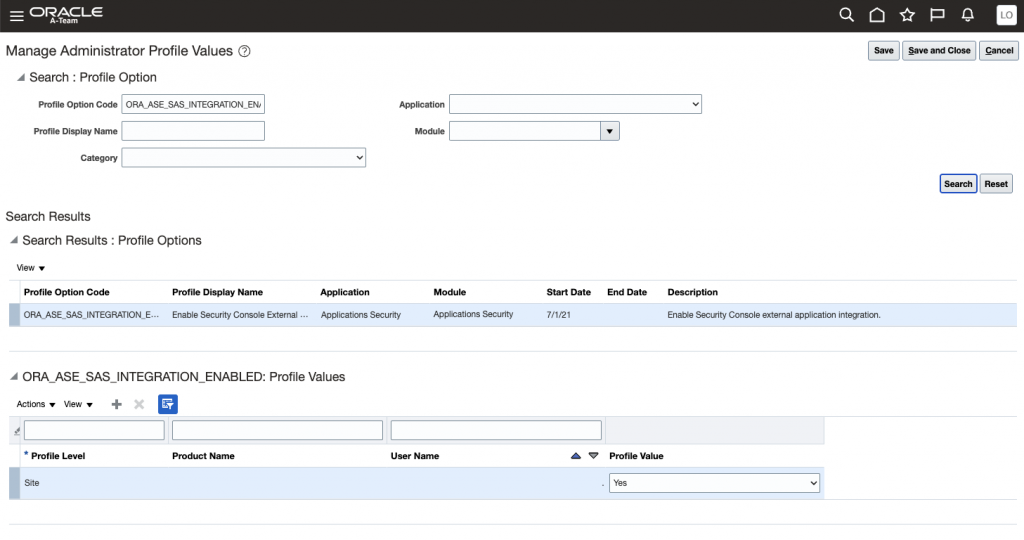
- In the Profile Option Code field, enter ORA_ASE_SAS_INTEGRATION_ENABLED.
- Ensure the profile value at the “Site” level is set to Yes.
- Save and close.
2. Create and Assign a Custom Role
While you might already have an appropriate role, creating one from scratch ensures full control and clarity. Here’s a streamlined process:
- Navigate to Tools > Security Console.
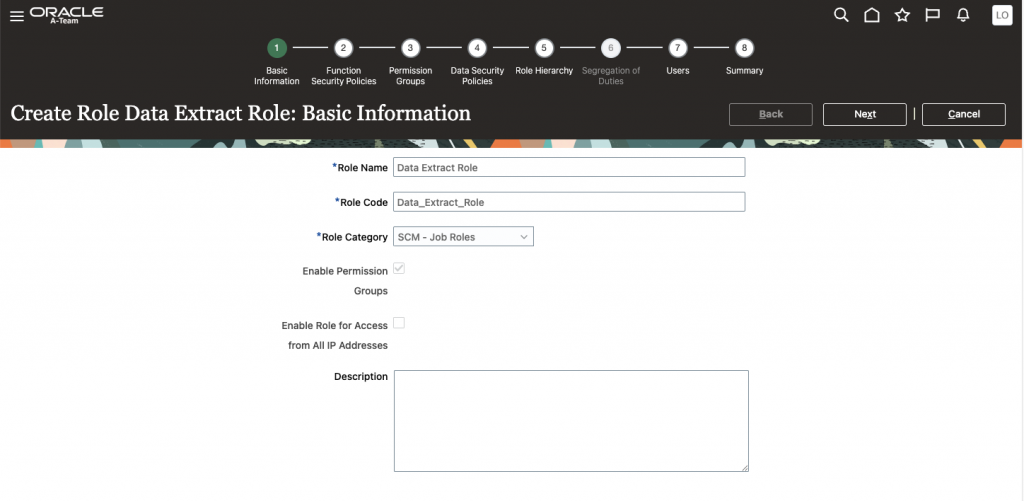
- Under Roles, click Create Role.
- Name your role (e.g., DataExtractRole).
- Set the role category (e.g., SCM Job Roles).
- Be sure to check Enable Permission Groups and confirm in the pop-up.
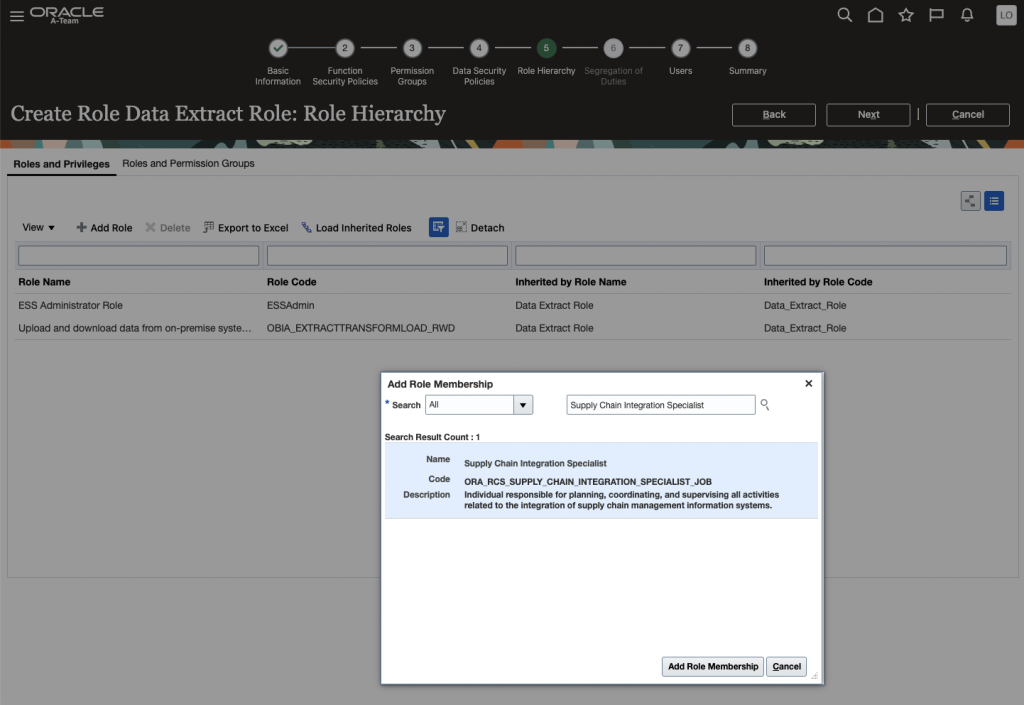
- Navigate to Role Hierarchy Add the following roles to your custom role’s hierarchy:
- ESSAdmin
- OBIA_EXTRACTTRANSFORMLOAD_RWD
- ORA_RCS_SUPPLY_CHAIN_INTEGRATION_SPECIALIST_JOB
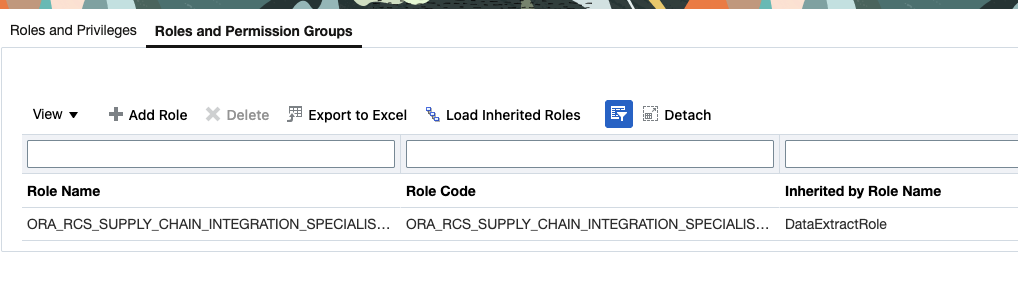
- Open the Roles and Permission Groups tab and confirm that ORA_RCS_SUPPLY_CHAIN_INTEGRATION_SPECIALIST_JOB appears in the list.
- Navigate to Users and assign your user account.
- Save and close.
Permission changes may take a few minutes to propagate. Refresh your session if you don’t see new options right away.
Data Extraction UI
Once your access is in place, you’ll find the Data Extraction tool under the Tools section of the Navigator:
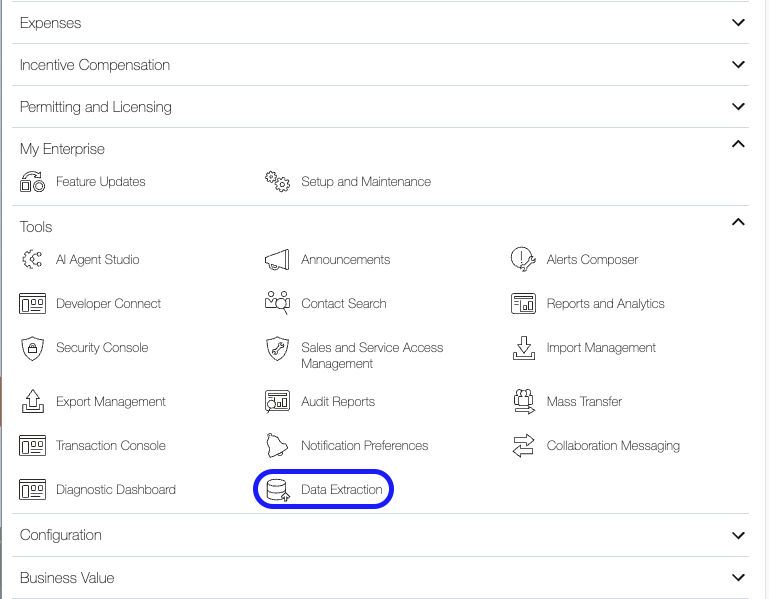
The interface is designed for ease of use, featuring three primary sections:
- Extract Definitions: Configure what data to extract and how.
- Extract Schedules: Set one-time or recurring extraction jobs.
- Extract Jobs: Monitor past and ongoing extraction runs.
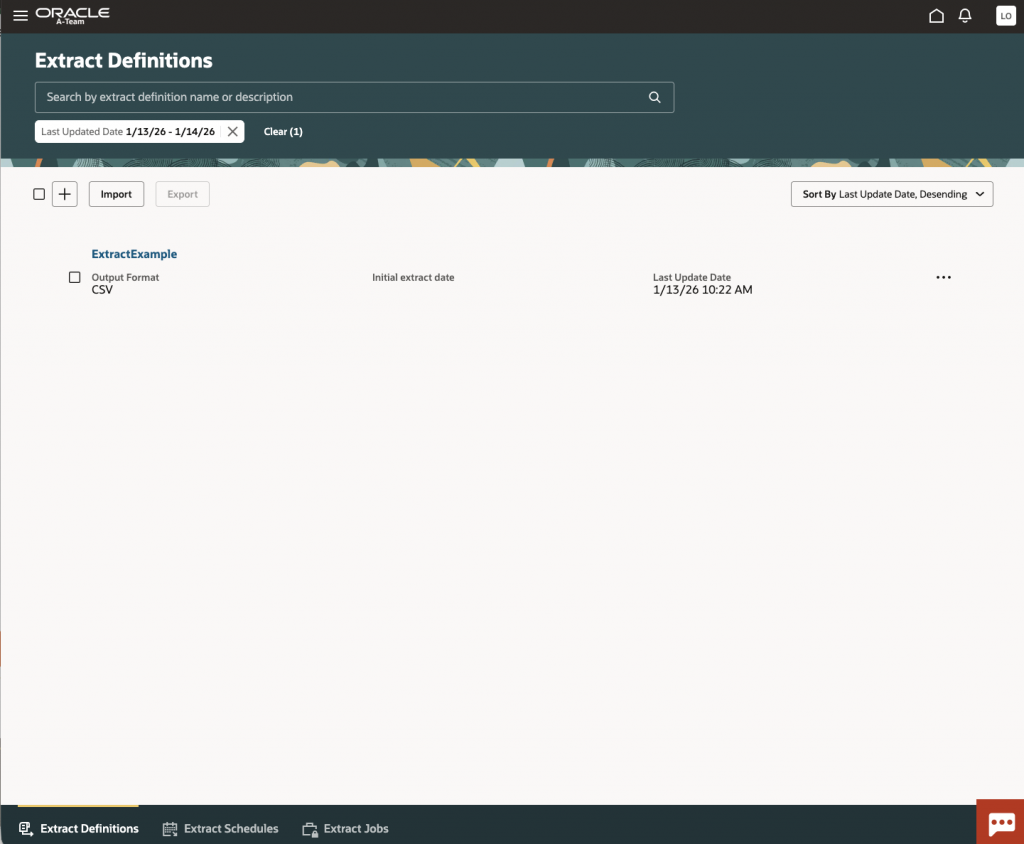
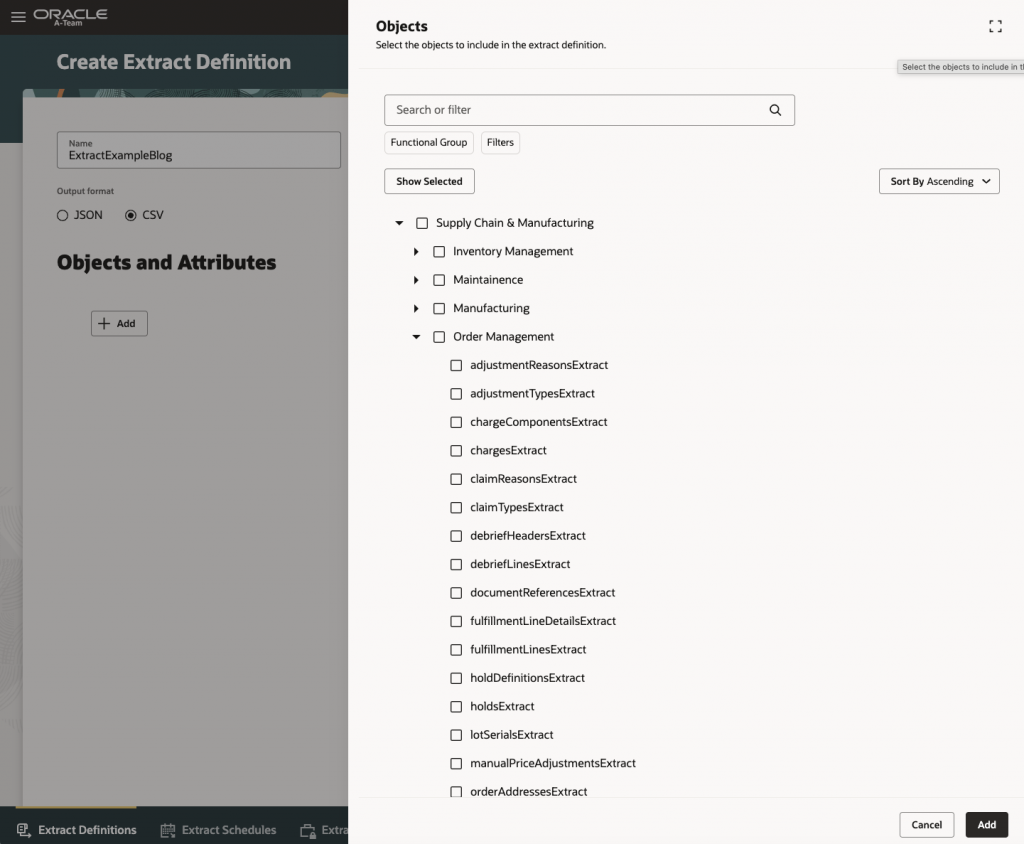
Creating an Extract Definition
- Click the + icon to start a new extraction.
- Provide a clear name and optional description.
- Define an extract date if required.
- Choose your output format: CSV (default) or JSON.
- Select Objects and Attributes:
- Click Add to choose business pillars (e.g., Supply Chain & Manufacturing).
- Drill down to the desired functional area, e.g., Order Management, then select the specific object such as Sales Orders Extract.
- Select all specific fields/attributes you wish to include.
- (Optional) Set up data filtering rules to narrow your extract.
- Click Create to save your extraction definition.
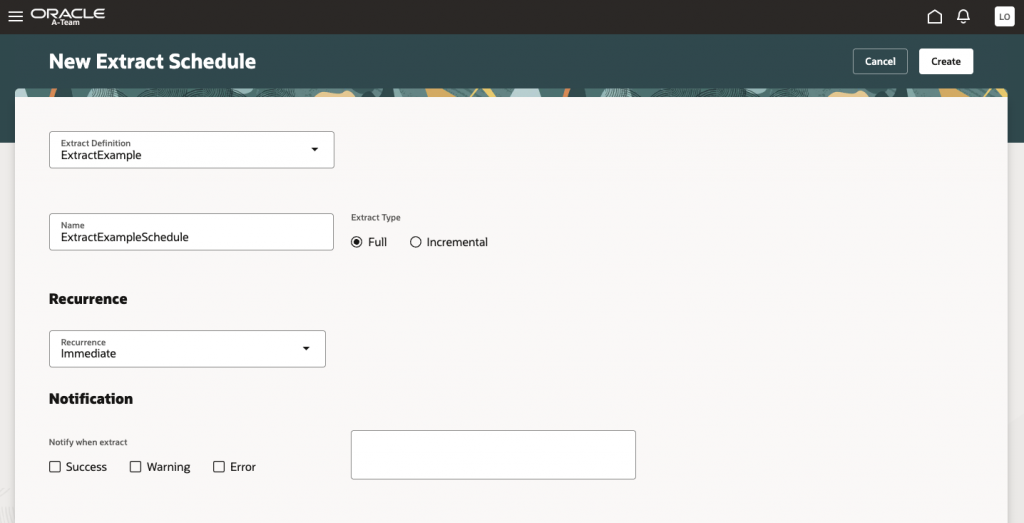
Scheduling & Running Your Extraction
After saving your extract definition and returning to the parent page, just click on the actions on the right side of the new row. We have “Create Extract Schedule” as a short cut, it auto-populates the schedule with the extract definition.
Depending on data volumes, initial extractions may take several minutes to complete.
Downloading Results
- Monitor job status (Pause,Running, Succeeded, etc) in the Extract Jobs tab.
- Once completed, data files are securely uploaded to UCM (Universal Content Management).
- Retrieve your extract:
- Visit your UCM instance (usually hostname/cs).
- Navigate to Content Management > Checked Out Content.
- Search with the Request ID from your extraction job.
- Download the generated zip file containing your data and metadata in CSV format.
If you don’t have access to UCM, review this document and add the proper permissions.
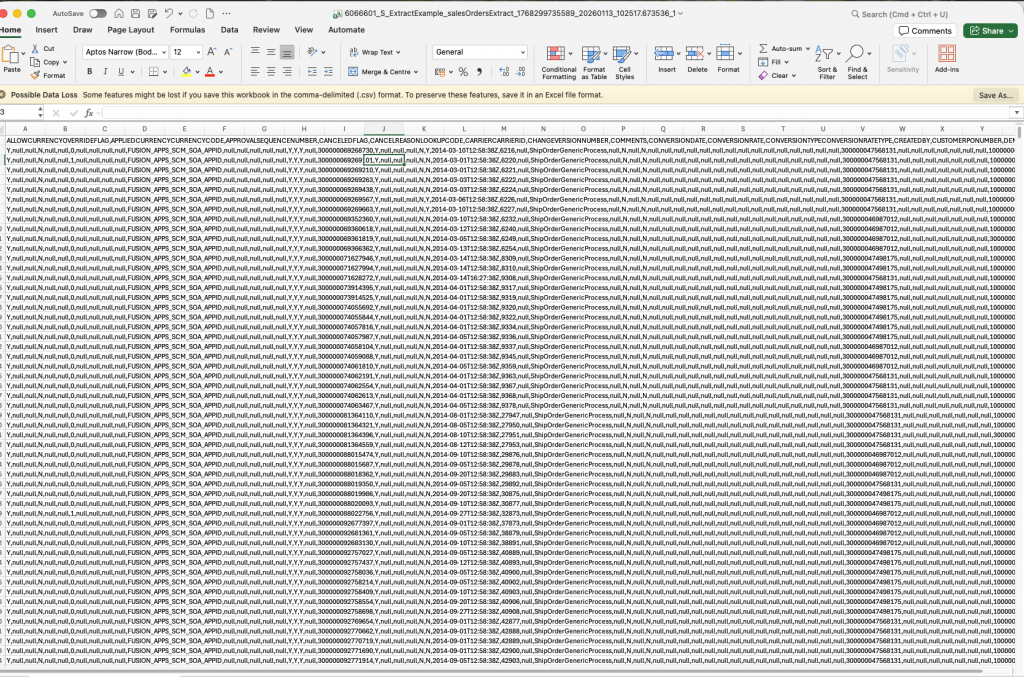
What Does the Output Look Like?
Each extraction generates the following outputs:
- A data file (.csv or .json) containing the requested records.
- A metadata file that outlines key details, including:
- EXTRACT_NAME
- JOB_TYPE
- FROM_LASTUPDATEDATE
- TO_LASTUPDATEDATE
- OUTPUT_CSV_COUNT
- TOTAL_ROWS
- STATUS
- ERROR_MESSAGE
Conclusion
This new Data Extraction tool delivers self service access to enterprise data, with robust security and built in flexibility. As the platform continues to evolve, support will expand across additional functional pillars.We welcome your feedback as we continue to enhance the solution, please feel free to share your thoughts with the Oracle team.