Deploying WAF is a common requirement to protect web applications. The OCI WAF can support multiple use cases and I have blogged regarding some in the past.

Fig 1
OCI WAF allows you to define various access control rules, OWASP based protection rules, etc. to control incoming (as well as outgoing) HTTP traffic. If any of the rules trigger, the corresponding ‘action‘ gets executed. If the rule triggering requires stopping further processing of the request, i.e., blocking the request, then this can be achieved with the WAF sending a HTTP response to the client. For example, OCI WAF provides out-of-the-box ‘Pre-configured 401 Response Code Action’ ,and if this action is tied to the rules, then the WAF will send a response back to the client with HTTP status code 401 if the rules trigger, thus stopping a potential malicious request. You may also define your own actions and return other HTTP 4xx codes along with any suitable message. For example, below I have defined a new action called ‘Block’ and associated it with various access control and protection rules in my WAF policy. This action returns HTTP status code 403 along with the message “Your request is blocked”.

Fig 2
While accessing my website with the URL http://a******.********.com/test.html?item={{itemid=1}} , we can see that the request is getting blocked and the response on the browser is “Your request is blocked”.
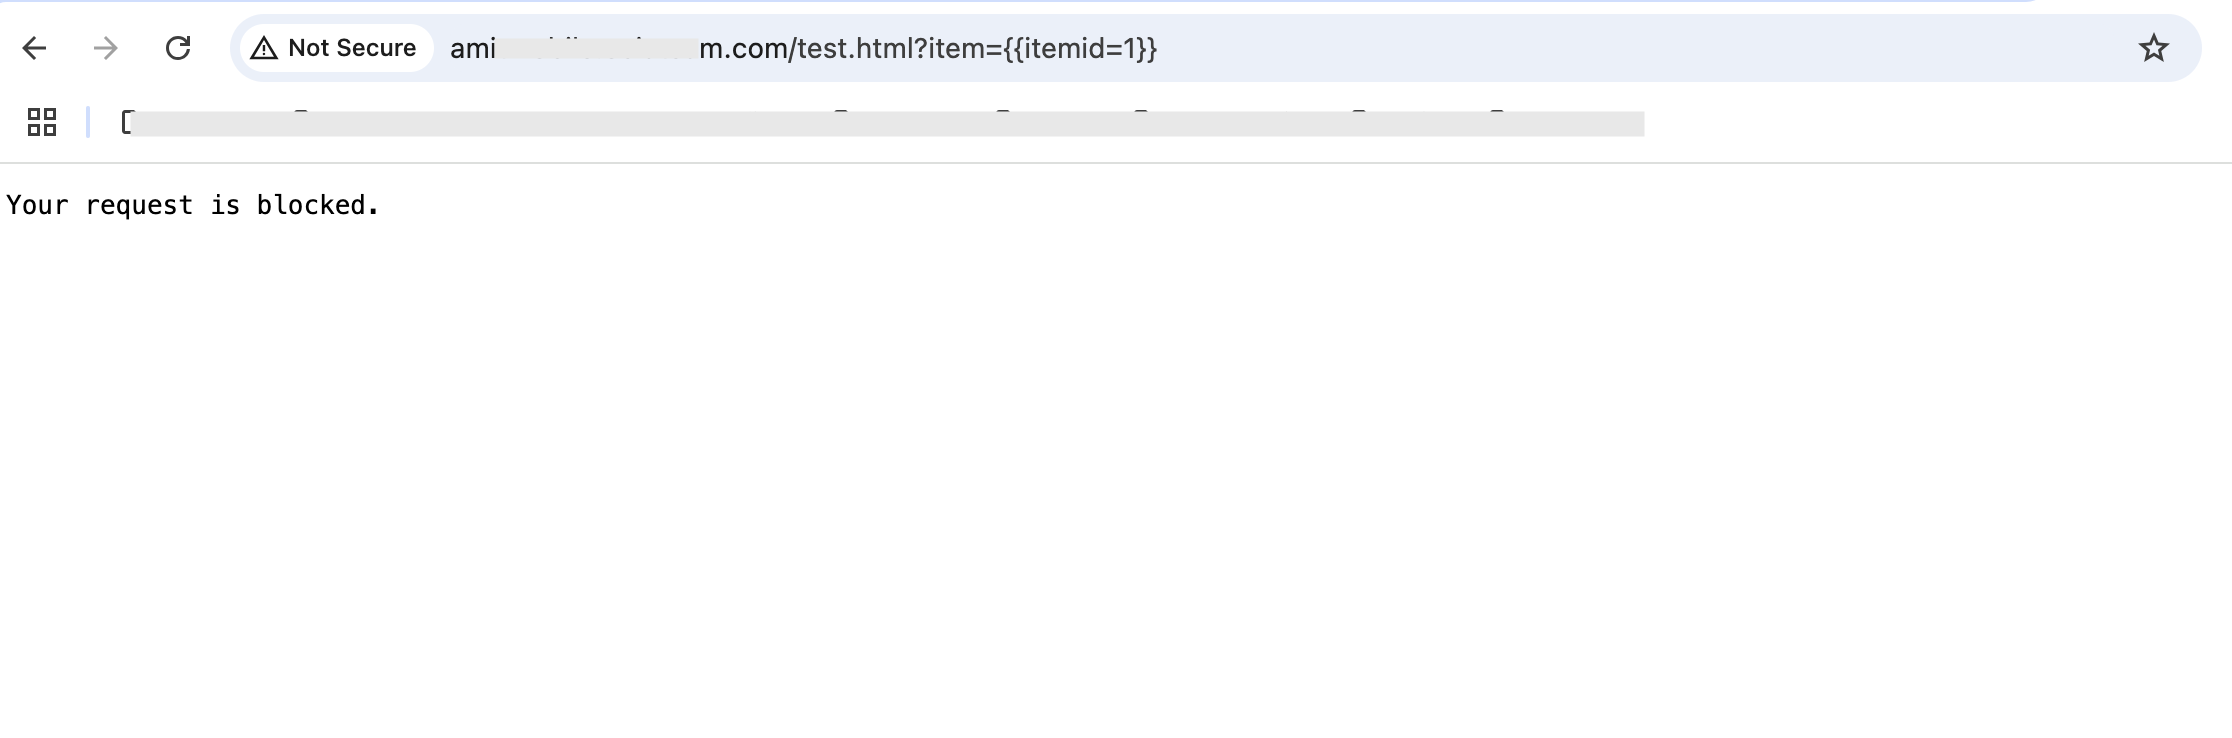
Fig 3
This is all fine – we now know that the WAF policy is in effect. However, how do we know “why” is the request getting blocked? This is important since although WAF can successfully block malicious requests, there can be cases of ‘false positives’ too. And to reduce false positives, tuning of the WAF configuration rules is needed. But that requires we understand the reason why the request was blocked by the WAF in the first place!
WAF Logs
The answer to the above question can be found in the WAF logs. OCI WAF provides comprehensive logs which are built over the load balancer logs; this is not surprising since the WAF is essentially a plugin of the load balancer.
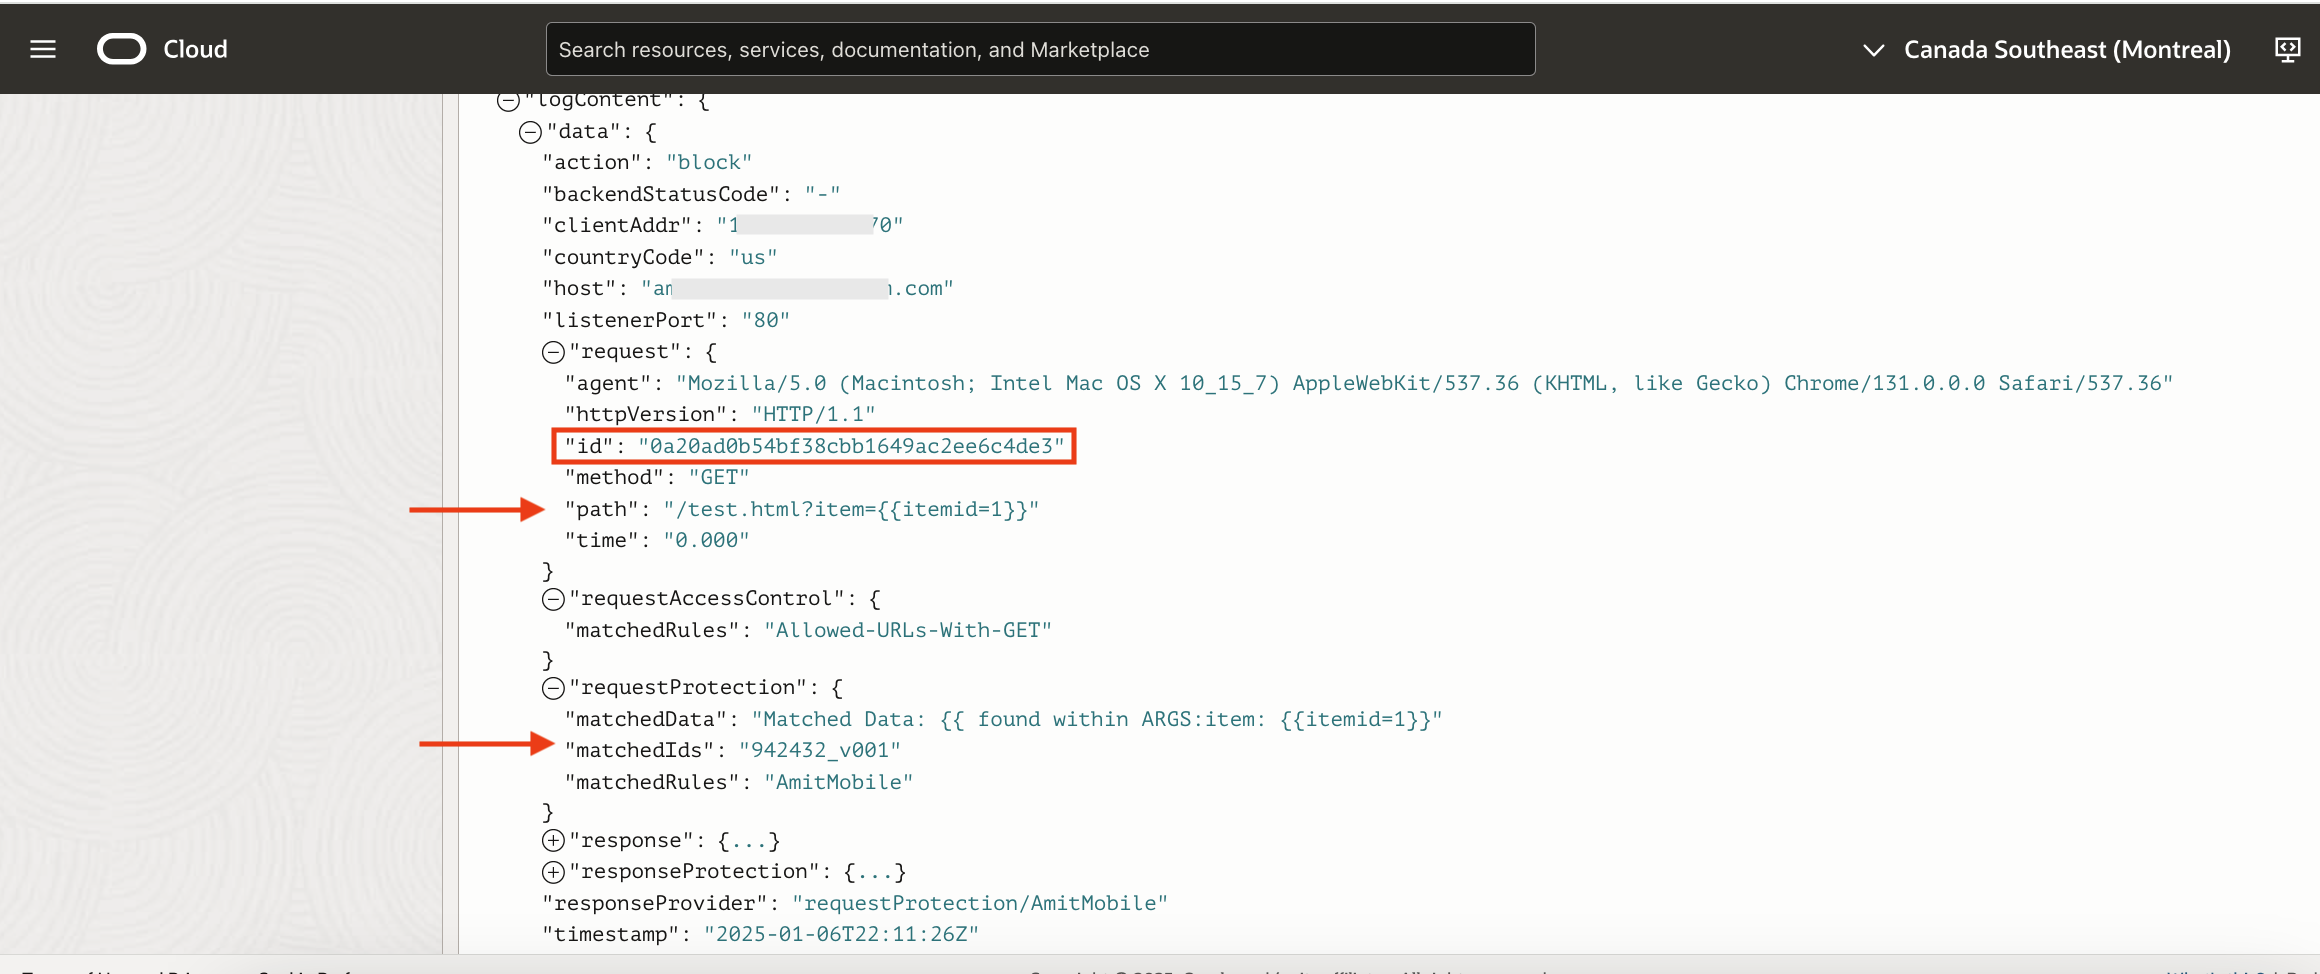
Fig 4
The request (Fig 3) is getting blocked since a protection rule is getting triggered. This is helpful but the logs if enabled, will have logs for all requests.
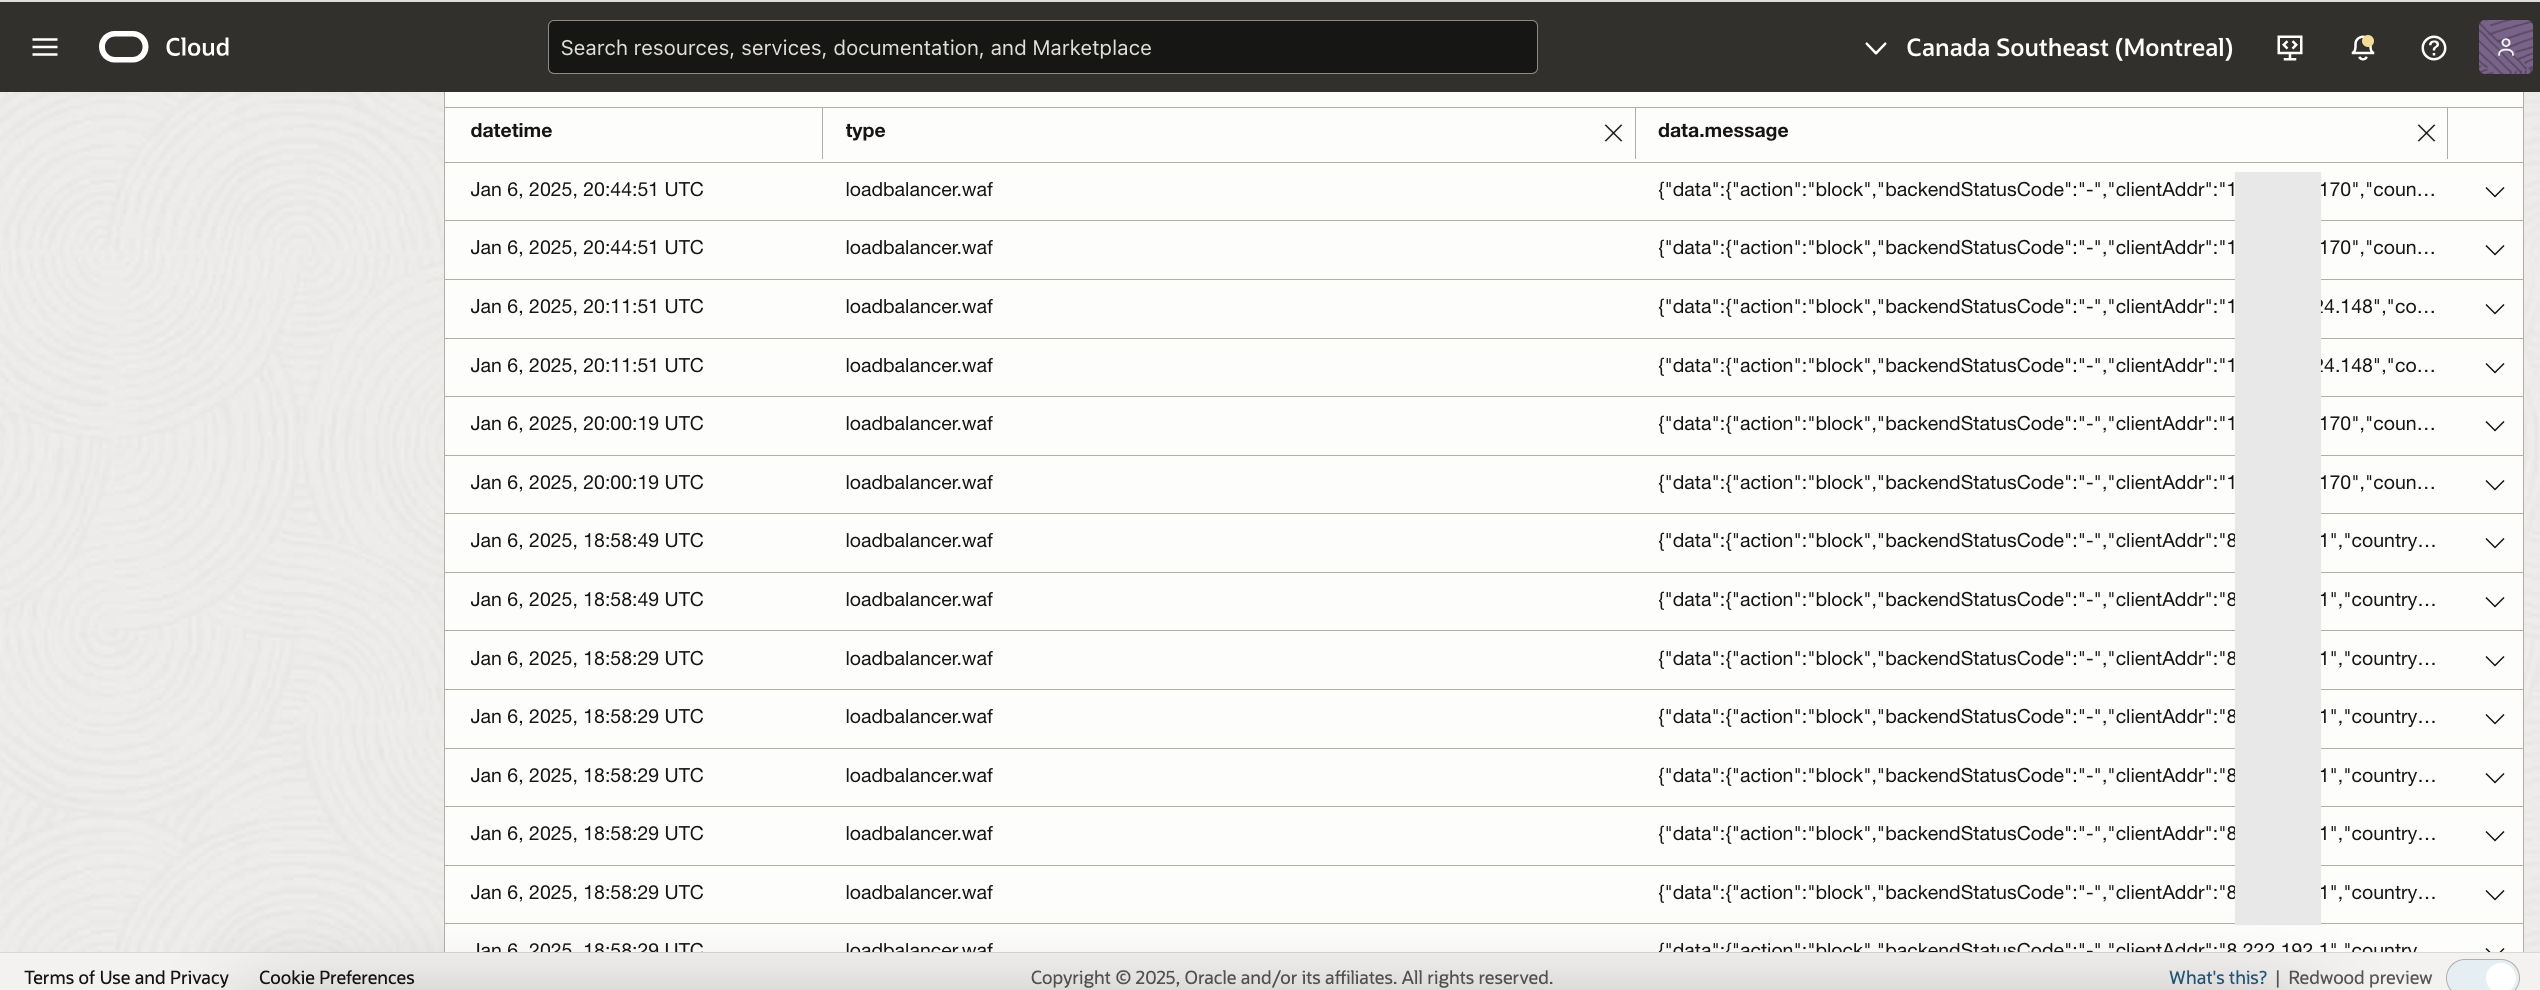
Fig 5
Now to identify your request from the above list can be challenging.
Dynamic Text Support
Every request processed by the load balancer is uniquely tagged with an ‘id’ field (Fig 4). The ‘id’ field is in hexadecimal format and generated from 16 random bytes. This field can be leveraged for troubleshooting purposes. Specifically, this field can be incorporated directly into the message body of the action. This feature of using a variable in the message body is called ‘dynamic text support’.
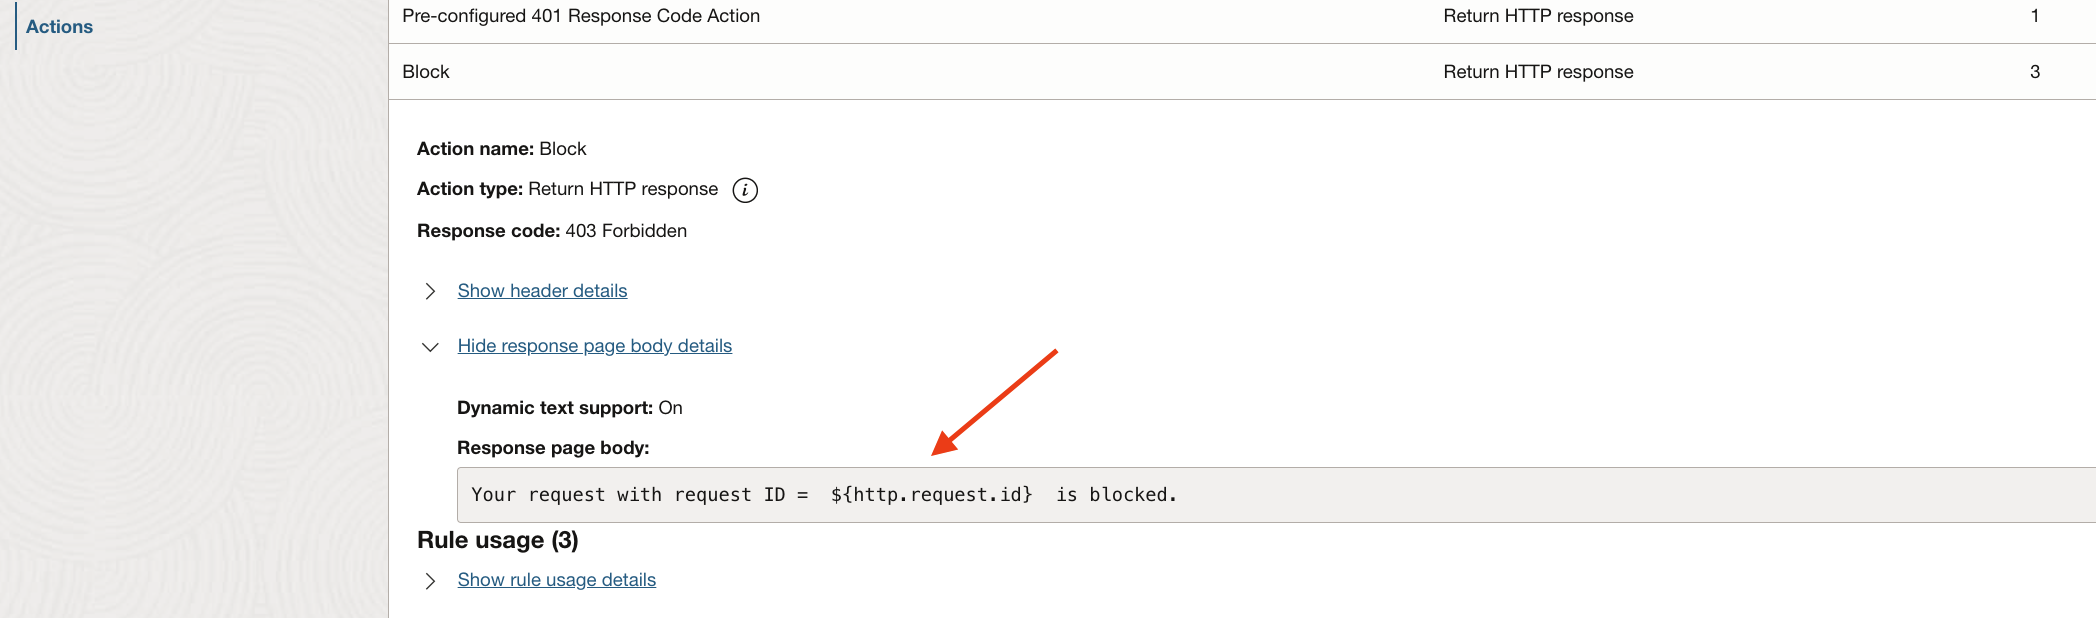
Fig 6
With dynamic text support, the response message will be –
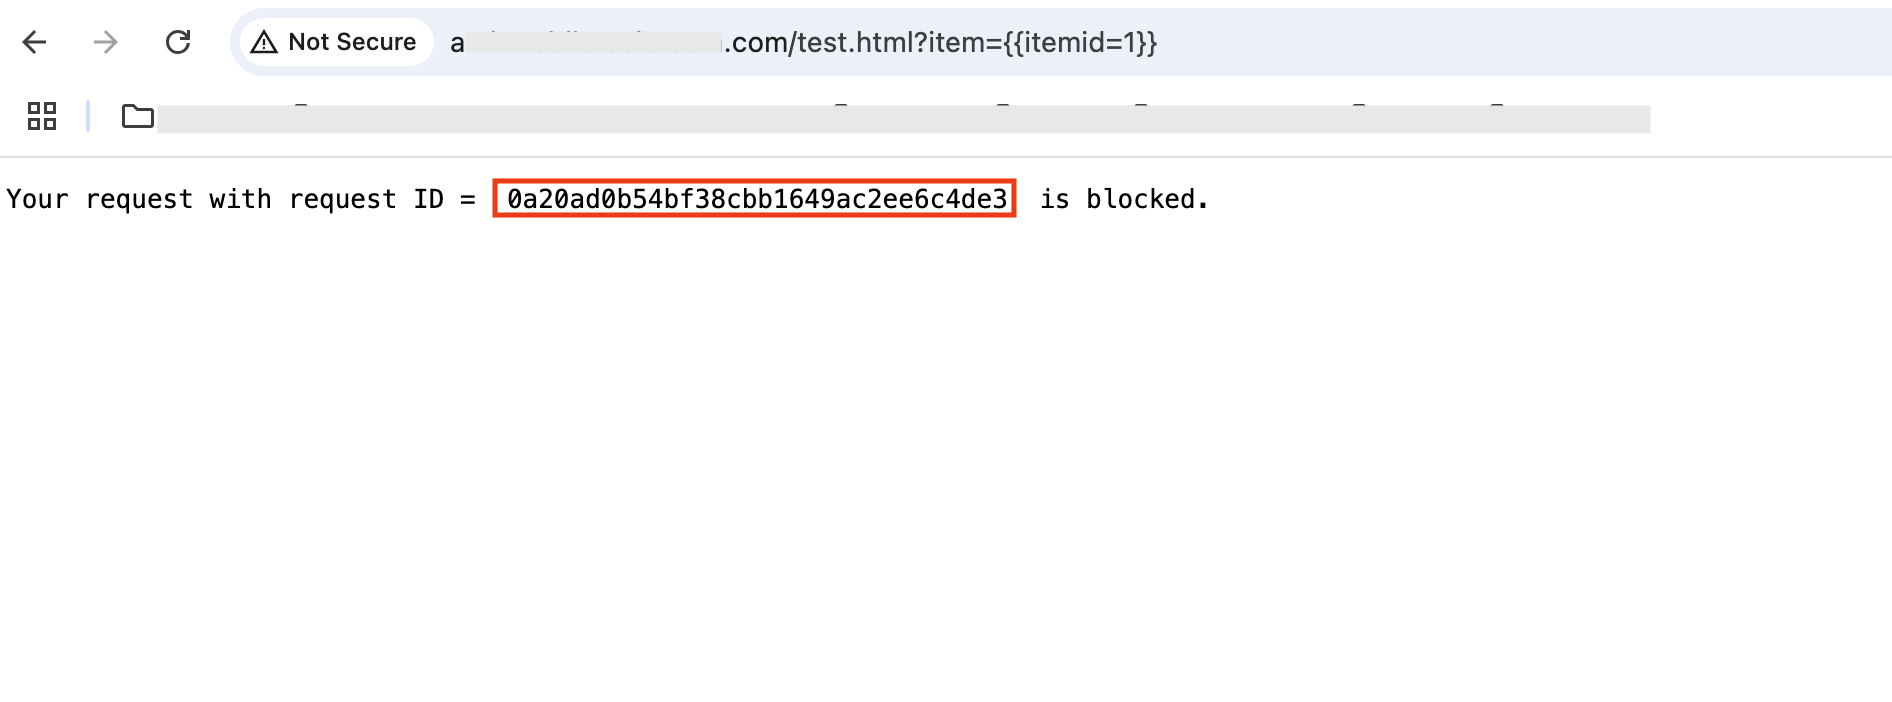
Fig 7
Note that the request id in the response message matches the id in the logs (Fig 4).
Load Balancer Request ID
The request id can be sent back to the client as a response header as well by the load balancer. For example, in the following figure, I have defined the header as ‘X-AmitRequest-Id’. This header will contain the request id.
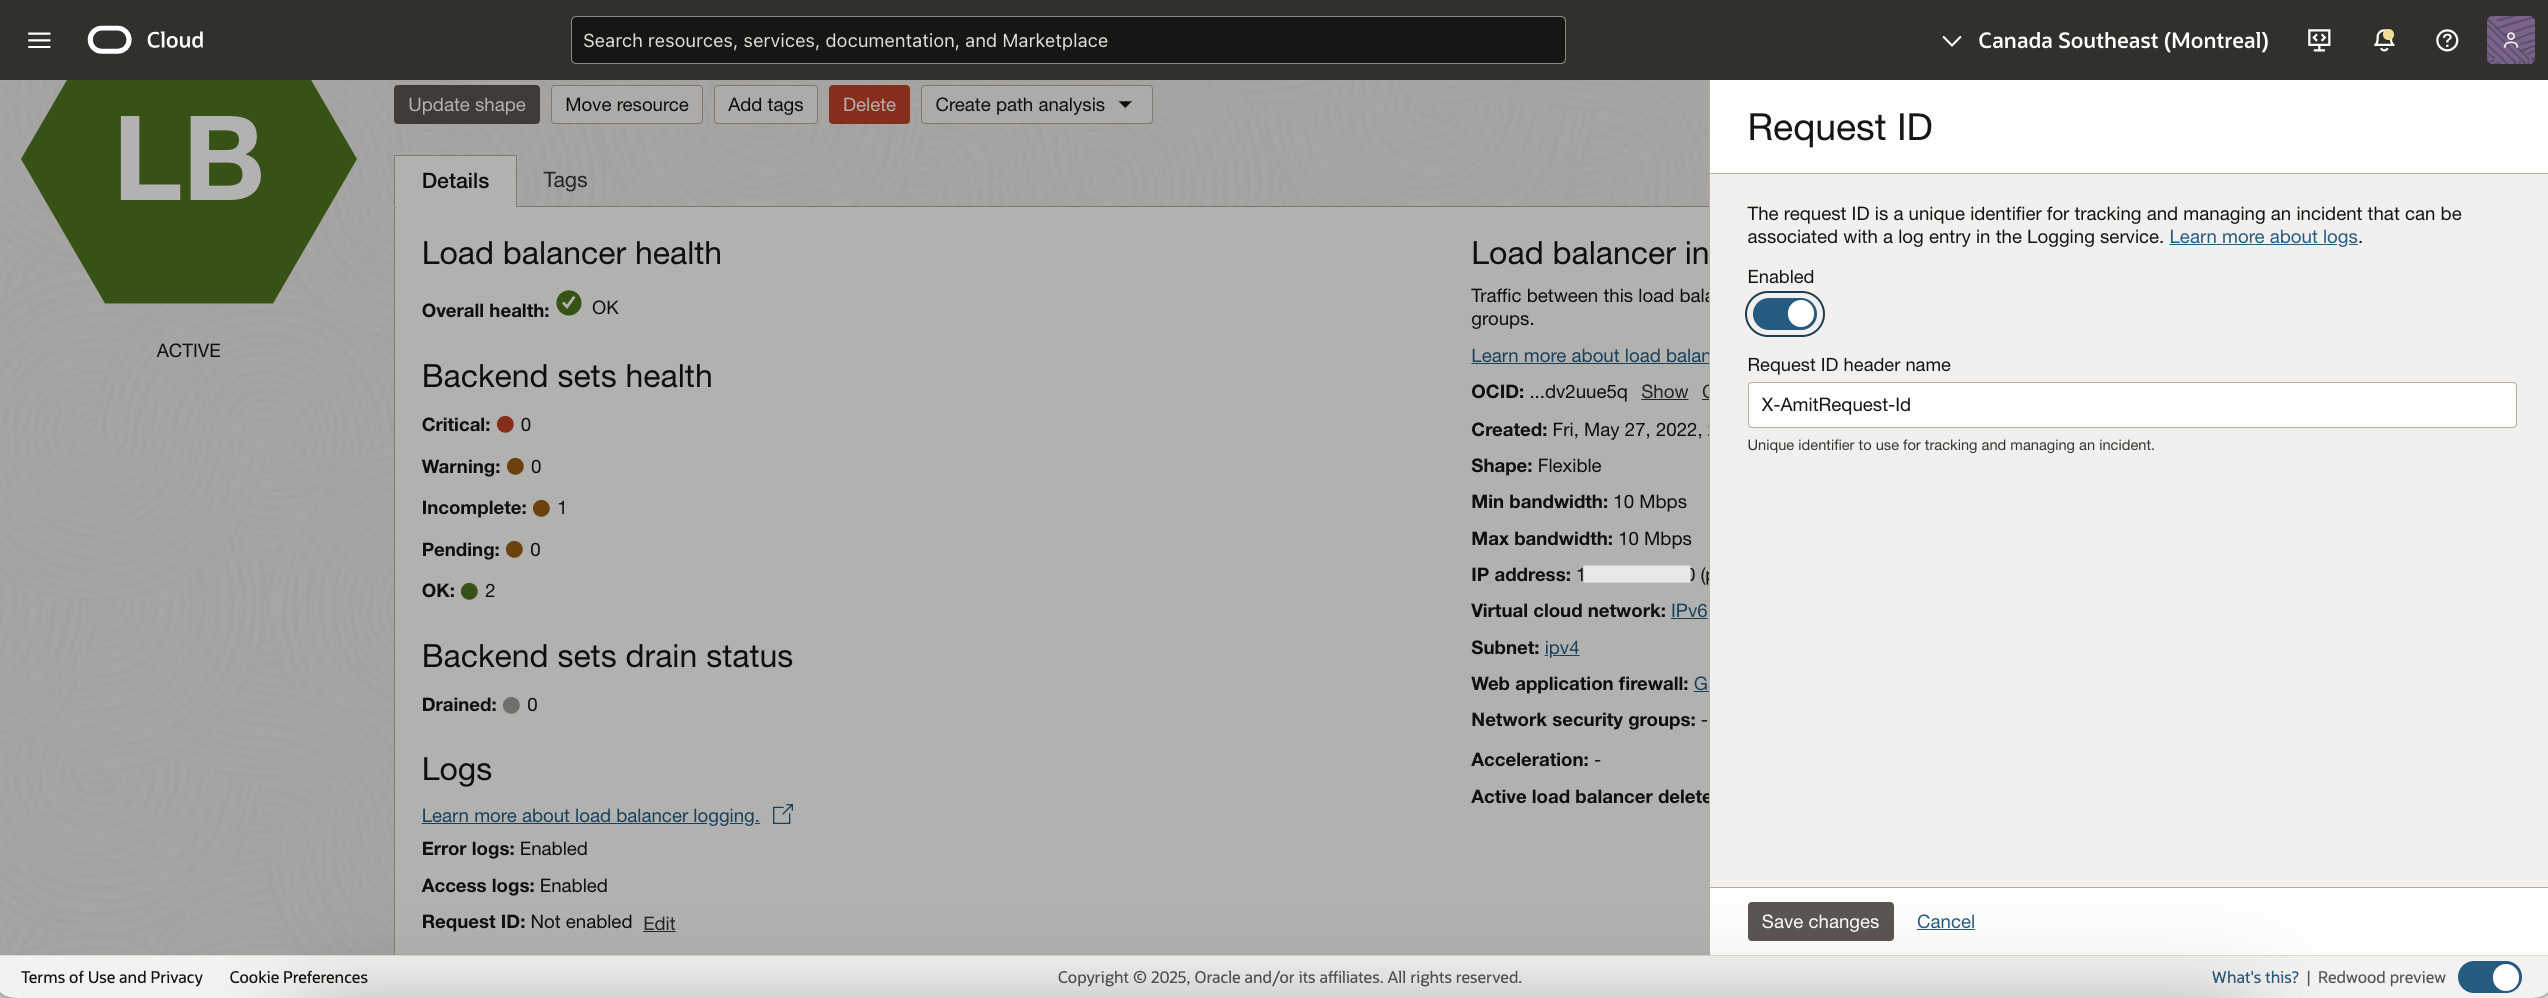
Fig 8
With the above Request ID header configured, the response received will be –
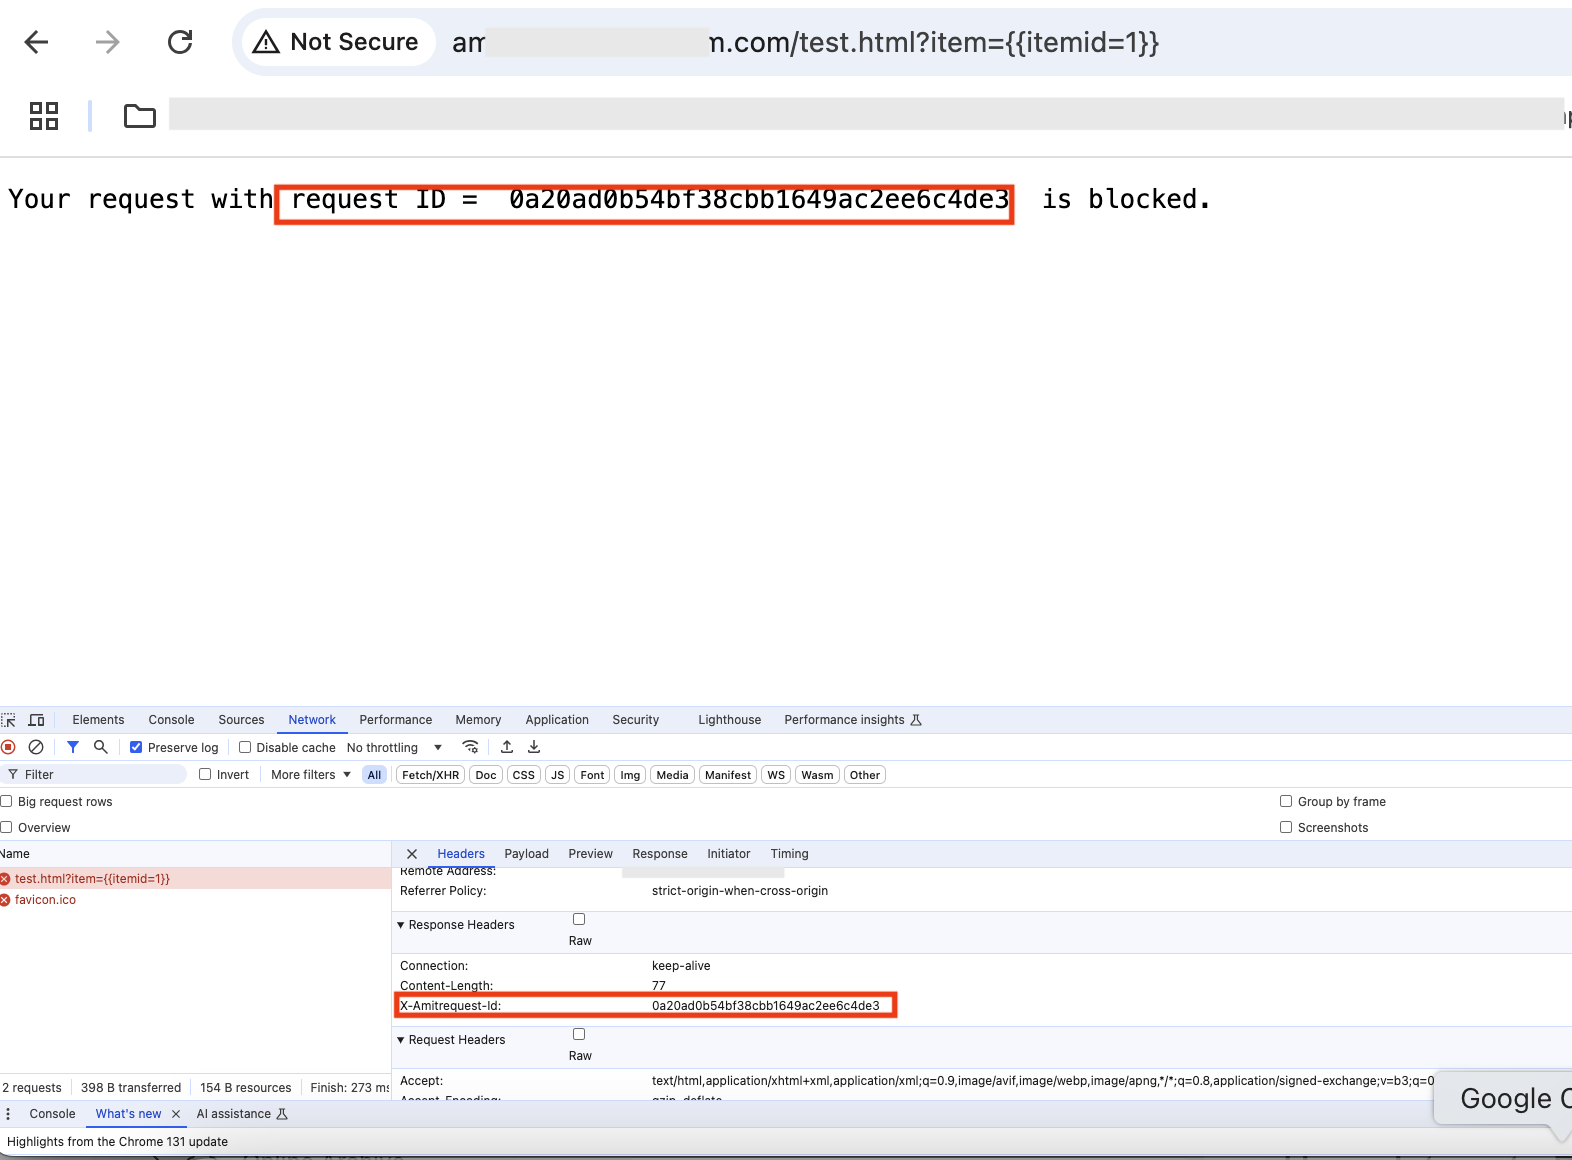
Fig 9
Note X-AmitRequest-Id header arrives as a response header and it has the request id from the logs (Fig 4).
Summary
In this blog post, we looked into how to use OCI WAF’s dynamic text support feature and the load balancer’s Request ID feature to triage and troubleshoot any HTTP requests.