Introduction
In many hybrid cloud environments, AWS IAM Identity Center becomes the central identity provider, while Oracle Cloud Infrastructure (OCI) is added later for specific workloads. Using SAML 2.0, you can integrate AWS IAM Identity Center as the identity provider (IdP) and OCI Identity Domains as the service provider (SP), giving your users a seamless single sign‑on experience into OCI using their AWS-managed identities.
This post walks through an end‑to‑end setup of that SAML integration, including attribute mappings, group mappings, and practical tips from troubleshooting a real configuration.
Architecture overview
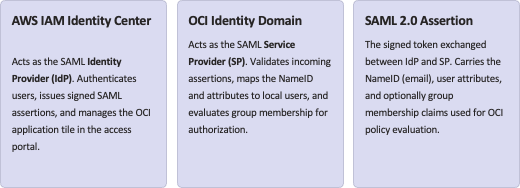
At a high level:
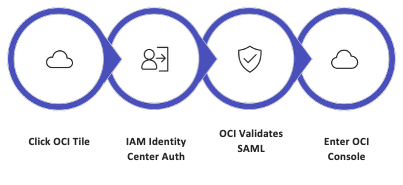
A typical flow:
- User clicks the “OCI” tile in the AWS access portal.
- IAM Identity Center authenticates the user and issues a signed SAML assertion.
- OCI validates the assertion, maps the NameID and attributes to a user in the identity domain, and evaluates group membership for authorization.
Before touching any AWS configuration, you must collect the SP metadata XML from OCI. This file contains the ACS URL and SAML audience values that AWS needs to correctly target the SAML assertion. The metadata exchange is the foundation of the trust relationship between the two clouds.
Step 1 – Prepare OCI as a SAML service provider
The first step is to export the SP metadata from your OCI identity domain. This XML file encapsulates everything AWS IAM Identity Center needs to know about OCI as a SAML service provider — including the Assertion Consumer Service (ACS) URL, the entity ID, and the signing certificate. Uploading this file into AWS later will auto-populate the critical SAML fields, reducing the risk of manual entry errors.
- Sign in to the OCI Console with administrator privileges.
- Navigate to Identity & Security → Domains, then open the identity domain you plan to federate.
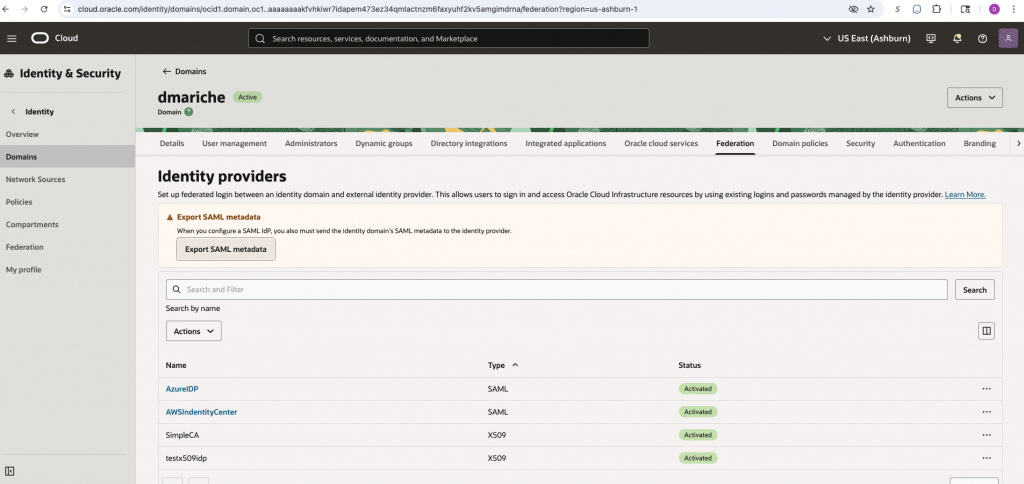
- Under Security → Identity providers, locate the option to download the metadata file.
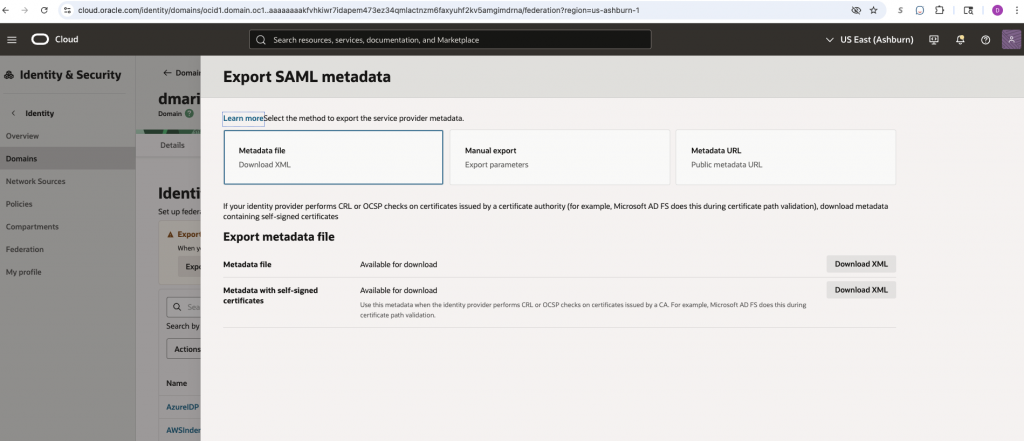
- Locate and download the metadata file for this identity domain. Save it locally — for example as OCISPMetadata.xml. You will upload this file to AWS in the next step.
Keep the metadata file in a safe location. It contains the OCI tenant’s public signing certificate and ACS endpoint. If you later rotate certificates or reconfigure the domain, you will need to re-export and re-upload an updated version.
Step 2 – Create a custom SAML 2.0 app in AWS IAM Identity Center
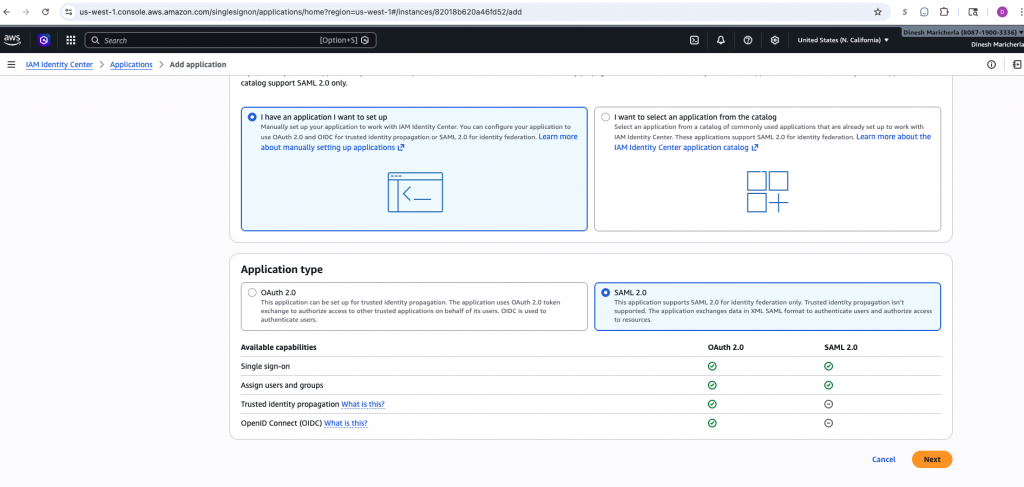
With the OCI SP metadata in hand, switch to the AWS console and create a new custom SAML 2.0 application in IAM Identity Center. This application represents OCI as a federated destination within AWS. It defines how AWS signs and delivers SAML assertions to OCI, and it controls which users see the OCI tile in their AWS access portal.
- In the AWS console, navigate to IAM Identity Center → Applications.
- Choose Add application → Add custom SAML 2.0 application.
3. Provide a clear display name (e.g., OCISAMLSSOApp) and an optional description. This name appears as the tile label in the AWS access portal for end users.
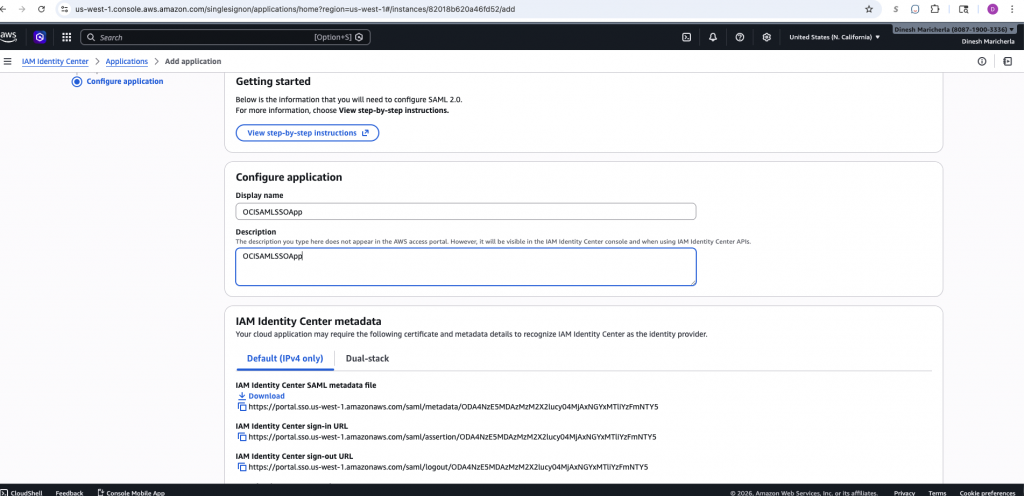
- From the application page, download the IdP metadata XML before saving. Save it as something recognizable, e.g., AWSIDP_CustomSAML2.0application_ins-XXXXXXXX.xml — you will upload this to OCI in a later step.
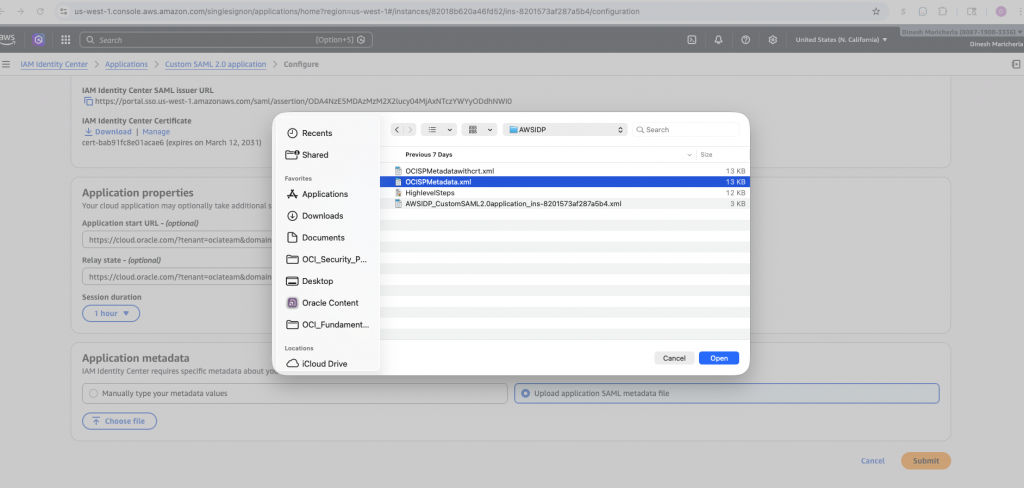
- Under Application Properties, provide the Application start / Relay state URL. The start URL is the post-SSO browser destination chosen by AWS; the relay state is a value carried inside the SAML flow that OCI can use to redirect or maintain context after login.

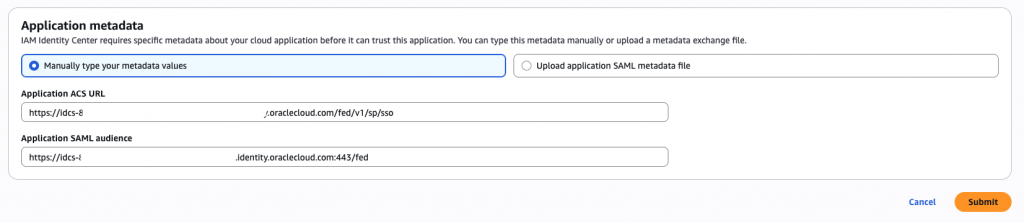
- Under Application metadata, choose Upload application SAML metadata file and select the OCISPMetadata.xml file downloaded from OCI. AWS will auto-populate the Application ACS URL and Application SAML audience. Submit to save.

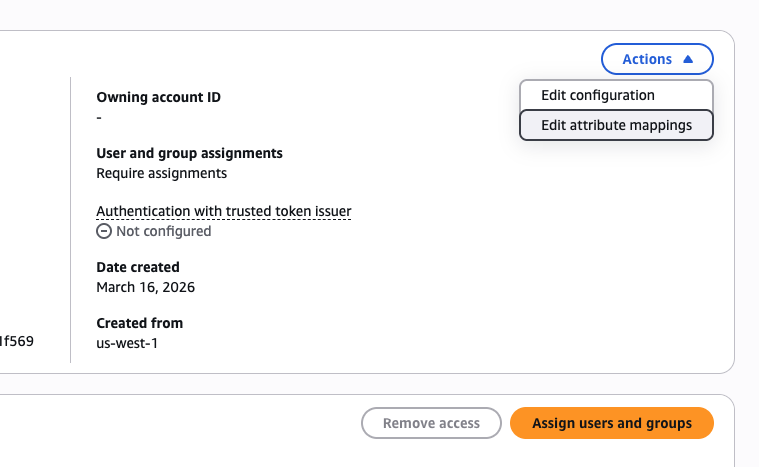
Step 3: Configure SAML attribute mappings in AWS
SAML attribute mappings are the mechanism by which AWS enriches the SAML assertion with user profile data beyond just the identity subject. OCI depends on these attributes to correctly identify, provision, and authorize users within the identity domain. Misconfigured or missing attributes are one of the most common sources of SSO failures, so getting this section right is critical.
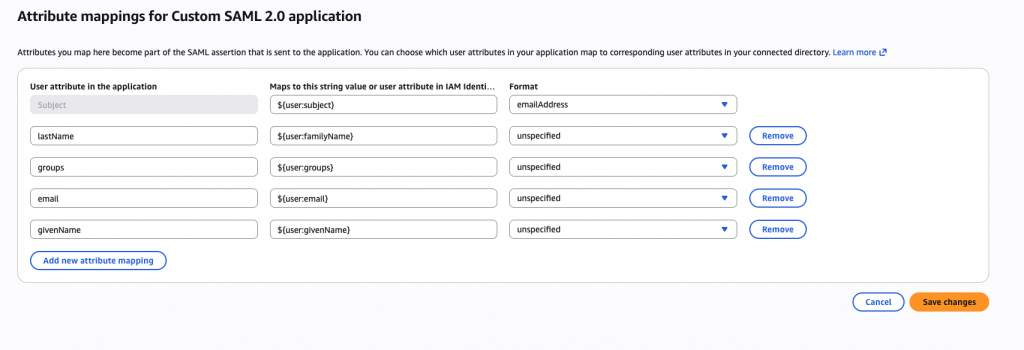
In the custom SAML app’s Attribute mappings section, configure the following mappings. The Subject (NameID) is the primary identity claim — set it to the user’s email address so OCI can match it against the username stored in the identity domain.
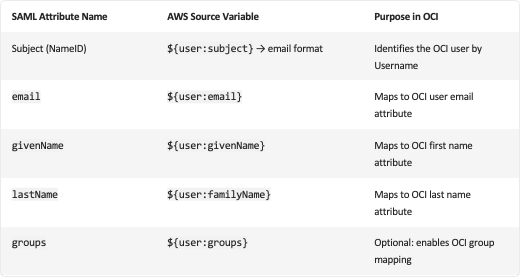
The groups attribute is required if you intend to use OCI group membership for dynamic authorization via OCI IAM policies. Without it, all federated users land with no group memberships and will likely be denied access to protected OCI resources.
Step 4: AWS- Assign users and groups for the application
Creating the SAML application in AWS does not automatically grant any users access to it. You must explicitly assign users or groups to the custom SAML application before those users will see the OCI tile in their AWS access portal and be able to initiate the SSO flow. This is an important access control checkpoint — only assigned principals will be able to generate a valid SAML assertion for OCI.

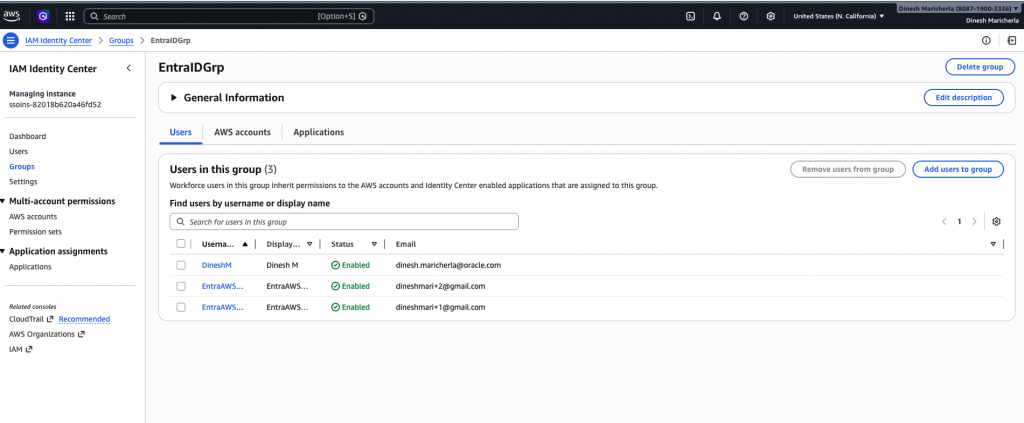
Assignment controls the SAML assertion issuance. Users not assigned to the application will not see the OCI tile and cannot initiate an SSO session — even if a matching account exists in OCI.
Step 5: Add AWS IAM Identity Center as a SAML IdP in OCI
Now switch back to OCI. In this step, you register AWS IAM Identity Center as a trusted SAML identity provider within the OCI identity domain. This tells OCI to accept SAML assertions signed by the AWS IdP and defines how the incoming NameID and attributes map to OCI user accounts. Getting the user identity mapping right here is the most nuanced part of the entire integration.
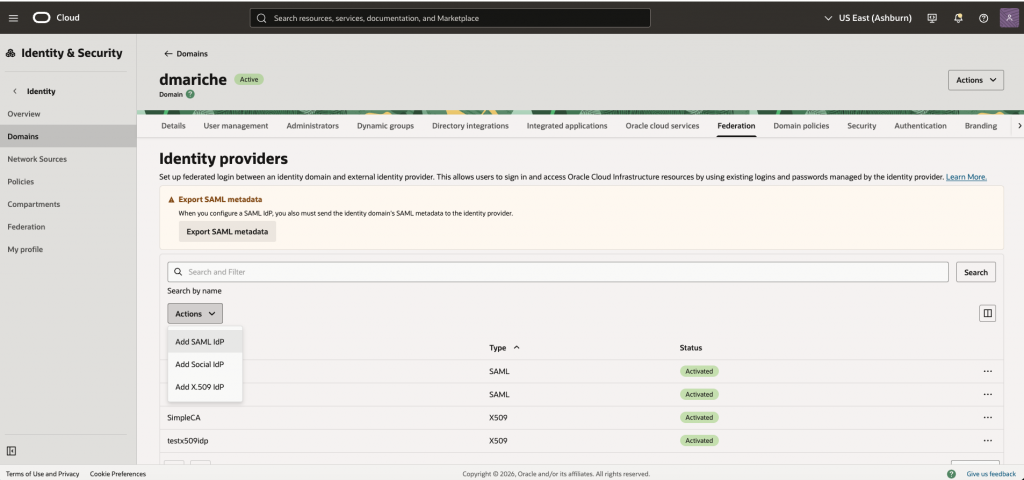
- In your OCI identity domain, navigate to Security → Identity Providers and choose Add IdP → Add SAML IdP. This launches the SAML IdP wizard.
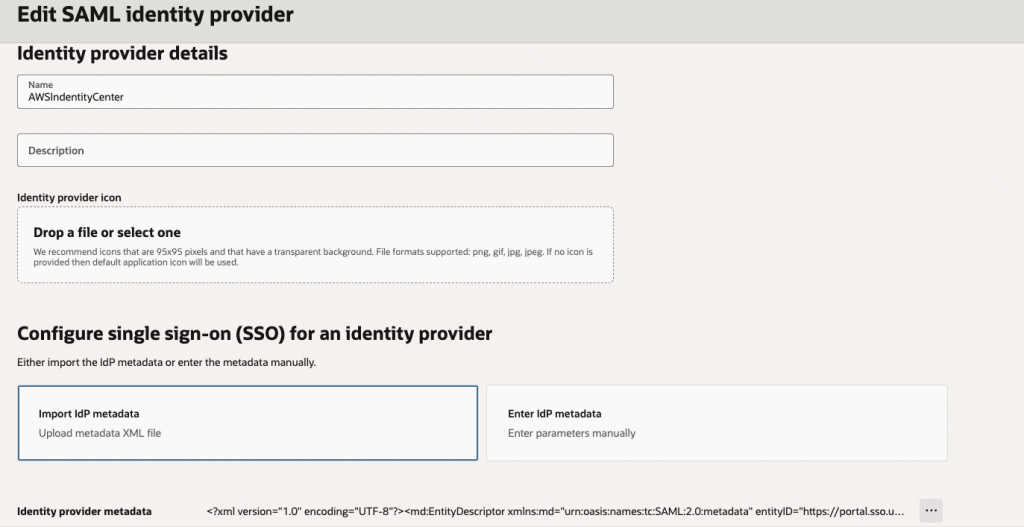
- Provide a descriptive name for the IdP (e.g., AWSIdentityCenter) and import the IdP metadata XML downloaded from the AWS custom SAML application — in this example, AWSIDP_CustomSAML2.0application_ins-8201573af287a5b4.xml. OCI will parse the signing certificate and SSO endpoint automatically.
- Map the user identity section

- In the Map user identity section, configure OCI to use the SAML NameID as the user’s Username in the identity domain. Since AWS sends the NameID in email format, this means OCI looks up a user whose Username equals the incoming email address. This one-to-one match is how OCI determines which local account is authenticating via SSO.
- Finish the wizard and create the IdP entry. At this point the IdP exists but is not yet active or included in any sign-on policy — those steps follow next.
When AWS sends a SAML NameID of user@example.com, OCI searches the identity domain for a user with Username = user@example.com. If no match is found, login fails. Ensure both systems share identical email/username values for every federated user.
Step 6: Activate the Identity Provider/Add an Idp policy
Creating the SAML IdP entry in OCI is not sufficient on its own — it must be explicitly activated and added to the identity domain’s sign-on policy before OCI will present it as a login option or route federated assertions through it. This two-part activation step (enable the IdP, then include it in the policy rule) is a common source of confusion for first-time integrators.
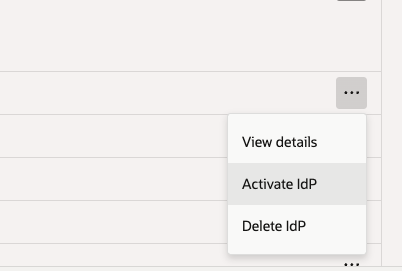
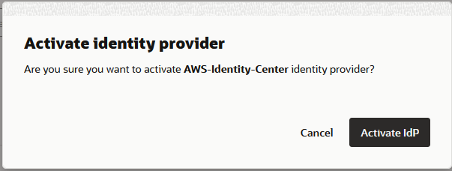
- After creating the IdP, locate it in the Identity Providers list and toggle its status to Active. An inactive IdP will not appear as a login option and cannot receive SAML assertions.
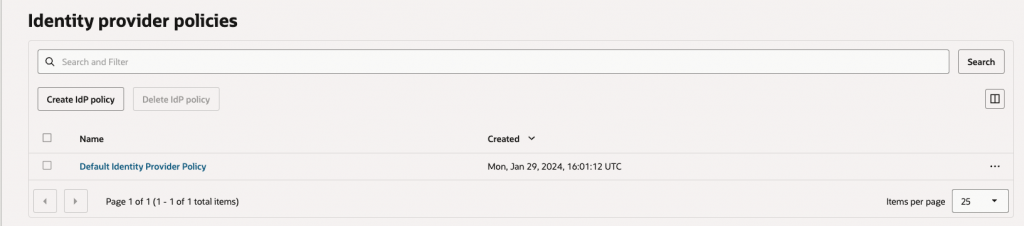
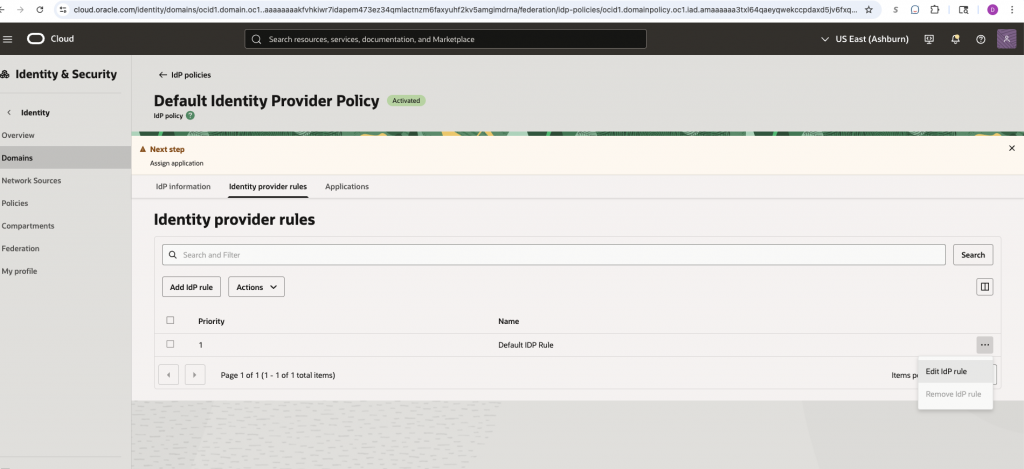
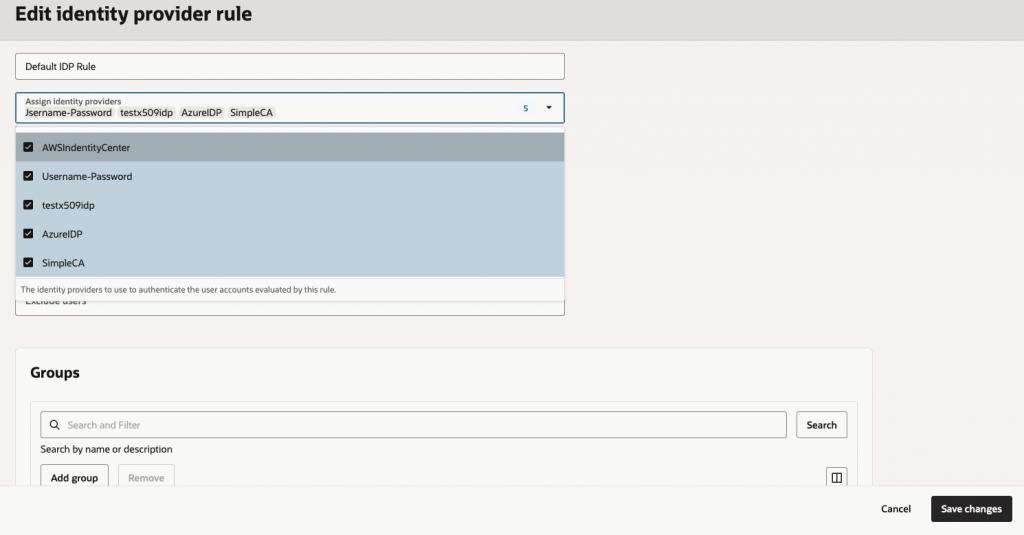
- Navigate to the Default Identity Provider Policy under Security policies. Edit the Default IDP Rule to add AWSIdentityCenter to the allowed identity providers list. This makes the AWS IdP available during login and routes incoming SAML sessions through it correctly.
Once this step is complete, the core SAML trust relationship between OCI Identity Domain and AWS IAM Identity Center is fully configured. All that remains is creating matching test users and validating the end-to-end SSO flow.
Step 7: Create a test user at OCI
For the SAML SSO flow to succeed, the authenticating user must exist in both AWS IAM Identity Center and the OCI identity domain with matching identity values. OCI uses the SAML NameID (email address) to look up the corresponding local user. If OCI cannot find a user with a matching username, authentication will fail even if the SAML assertion is cryptographically valid.
The test account used in this walkthrough, the user account is already provisioned in AWS IAM Identity Center and assigned to the custom SAML application created in Step 2.

Create an identical user in the OCI identity domain. The Username field must exactly match the email address of the AWS user. Case sensitivity matters — ensure the strings are identical.
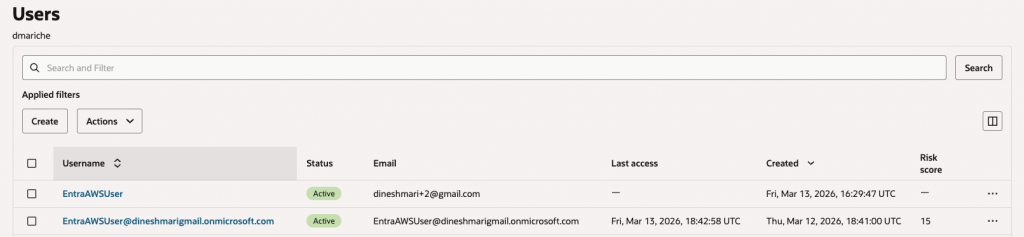
This manual dual-provisioning approach is sufficient for testing and small deployments. For production at scale, consider automating user sync using SCIM provisioning between AWS IAM Identity Center and OCI Identity Domains to keep user records consistent without manual intervention.
Step 8: Testing
With both sides configured and a matching test user in place, it is time to validate the complete SSO flow. The test exercises every component of the integration — from the OCI login page selecting the correct IdP, through AWS authentication and MFA, to the final redirect back into the OCI console. Each stage is a potential failure point, so walk through it carefully and capture screenshots for any troubleshooting sessions.
- Open the OCI login URL with your tenant and domain parameters, for example: https://cloud.oracle.com/?tenant=ociateam&domain=dmariche
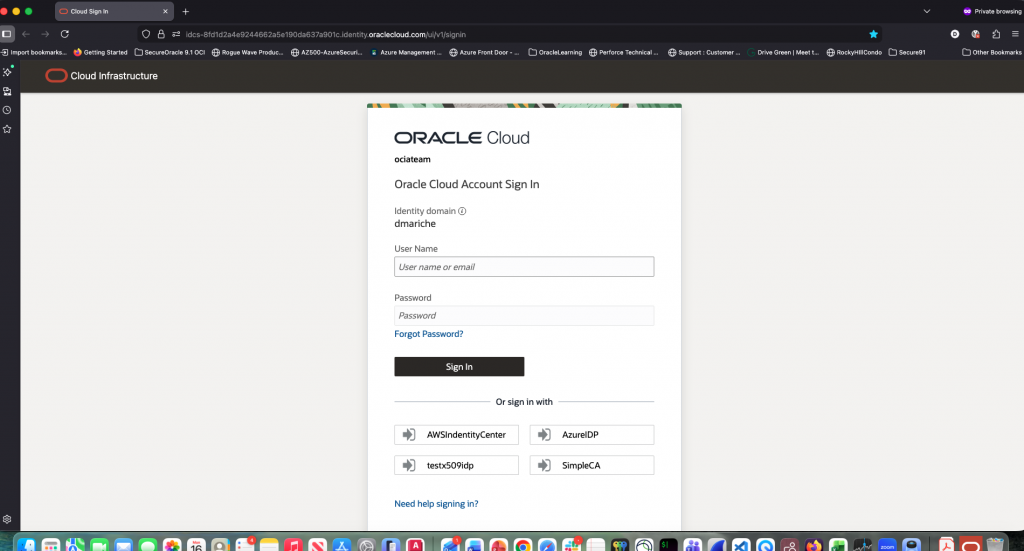
- On the OCI login page, choose the AWSIdentityCenter identity provider option. OCI will initiate the SP-initiated SAML flow and redirect the browser to AWS.
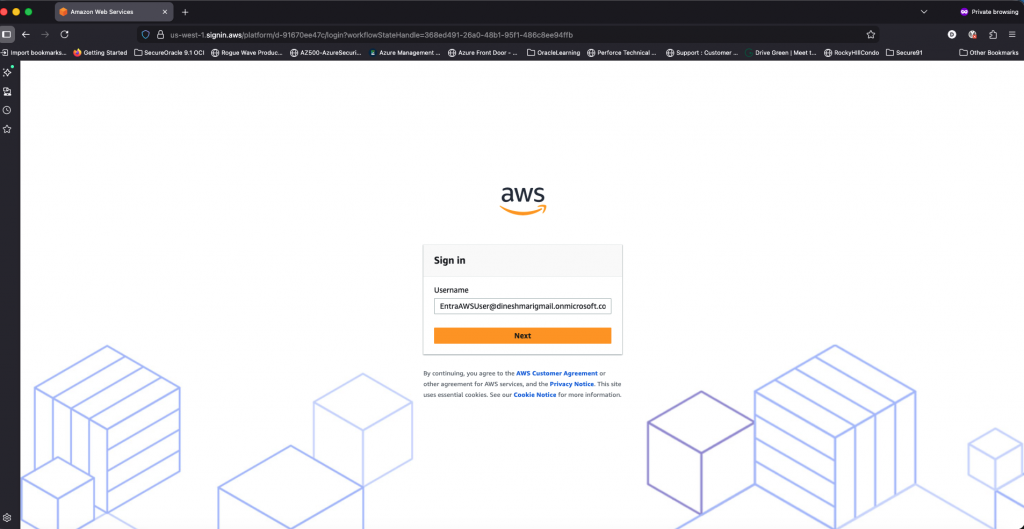
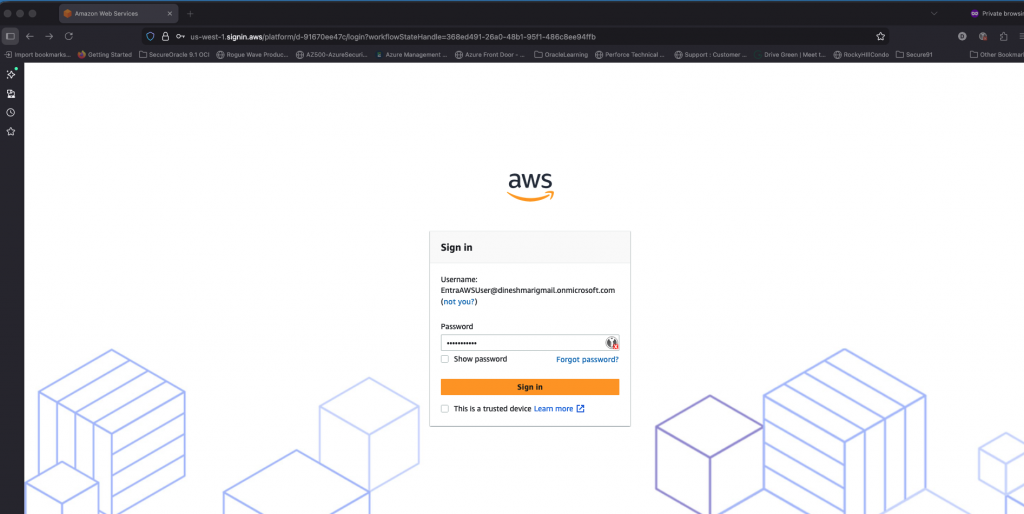
- Log in using the test user credentials at the AWS IAM Identity Center login page. Enter the password for the test user.
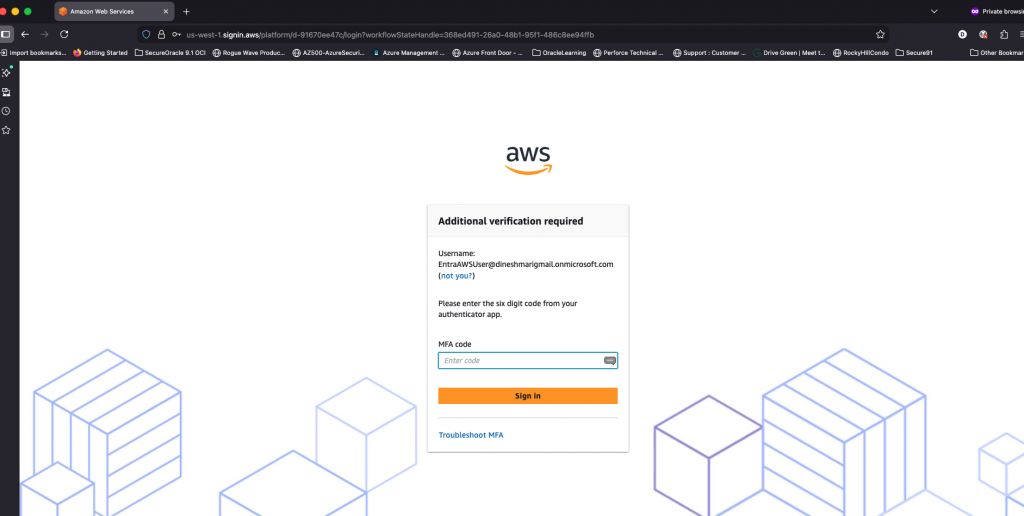
- If MFA is enforced (recommended for production), complete the multi-factor authentication step. AWS will issue the signed SAML assertion upon successful authentication.
- After successful AWS authentication, the browser is redirected to the OCI console. The user is now logged in as the mapped OCI identity — confirming the full SAML 2.0 SSO chain is working correctly.
You have now completed a full SAML 2.0 federation between AWS IAM Identity Center and OCI Identity Domains. This integration enables your users to access OCI resources using their existing AWS-managed identities, eliminating the need for separate OCI credentials and providing a consistent SSO experience across your hybrid cloud environment.